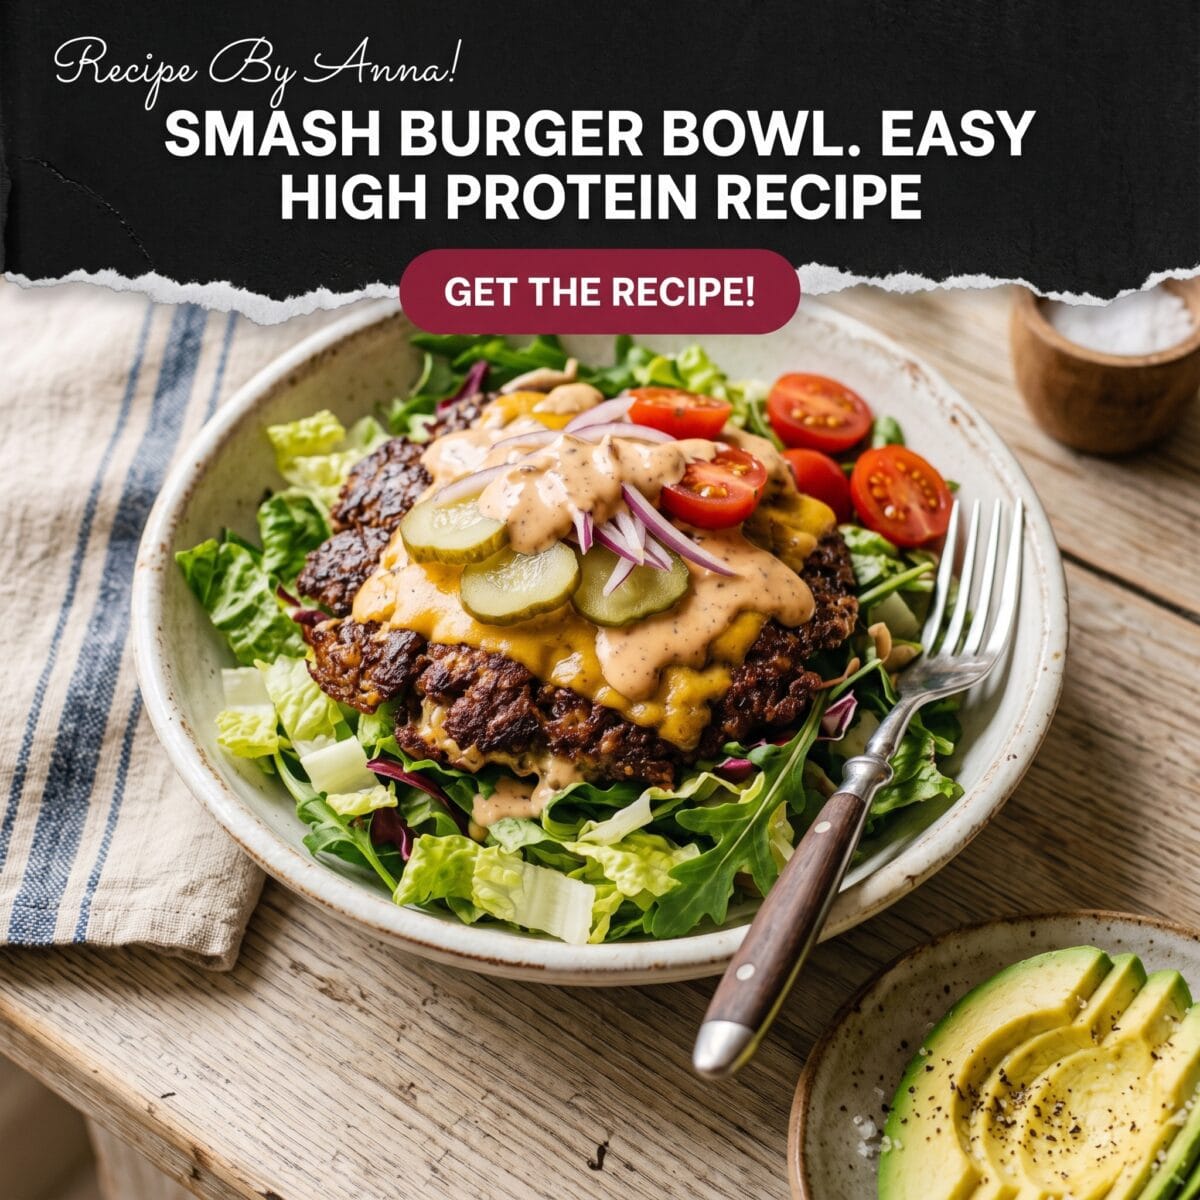
Smash Burger Bowl — Easy High-Protein Recipe
This Smash Burger Bowl takes everything that makes a smash burger worth eating — the ultra-thin, lacy-edged beef patty, the special sauce, the pickles, the sharp cheddar, the shredded lettuce — and puts it in a bowl instead of on a bun, producing a high-protein, lower-carb version of the same thing that is faster to make, easier to meal prep, and genuinely more satisfying as a lunch or dinner than a deconstructed burger that just feels like components on a plate.
The smash technique is the key that makes this different from just crumbling beef over salad greens — you press small balls of ground beef hard against a screaming hot skillet until they sear into thin, caramelised, lacy-edged rounds with maximum browning contact and the specific flavour that only comes from beef at extremely high heat against cast iron or stainless steel. The Maillard reaction that happens in those first 30 seconds of contact between cold beef and a very hot pan is what makes a smash burger fundamentally different from any other form of cooked ground beef.
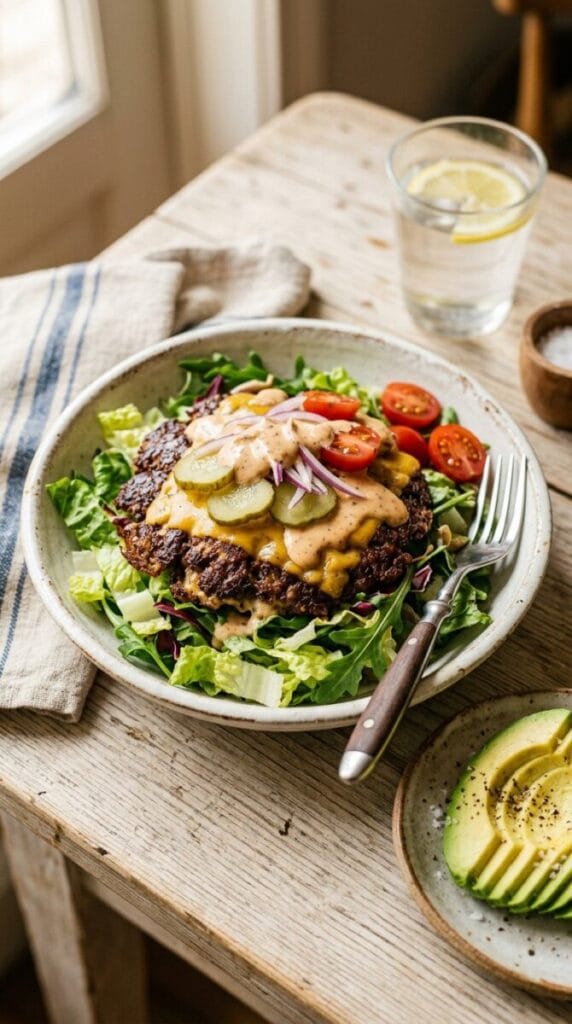
Two of those thin patties per bowl, the special sauce drizzled over everything, and the full burger fixings — pickles, diced onion, shredded lettuce, tomato — and you have a bowl that hits 40-plus grams of protein with the same flavour as a fast food smash burger but without the bun, the seed oils, or the drive-through wait.
Why the Bowl Format Works Better for Meal Prep
The components stay in better condition stored separately than a fully assembled burger — the lettuce doesn’t wilt sitting under a bun, the pickles don’t make the bread soggy, and the smash sauce keeps in the fridge for a week without affecting anything around it. A meal-prepped smash burger bowl is as good on day three as day one in a way that a meal-prepped burger fundamentally isn’t.
The high protein content from the ground beef and the added cottage cheese in the sauce also makes this one of the most filling bowl formats in a rotation — a bowl with two smash patties keeps hunger at bay longer than almost any other lunch-sized recipe in this collection.
- Prep Time: 15 minutes
- Cook Time: 10 minutes
- Total Time: 25 minutes
- Yield: 2 bowls (easily scaled)
What You Need
For the smash patties:
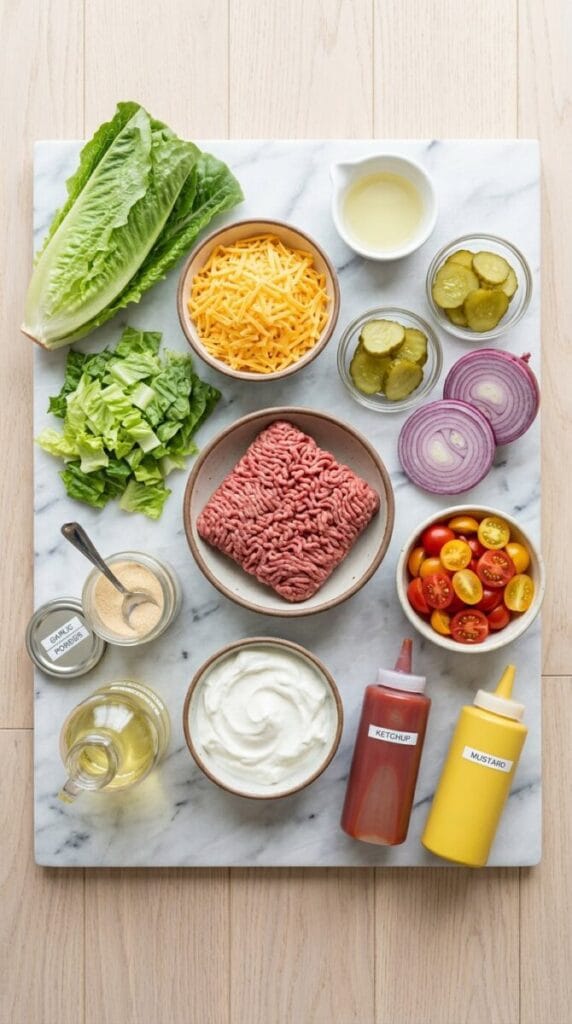
- Ground beef, 80/20 fat ratio: 8 oz (225g) — the fat content is what creates the caramelised, crispy edges; leaner beef produces dry, pale patties without the same crust
- Fine sea salt: 1/2 teaspoon
- Black pepper: 1/4 teaspoon
- Garlic powder: 1/4 teaspoon
- American or sharp cheddar cheese, sliced: 2 to 4 slices
For the smash sauce:
- Mayonnaise: 3 tablespoons
- Ketchup: 1 tablespoon
- Yellow mustard: 1 teaspoon
- Dill pickle brine: 1 teaspoon
- Garlic powder: 1/4 teaspoon
- Onion powder: 1/4 teaspoon
- Smoked paprika: 1/4 teaspoon
- Sugar: 1/4 teaspoon
- Fine sea salt and pepper: to taste
For the bowl base and toppings:
- Shredded iceberg or romaine lettuce: 3 cups
- Cherry tomatoes, halved: 1/2 cup
- Dill pickles, sliced: 1/3 cup
- White onion, finely diced: 3 tablespoons
- Shredded cheddar cheese: 1/4 cup
- Sesame seeds: 1 teaspoon (optional — nods to the burger bun)
How to Make It
Making the smash sauce:
- Whisk all the sauce ingredients together in a small bowl until smooth. Taste and adjust — more pickle brine for tang, more ketchup for sweetness, more mustard for sharpness. The sauce should be well-seasoned and slightly more flavourful than you want to eat alone since it will be diluted by the bowl components.
- Refrigerate until serving — the sauce keeps for up to a week in the fridge and improves after a day as the flavours integrate.
Cooking the smash patties:
- Divide the ground beef into 4 equal portions (approximately 2 oz each) and roll each into a loose ball — do not compact them tightly, as a dense ball is harder to smash thin and produces a thicker, less caramelised result.
- Season each ball with a small pinch of salt, pepper, and garlic powder.
- Heat a cast iron skillet or heavy stainless steel pan over the highest heat your stove produces for 3 to 4 minutes until visibly smoking — the extreme heat is not optional for the caramelised crust that defines a smash burger. A non-stick pan will not reach high enough temperatures and will produce pale, steamed beef rather than a seared crust.
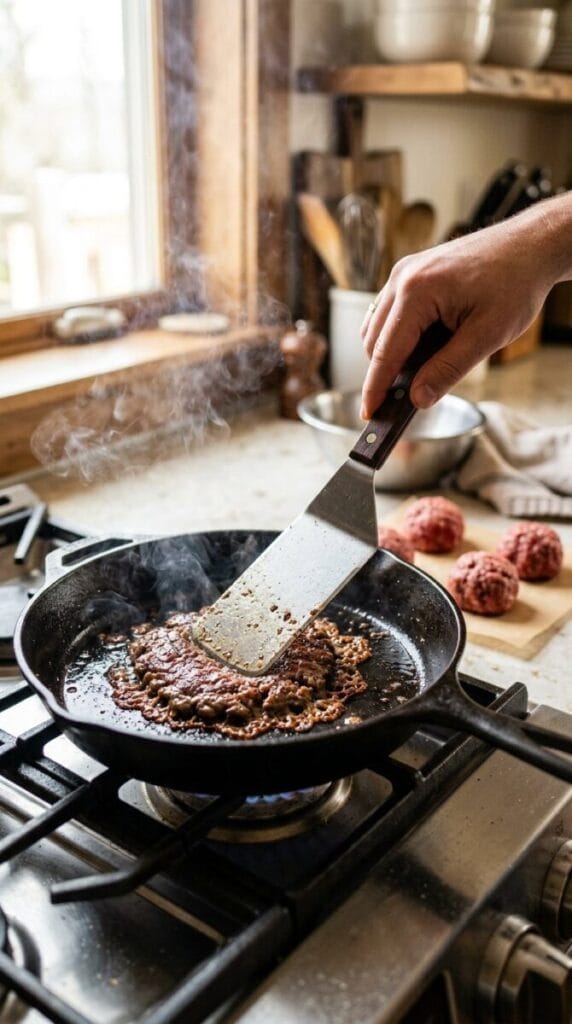
- Working quickly with one or two patties at a time, place a beef ball in the hot pan and immediately press it flat with the back of a sturdy metal spatula, a cast iron press, or a heavy pan — apply significant, steady downward pressure for 10 full seconds. The patty should spread to approximately 4 inches in diameter and be very thin.
- Cook undisturbed for 1 minute and 30 seconds to 2 minutes until the edges are deeply brown and lacy and the top surface has changed from red to grey more than halfway up — the lacy edges are the visual indicator of proper caramelisation.
- Flip the patty in one confident motion — it should release cleanly from the pan if the crust is properly formed. If it sticks, give it another 20 seconds.
- Immediately lay a slice of cheese over the flipped patty and cook for 30 to 45 seconds until the cheese is melted and the second side is seared.
- Remove and rest on a plate for 1 minute while cooking the remaining patties.
Assembling the bowl:
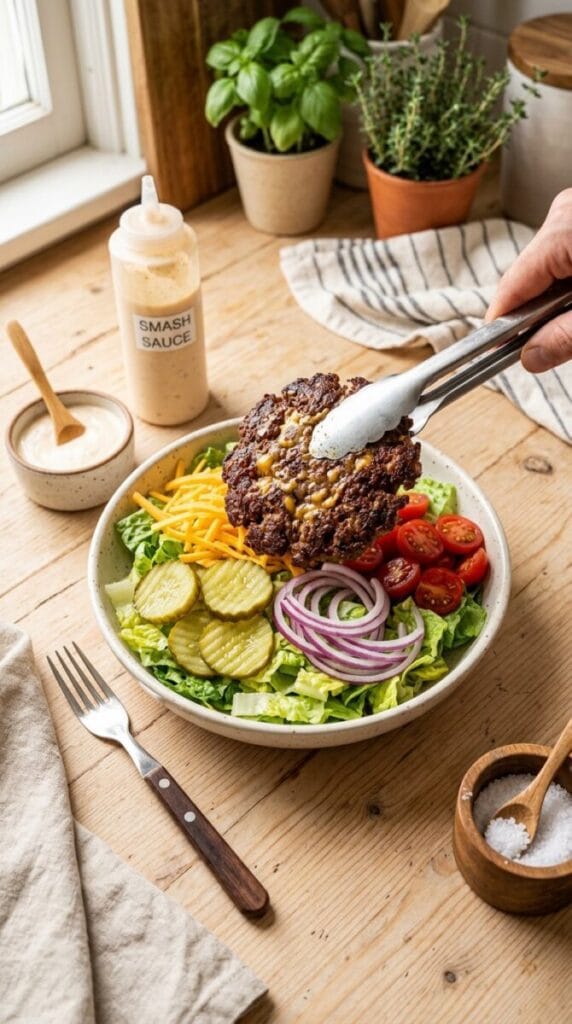
- Build a generous base of shredded lettuce in each bowl.
- Add the tomatoes, pickles, and diced onion.
- Place 2 smash patties (1 serving’s worth) over the bowl components.
- Drizzle the smash sauce generously over everything.
- Scatter extra shredded cheese and sesame seeds over the top.
- Serve immediately — the hot patties will slightly wilt the lettuce if left to sit, so assembling right before eating produces the best texture contrast.
For another high-protein bowl that uses the same beef and bold-sauce formula in a completely different flavour direction, our Shrimp Avocado Mango Bowls are the lighter, tropical companion in the bowl rotation — alternating between the rich, indulgent smash burger bowl and the bright, citrusy shrimp bowl gives a week of lunch bowls that genuinely don’t feel repetitive.
The Smash Technique — Why the Heat and the Press Both Matter
The smash burger’s defining quality comes from maximising the contact area between the beef and the extremely hot pan surface — the more contact, the more Maillard browning, the more flavour. A thicker patty has relatively little surface contact with the pan; a smashed-thin patty is almost entirely surface contact with the pan, which is why the flavour-to-meat-volume ratio is so dramatically higher than any other form of cooked ground beef.
The pan must be smoking hot before the beef goes in. A moderately hot pan produces a patty that steams in its own moisture before the exterior can properly sear — the steam prevents the surface temperature from reaching the Maillard reaction threshold of around 280°F. A smoking hot pan sears the exterior almost instantaneously, sealing it before moisture can escape and creating the caramelised crust in under 2 minutes. According to Serious Eats, the key to a smash burger’s distinctive flavour is that the extreme surface temperature and the high fat content of 80/20 beef interact to produce hundreds of new flavour compounds through rapid Maillard browning and partial caramelisation of the fat — compounds that neither a grilled patty nor a conventionally seared thicker burger produces at the same concentration.
The 80/20 fat content is not an area for substitution — leaner beef (90/10 or above) doesn’t have enough fat to produce the lacy, caramelised edges that define a smash patty. The fat renders out during the high-heat smash and both creates the crust and bastes the surrounding edges as it does so.
What to Serve Alongside
This bowl is a complete meal on its own with the lettuce base, toppings, patties, and sauce. For a heartier serving, add a scoop of cooked white rice or a portion of fries to the bowl — the bowl format accommodates carb additions without becoming structurally awkward in the way a burger does when it gets too tall.
For a side that leans into the burger occasion without duplicating any component in the bowl, our Easy Broccoli Bacon Salad is a genuinely satisfying cold side that contrasts the richness of the smash patties with crunch and tang — particularly good if you are serving these bowls to a group and want a shared side rather than individual additions to each bowl.
Variations That Expand the Bowl Format
Make it a breakfast smash bowl by replacing the smash sauce with sriracha mayo, adding a fried egg on top of the patties, and swapping the pickle for sliced jalapeño — the breakfast bowl version uses the same smash technique with a completely different topping profile that works equally well for morning meal prep.
Add 1/4 cup of shredded parmesan and a drizzle of truffle oil over the assembled bowl for an upscale smash burger bowl direction that tastes genuinely different from the classic version — truffle and smash beef is an excellent combination that elevates the bowl toward a restaurant-style dish without changing the cooking technique at all.
Swap the beef for smashed ground turkey seasoned with onion powder, garlic, and a tablespoon of Worcestershire sauce for a lighter version — turkey smash patties don’t develop quite the same lacy edges as 80/20 beef but still benefit significantly from the high-heat smash technique and produce a noticeably lower-fat bowl with comparable protein content.
Recommended Kitchen Tools for the Best Smash Burger Bowl
6 essential tools for crispy browned beef, perfectly cooked toppings, and a creamy sauce.This easy high-protein smash burger bowl is all about crispy browned beef, perfectly cooked toppings, and a creamy sauce. These 6 essential tools make prep and cooking quick and easy.

Large Nonstick Skillet or Cast Iron Skillet
A heavy skillet gets hot enough to create the crispy, caramelized edges that make smash-style beef so delicious.

Stainless Steel Burger Press
A sturdy burger press flattens the beef quickly and evenly against the hot skillet for maximum crispy edges and browning.

Wide Metal Spatula
A strong, wide spatula is essential for smashing and flipping the beef without breaking apart the crispy browned edges.

Large Mixing Bowl
A roomy bowl makes it easy to assemble the rice or lettuce base, vegetables, beef, cheese, and sauce without a mess.

Instant-Read Thermometer
An instant-read thermometer helps check the beef’s internal temperature so you can cook it safely without unnecessarily drying it out.

Digital Kitchen Scale
A kitchen scale portions the ground beef evenly so each smash patty cooks at the same rate and protein portions stay consistent.
As an Amazon Associate we earn from qualifying purchases.
Nutritional Information
| Nutrient | Amount Per Bowl (2 smash patties, full toppings, sauce) |
|---|---|
| Calories | 480 kcal |
| Protein | 38 g |
| Carbohydrates | 12 g |
| Fats | 32 g |
These values are estimates based on two 2 oz smash patties, the full smash sauce, and the full topping list divided by 2 bowls. The 38 grams of protein comes primarily from the beef (approximately 14g per 2 oz of 80/20 ground beef) and the cheese — a high protein count for a bowl that takes under 25 minutes to make. Replacing the iceberg base with cooked rice adds approximately 40 grams of carbohydrate and 200 calories per bowl.
Meal Prepping This for the Week
Store the smash sauce in a small sealed jar in the fridge for up to a week — it improves over the first 24 hours and is the component most worth making ahead.
Smash patties reheat from the fridge acceptably in a hot skillet for 60 seconds per side but lose some of their lacy edge crust quality — the crust was created by the initial high-heat contact and doesn’t fully return on reheating. For the best meal prep experience, cook the patties fresh each day using pre-portioned beef balls stored in the fridge for up to 3 days — the actual cooking time is under 5 minutes per serving, making fresh-cooked patties practical even for a weekday lunch.
The bowl components — shredded lettuce, diced onion, sliced pickles, and halved tomatoes — keep separately in sealed containers for up to 4 days. Assemble each bowl fresh at serving time from the pre-prepped components and freshly cooked patties.
Mistakes That Prevent the Smash Crust
A pan that isn’t hot enough is the primary reason a smash burger bowl tastes like crumbled beef over salad rather than a deconstructed burger — the lacy, caramelised crust only forms at temperatures that a moderately warm pan cannot reach. Heat the pan over high heat until it is visibly smoking before any beef goes near it. If you’re not sure it’s hot enough, it isn’t.
Not pressing hard enough or not pressing for long enough produces a patty that is too thick to caramelise properly in the available cook time — press down firmly and hold the pressure for a full 10 seconds. The patty should be thin enough to see through slightly at the edges when held up to light.
Flipping too early before the lacy edges have formed causes the patty to tear rather than releasing cleanly — the crust that forms on the bottom of the patty is what allows it to lift off the pan in one intact piece. If it sticks when you try to flip, wait 20 to 30 more seconds and try again rather than forcing it off the surface.
Easy High-Protein
Smash Burger Bowl
All the best parts of a crispy smash burger—lacy-edged beef, melted cheese, pickles, crisp lettuce, and tangy special sauce—served in a satisfying, lower-carb bowl instead of a bun.
Ingredients
Instructions
Whisk mayonnaise, ketchup, mustard, pickle brine, garlic powder, onion powder, smoked paprika, sugar, salt, and pepper in a small bowl until smooth. Taste and adjust as desired.
Divide ground beef into 4 loose balls, about 2 ounces each. Do not tightly pack the meat. Season each ball with salt, pepper, and garlic powder.
Heat a cast iron or heavy stainless-steel skillet over the highest heat for 3–4 minutes, until visibly smoking hot. Avoid non-stick cookware for this technique.
Place one or two beef balls in the skillet. Immediately press each flat with a sturdy metal spatula, burger press, or heavy pan. Hold firm pressure for a full 10 seconds.
Cook undisturbed for 1½–2 minutes, until the edges are deeply browned and lacy. If the patty sticks when you try to flip it, wait another 20 seconds.
Flip each patty in one confident motion. Add a slice of cheese immediately and cook for 30–45 seconds, until the cheese melts and the second side is seared.
Divide shredded lettuce between two bowls. Add tomatoes, pickles, diced onion, and two smash patties to each bowl.
Kitchen Notes
The hot skillet is essential. A warm pan steams the beef, while a smoking-hot cast iron pan creates the crisp browned smash crust.
The fat content renders into the skillet and creates the lacy, caramelized edges that make smash burgers special.
Smash immediately after the beef hits the skillet, then hold steady pressure for 10 seconds to make a thin, high-contact patty.
Keep the cold toppings separate until serving so the lettuce remains crisp and the hot patties keep their best texture.
Easy Variations
Use sriracha mayo in place of smash sauce, add a fried egg, and swap pickles for sliced jalapeños.
Add shredded parmesan and a tiny drizzle of truffle oil over the finished bowl for a restaurant-style upgrade.
Use ground turkey seasoned with garlic, onion powder, and Worcestershire sauce for a lighter version with comparable protein.
Add cooked fries, roasted potatoes, or white rice for a heartier bowl that still has all the smash burger flavor.
Store sauce in a sealed jar in the refrigerator for up to 1 week. It becomes even more flavorful after resting overnight.
For the crispiest edges, cook patties fresh. Store pre-portioned raw beef balls in the refrigerator for up to 3 days.
Reheat cooked patties in a very hot skillet for about 60 seconds per side. They will still be delicious, though less crisp than fresh.
Store lettuce, tomatoes, onion, and pickles in separate sealed containers for up to 4 days, then assemble bowls at serving time.