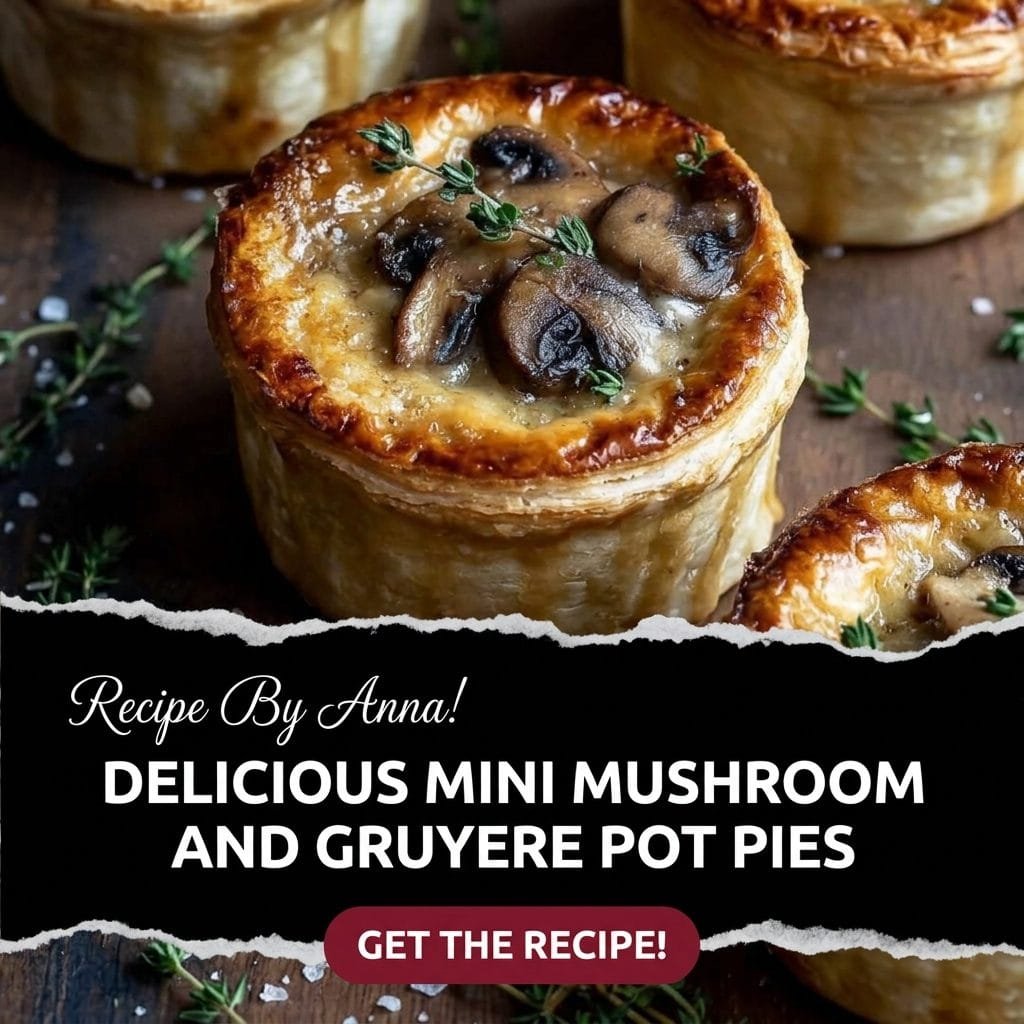
Mini Mushroom and Gruyère Pot Pies
There is something specifically wonderful about receiving your own individual pot pie. A full-sized pot pie shared at the table is generous and communal. An individual pot pie set in front of you specifically is generous and personal — the golden dome is yours, the first crack through the pastry is yours, and the steam that escapes belongs entirely to you. This is the minor theatricality that makes mini pot pies worth the extra effort of individual assembly over a single large one.
The filling here is a concentrated, deeply savoury mushroom and Gruyère mixture — cremini and shiitake mushrooms browned until deeply golden, thyme and garlic in the butter, a splash of white wine, cream and Gruyère stirred in off the heat to produce a thick, silky filling that holds its shape inside the pastry without running. The Gruyère specifically is the cheese that makes this specifically Gruyère pot pies rather than generic cheese pot pies — its nutty, slightly sweet, perfectly melting character is what connects this to the French bistro tradition of pairing mushrooms and Gruyère, from the quiche to the croque monsieur to these pot pies.
Puff pastry lids. Six ramekins. An oven. A dinner that earns its occasion.
Why Mini Instead of One Large
The individual format is not just theatrical — it is structurally practical for this filling. A mushroom and cream filling in a single large pie dish has too much volume for the steam to escape efficiently through the vents, which can make the pastry lid soggy from underneath. Individual ramekins have a higher filling-to-pastry-circumference ratio, which means the steam vents in the small pastry lids are more effective relative to the volume of filling below them. Each small pot pie produces a crisper, more fully cooked pastry lid than the same filling in a large dish.
They also present, serve, and reheat better than a large pot pie — each portion is complete and contained, there is no serving the awkward last spoonful from a shared dish, and individual ramekins can go into the fridge and reheat in the oven with the pastry lid intact without the soggy-center-of-the-dish problem that large pot pie leftovers sometimes produce.
- Prep Time: 25 minutes
- Cook Time: 35 minutes
- Total Time: 1 hour
- Yield: 6 individual pot pies (using 8 oz / 240ml ramekins)
What Goes In
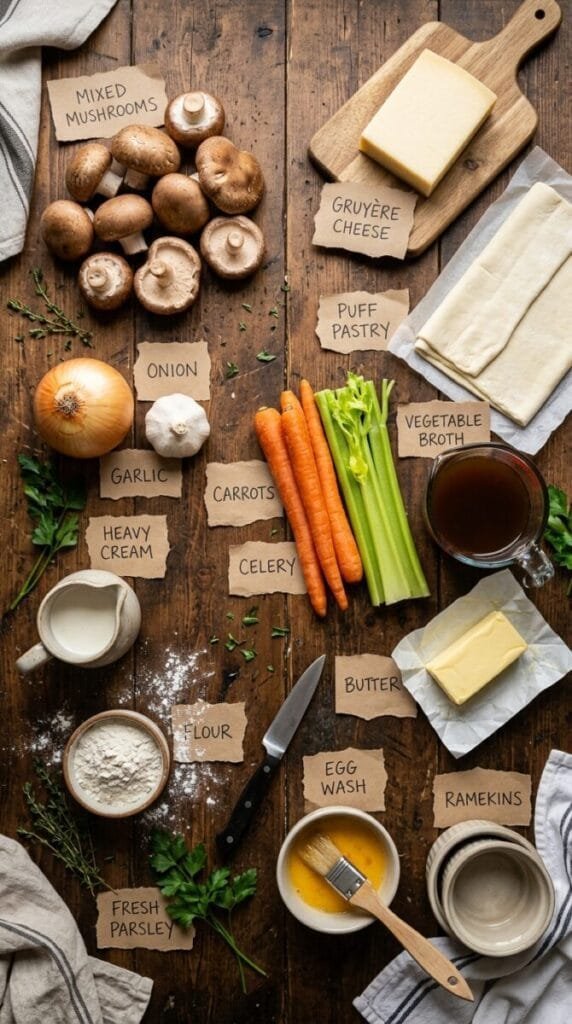
For the mushroom filling:
- Mixed mushrooms — cremini and shiitake: 1.5 lbs (680g), sliced — the cremini for body and earthiness, the shiitake for deeper umami; clean with a damp cloth rather than rinsing under water, which makes mushrooms soggy
- Unsalted butter: 3 tablespoons
- Shallots, finely diced: 3
- Garlic cloves, minced: 4
- Fresh thyme: 1 tablespoon leaves
- Dry white wine or dry sherry: 1/3 cup (80ml)
- All-purpose flour: 2 tablespoons — to thicken the filling
- Whole milk: 1/2 cup (120ml)
- Heavy cream: 3/4 cup (180ml)
- Gruyère, freshly grated: 1 cup (100g) — do not use pre-shredded; the anti-caking starch prevents clean melting and produces a grainy texture in the filling
- Dijon mustard: 1 teaspoon
- Fresh lemon juice: 1 teaspoon
- Worcestershire sauce: 1/2 teaspoon
- Fine sea salt: 1 teaspoon — added after mushroom browning
- Black pepper: 1/2 teaspoon
- Fresh flat-leaf parsley: 3 tablespoons, finely chopped — stirred in at the end; adds freshness that the rich filling benefits from
For the pastry lids:
- Frozen puff pastry, thawed: 1 package (2 sheets, approximately 17 oz / 480g total) — thawed in the fridge overnight; do not thaw at room temperature, which makes the pastry too soft to cut cleanly
- Egg, beaten with 1 tablespoon milk: 1 — for egg wash
- Flaky sea salt and fresh thyme: for the pastry tops
Equipment:
- 6 oven-safe ramekins (8 oz / 240ml capacity)
- A round cookie or biscuit cutter approximately 1 inch wider than the ramekin opening — to cut the pastry circles with an overhang that hangs over the ramekin edge
🍽️ Tools for the Mini Mushroom and Gruyère Pot Pies
Six everyday tools for browned mushrooms, fresh cheese shreds, glossy pastry lids, and easy oven-to-table serving.

Sweese 8-Ounce Porcelain Ramekins, Set of 4
Four oven-safe ramekins make the classic personal pot pie size, with enough room for creamy filling and a pastry lid.

Lodge Pre-Seasoned Cast Iron Skillet, 12-Inch
A wide, heavy skillet gives mushrooms room to brown instead of steam before they become pot-pie filling.

Pyrex 4.5-Quart Glass Mixing Bowl + OXO Silicone Pastry Brush
Use a small bowl for the egg wash and the flexible OXO brush for glossy, golden pastry lids.

Victorinox 3.25-Inch Serrated Paring Knife
A sharp knife slices mushrooms cleanly and trims pastry rounds to fit each ramekin.

OXO Good Grips 4-Sided Box Grater with Container
The coarse side shreds Gruyère quickly, and freshly grated cheese melts into a smoother, creamier filling.

Nordic Ware Natural Aluminum Commercial Baker’s Half Sheet
A rimmed baking sheet catches overflow and lets you carry all four hot ramekins in one trip.
How It Comes Together
Make the filling:
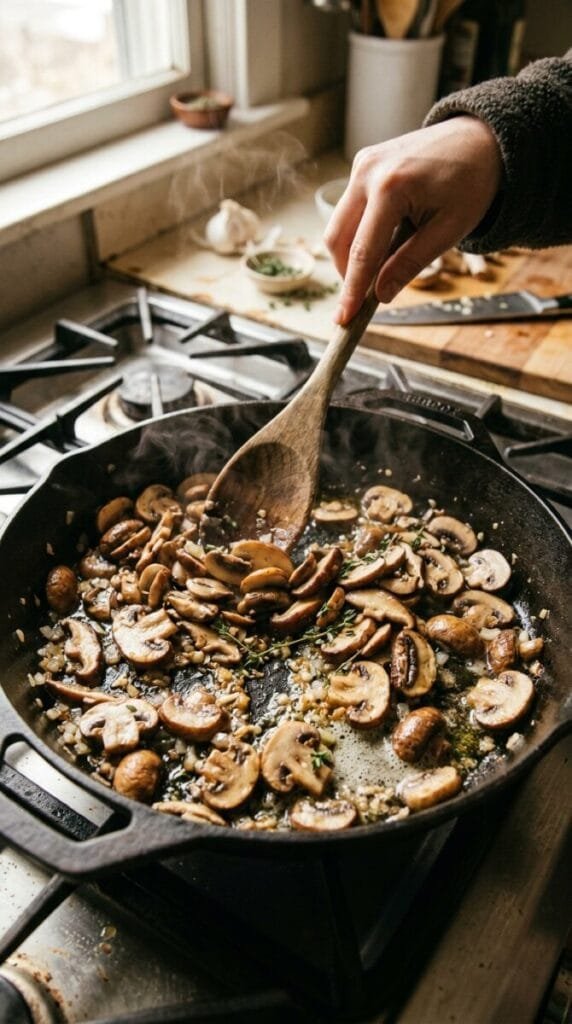
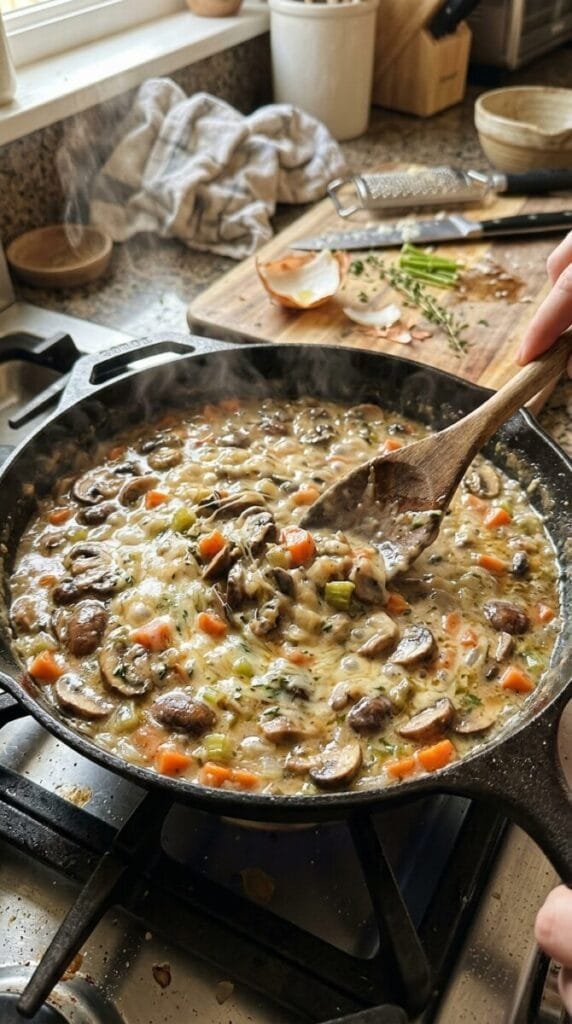
- Heat 1 tablespoon of the butter in a large, wide skillet over high heat. Add the mushrooms in a single layer — in batches if needed; crowding produces steaming rather than browning. Cook without stirring for 3 to 4 minutes. The same high-heat, don’t-move-them, salt-after-browning principle applies here as in every mushroom recipe in this collection. When golden on one side, toss and cook 2 more minutes. Season with a pinch of salt after browning. Transfer to a bowl.
- Reduce the heat to medium. Add the remaining 2 tablespoons of butter to the same pan. Add the shallots and cook for 3 minutes until softened and beginning to turn golden.
- Add the garlic and thyme and cook for 60 seconds.
- Add the flour and stir for 2 minutes to cook out the raw flour taste — this is the roux that thickens the filling.
- Add the white wine and scrape up any browned bits from the pan. Cook until mostly evaporated.
- Add the milk and cream in a steady stream, whisking constantly. Bring to a simmer and cook, stirring, for 3 to 4 minutes until the sauce has thickened enough to coat the back of a spoon — thick enough that a line drawn through it on the spoon holds for 2 to 3 seconds.
- Remove from heat. Add the Dijon, Worcestershire, lemon juice, pepper, and the remaining salt. Stir in the Gruyère in two additions, off the heat, stirring after each until melted. Return the browned mushrooms to the pan and stir to combine. Fold in the parsley. Taste and adjust — the filling should taste boldly seasoned, as the pastry will mellow it.
- Allow the filling to cool for 15 to 20 minutes. A warm filling poured into ramekins before pastry is added produces condensation that can make the underside of the pastry soggy. The filling does not need to be completely cold — just cooled enough that it is not steaming when the pastry goes on.
Assemble and bake:
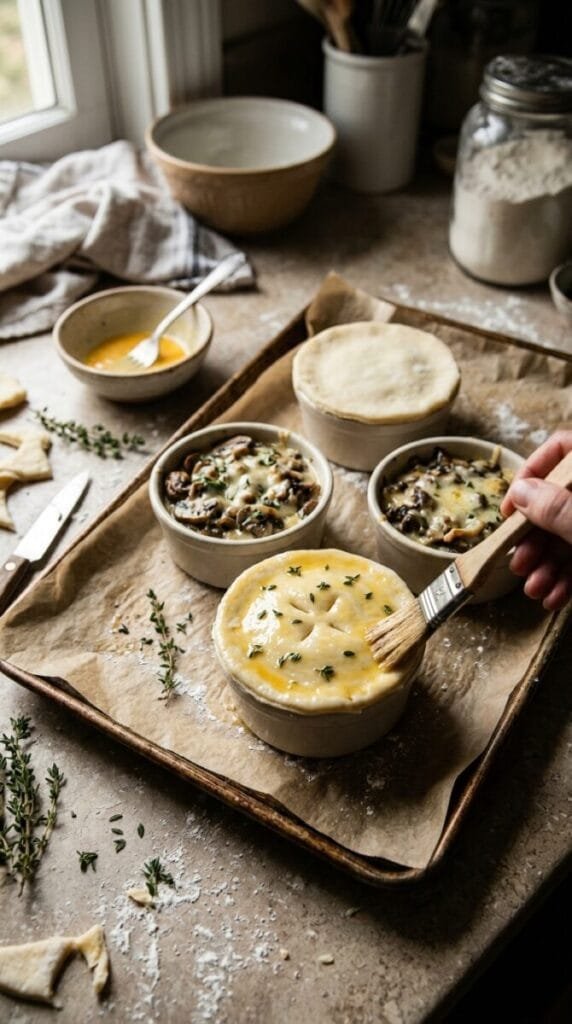
- Preheat the oven to 400°F (200°C). Place the ramekins on a large baking sheet — this catches any filling that bubbles over and makes transferring the hot ramekins safer.
- Divide the cooled filling evenly between the 6 ramekins, filling each to just below the rim.
- Roll the thawed puff pastry slightly to thin it and cut 6 circles approximately 1 inch wider than each ramekin opening. Drape each circle over a filled ramekin and press the overhang firmly down around the outside of the rim — the pastry should be in contact with the rim of the ramekin rather than just draped loosely over it. This seal is what keeps the pastry from puffing off the ramekin during baking.
- Cut 2 to 3 small slits in the center of each pastry lid to allow steam to escape.
- Brush the pastry generously with egg wash. Scatter a pinch of flaky sea salt and a few fresh thyme leaves over each pastry top.
- Bake at 400°F for 22 to 25 minutes until the pastry is a deep, golden amber — not pale gold, which indicates underdone pastry, but the specific deep amber that indicates the pastry layers have fully separated and cooked through.
- Cool for 5 minutes before serving — the filling is extremely hot and the ramekins will be very hot. Transfer each ramekin to a small plate for serving. The pot pie is best eaten when the pastry is still crisp — the crust softens as it sits.
Mini mushroom and Gruyère pot pies as the main course with our Chickpea Feta Avocado Salad alongside is the dinner party combination that covers the warm, rich, individually plated main and the cold, bright, shareable salad simultaneously — the pot pie golden and steaming at each place setting, the chickpea salad in a large bowl at the center of the table, and the combination making a vegetarian dinner that looks more planned and more considered than the 60 minutes of actual cooking time would suggest.
The Cooling Filling, the Deep Amber Lid, and the Ramekin Seal
Cooling the filling before adding the pastry is the step that most prevents the soggy underside that makes pot pie pastry disappointing — hot filling beneath a raw pastry sheet creates immediate steam that condenses on the dough before it has had a chance to dry out in the oven. The steam essentially pre-soaks the bottom of the pastry before baking begins, and the oven time is then spent trying to dry out and crisp pastry that started wet rather than spending that time building flakiness from a dry starting point. The 15 to 20-minute cooling window is the practical solution — the filling stays warm enough to be pourable and to bake correctly, but is cool enough to not immediately produce steam beneath the pastry.
The deep amber colour on the puff pastry lid is the indicator that appears in every puff pastry recipe in this collection: pale golden puff pastry has not reached the temperature where the many layers have fully separated and cooked through; deep amber puff pastry has. The full separation of puff pastry layers requires sustained high heat (400°F) for sufficient time — the layers need to puff, dry, and set individually, which happens progressively from the outside in as heat penetrates the pastry. Pale pastry looks baked from the outside but has underbaked layers in the center. The amber colour indicates the full depth has been reached.
Pressing the pastry overhang firmly against the outside of the ramekin rather than simply draping it over the top is the technique that keeps the pastry from lifting off during baking when the air beneath it heats and expands. A loosely draped pastry lid becomes a pastry dome as the air beneath it expands — fine aesthetically but the seal around the filling is lost and filling can bubble out from the sides rather than only from the steam vents. The pressed seal contains the filling and channels all the steam through the vents, which is what produces the correct visual (pastry staying close to the filling below, domed neatly, not floating).
What to Serve Alongside
A simple green salad is the natural companion for a pot pie — the fresh, cold, acidic salad against the warm, rich, creamy filling provides the contrast that makes the combination satisfying rather than one-dimensionally heavy. A Dijon vinaigrette specifically connects to the Dijon in the filling and makes the pairing feel coherent.
For a more composed table, our Garlic Butter Orzo with Mushrooms and Spinach serves as a side that deepens the mushroom direction of the pot pies into a complete mushroom-forward dinner — the orzo underneath the pot pies on a plate is genuinely excellent and is the format to use when the occasion calls for something more substantial than a salad alongside. The creamy orzo and the creamy pot pie filling share the same richness register, which means the green salad alongside is genuinely needed in this case to provide the contrasting freshness.
Variations Worth Making
Add Spinach: Stir 2 cups of baby spinach into the hot filling off the heat before cooling — the residual heat wilts it completely in 2 minutes. The spinach version adds a green element to the filling that is visible when each pot pie is cut open and provides an additional vegetable component. Squeeze any excess moisture from thawed frozen spinach before adding if using that instead of fresh.
With Caramelized Onions: Add 1 cup of properly caramelized onions (the 35-minute low-and-slow version from the French Onion Chicken Bake) to the filling alongside the browned mushrooms. The caramelized onions add their characteristic sweet, jammy depth to the mushroom filling and produce a pot pie with a noticeably more complex, richer flavour — particularly good in autumn and winter when the sweetness of the caramelized onion connects to the season’s flavour palette.
Single Large Pot Pie: Use a 9×13 inch baking dish or a large deep pie dish. Pour all the filling in. Top with a single piece of puff pastry trimmed to fit with 1-inch overhang, cut vents, egg wash, and bake at 400°F for 25 to 28 minutes. The large format loses the individual theatricality but gains ease of assembly and serves the same 6 portions from a single dish. The filling is identical — the only difference is presentation and the slightly less crisp pastry-to-filling ratio.
Chicken and Mushroom: Add 2 cups of shredded cooked chicken alongside the browned mushrooms. The chicken and mushroom filling is the most substantial version and the most traditional pot pie direction — the mushrooms provide the umami depth and the Gruyère provides the sophistication that elevates this version above a standard chicken pot pie while keeping it recognisably in the same comfort food category.
Nutritional Information
| Nutrient | Amount Per Pot Pie (based on 6 pot pies) |
|---|---|
| Calories | 510 kcal |
| Protein | 14 g |
| Carbohydrates | 38 g |
| Fats | 34 g |
510 calories per individual pot pie reflects the puff pastry (which is primarily butter and flour), the heavy cream, and the Gruyère in the filling together. The 34 grams of fat are primarily from the pastry’s butter content and the cream — the fat sources that produce the flakiness and richness that make this specifically a special-occasion dish. The 14 grams of protein comes from the Gruyère, the mushrooms, and the cream. As a complete dinner with a simple salad alongside, this is a generously caloric but entirely appropriate special-occasion meal.
Make-Ahead Options
The filling can be made up to 2 days ahead and stored in the fridge — it reheats gently in a saucepan with a splash of cream to restore its consistency. The assembled, unbaked pot pies (filling in ramekins, pastry on top, egg wash applied) can be refrigerated for up to 24 hours before baking — bake from cold, adding 5 to 8 minutes to the bake time. Do not freeze assembled unbaked pot pies with puff pastry lids — the pastry loses its ability to puff after freezing and thawing and produces a denser, less flaky result.
Leftover baked pot pies refrigerate well for up to 2 days. Reheat covered with foil at 325°F for 15 to 18 minutes — the foil prevents the already-baked pastry from overcooking while the filling reheats. Remove the foil for the last 3 minutes to re-crisp the pastry surface slightly.
The Mistakes That Are Worth Avoiding
Not browning the mushrooms properly before adding them to the filling — either from a pan that is not hot enough or from crowding — produces a filling with mushrooms that are pale, soft, and watery rather than golden, slightly chewy, and concentrated. The browned mushroom contributes more flavour to the filling than the same weight of steamed mushroom. High heat, wide pan, batches if needed, patience.
Not cooling the filling before topping with pastry produces a soggy, pre-steamed pastry underside that the oven cannot fully crisp during the bake time — the initial 15 to 20 minutes of oven time are spent drying a wet pastry bottom rather than building flakiness from a dry one. The 15 to 20-minute cooling window is specifically what makes the difference between a crisp pastry lid and a disappointingly soft one.
Underbaking to a pale golden colour produces puff pastry that is doughy in the center layers — the underbaked center layers have not had the sustained heat exposure needed to dry out and set. A pale puff pastry lid is not a ready puff pastry lid. Wait for the deep amber. It makes the difference between a pot pie that is impressive and one that is merely good.
Mixed Mushrooms · Gruyère · Thyme · Golden Puff Pastry
Mini Mushroom & Gruyère Pot Pies
Individual pot pies filled with golden mushrooms, shallots, thyme and a creamy Gruyère sauce, finished with crisp puff pastry lids. Six ramekins of rich, savory comfort for a special dinner.
Ingredients
As an Amazon Associate, we earn from qualifying purchases. Ingredient and equipment links below are affiliate links.
For the Mushroom Filling
- Mixed cremini and shiitake mushrooms, sliced, tough stems removed 1½ lb / 680 g
- Unsalted butter 3 tbsp, divided
- Shallots, finely diced 3
- Garlic, minced 4 cloves
- Fresh thyme leaves 1 tbsp
- Dry white wine or dry sherry ⅓ cup / 80 ml
- All-purpose flour 2 tbsp
- Whole milk ½ cup / 120 ml
- Heavy cream ¾ cup / 180 ml
- Gruyère, freshly grated 1 cup / 100 g
- Dijon mustard 1 tsp
- Fresh lemon juice 1 tsp
- Worcestershire sauce ½ tsp
- Fine sea salt 1 tsp, divided; to taste
- Black pepper ½ tsp
- Fresh flat-leaf parsley, finely chopped 3 tbsp
For the Pastry Lids
- Frozen puff pastry, thawed in the fridge and kept cold 2 sheets / about 17 oz (480 g)
- Egg, for egg wash 1
- Milk, for egg wash 1 tbsp
- Flaky sea salt a pinch per pie
- Fresh thyme leaves for the tops
Equipment
- Oven-safe ramekins 6 × 8 oz / 240 ml
- Round pastry cutter 1 inch wider than ramekin opening
- Rimmed baking sheet 1
For a vegetarian dish, choose anchovy-free Worcestershire sauce and cheese made with vegetarian rennet; traditional versions may contain animal-derived ingredients.
How to Make Them
- Brown the mushrooms Heat 1 tablespoon butter in a wide skillet over medium-high heat. Add the dry, sliced mushrooms in a single layer, working in batches if needed. Cook undisturbed for 3–4 minutes, then turn and cook about 2 minutes more until golden. Adjust the heat to avoid burning the butter. Season with a pinch from the measured salt and transfer to a bowl.
- Soften the shallots Reduce the heat to medium. Add the remaining 2 tablespoons butter and the shallots. Cook for about 3 minutes until softened.
- Add garlic, thyme and flour Stir in the garlic and thyme and cook for 1 minute. Add the flour and stir for 2 minutes to cook out the raw flour taste.
- Deglaze with wine Add the white wine or sherry, stirring and scraping up the browned bits. Cook until mostly evaporated.
- Thicken the cream sauce Gradually whisk in the milk and cream. Bring to a gentle simmer and cook, stirring, for 3–4 minutes until the sauce coats the back of a spoon.
- Finish the filling off the heat Remove from the heat. Stir in the Dijon, Worcestershire sauce, lemon juice and pepper. Add the Gruyère in two additions, stirring until melted. Fold in the mushrooms and parsley. Taste and add the remaining measured salt as needed.
- Cool the filling and preheat Let the filling cool for 15–20 minutes, until it is no longer steaming. Meanwhile, preheat the oven to 400°F (200°C) and place six oven-safe 8 oz / 240 ml ramekins on a rimmed baking sheet.
- Fill the ramekins Divide the cooled filling evenly among the six ramekins, leaving space below each rim for bubbling.
- Cut and attach the pastry lids Roll the cold, thawed puff pastry slightly and cut six circles about 1 inch wider in diameter than the ramekin openings. Drape over the filling and press the overhang firmly against the outside of each rim. Keep the pastry cold while working.
- Vent, brush and garnish Cut 2–3 small slits in each pastry lid. Beat the egg with 1 tablespoon milk and brush over the tops. Finish with a pinch of flaky salt and a few thyme leaves.
- Bake until deeply golden Bake at 400°F (200°C) for 22–25 minutes, or until the pastry is well risen, deeply golden and cooked through, with the filling bubbling through the vents. Allow additional time if needed.
- Rest briefly before serving Let stand for 5 minutes. Using oven mitts, place each ramekin on a small serving plate. Warn diners that both the dishes and filling are hot.
*The original recipe lists 35 minutes cooking and 1 hour total. The detailed steps may take longer, especially when browning in batches. Allow roughly 75–90 minutes including filling cooling and the final rest, plus advance pastry thawing.
Nutrition
| Nutrient | Per 1 pot pie (6 total) |
|---|---|
| Calories | 510 kcal |
| Protein | 14 g |
| Carbohydrates | 38 g |
| Fat | 34 g |
Estimates supplied with the original recipe, not independently calculated. Actual values vary by ingredients, pastry used and portion size.