Flourless Oat and Chia Bread | Healthy Homemade & Gluten-Free
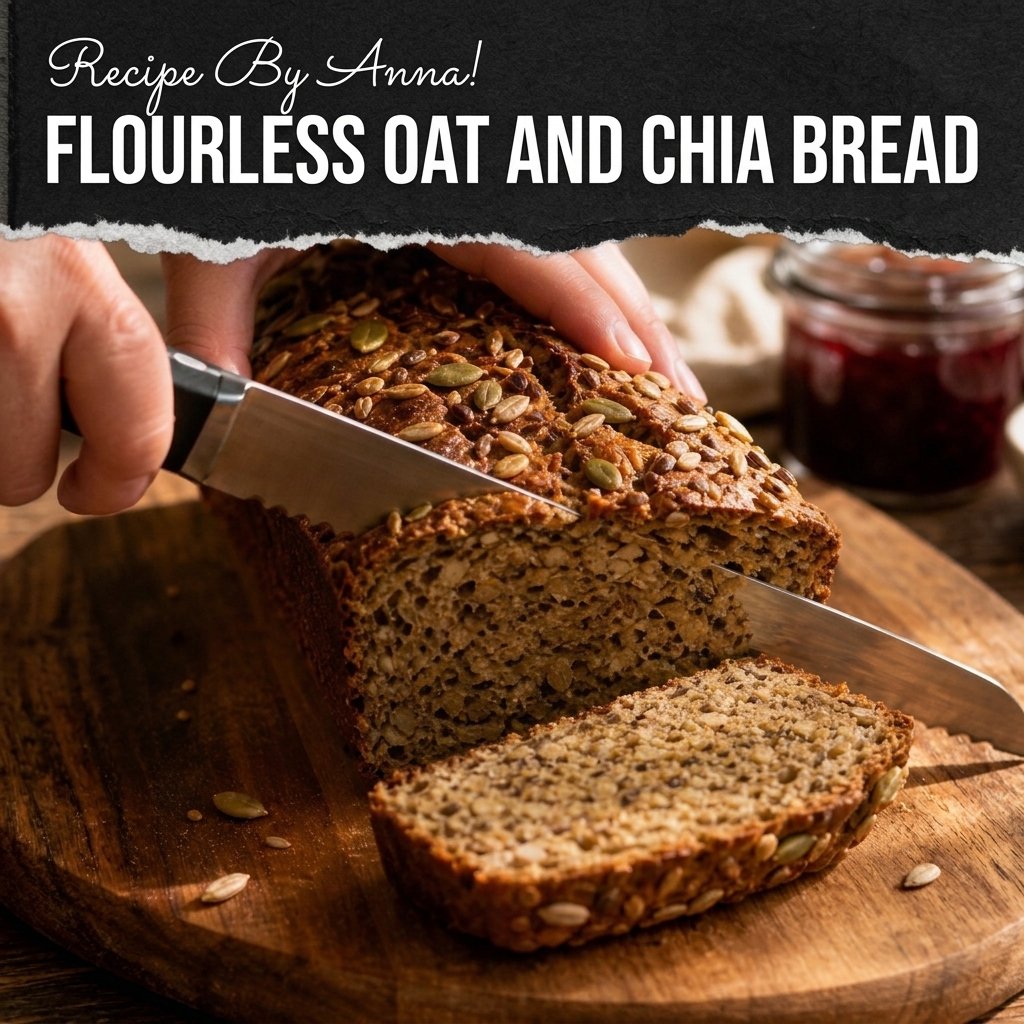
This is the loaf I bake when I want bread in the house but not the heavy feeling that comes with it. Flourless oat and chia bread is exactly what the name says: rolled oats blitzed into a coarse flour, chia seeds that swell into a gel and hold everything together, and not a speck of wheat flour anywhere. The result is dense, nutty, faintly sweet, and studded with seeds — less a sandwich loaf, more a toast loaf. A thick slice, crisped in the toaster and topped with whatever the morning calls for, is one of the quiet pleasures of my week.
The recipe fits in one bowl plus a blender, contains no eggs and no dairy if you use plant milk, and earns its “healthy” label honestly: oats bring soluble fiber, chia brings omega-3s and more fiber, applesauce keeps it moist without a cup of oil, and maple syrup does the sweetening at a modest two tablespoons for the whole loaf. It is also, with one important checkbox, gluten-free — and that checkbox is worth a whole paragraph below, because it’s the difference between a label and a fact.
A few honest notes before you start. This bread is dense on purpose — it will never be fluffy white bread, and pretending otherwise helps nobody. It must cool completely before slicing, which is the hardest instruction in the recipe and I feel genuinely bad about it. And it reaches its true form toasted: straight from the loaf it’s respectable, but the toaster turns it into something worth getting out of bed for. Plan the bake for the afternoon, slice it the next morning, and thank yourself later.
Why It Works Without Flour
Two ingredients do the structural work that flour normally does, and each covers for the other. The oats, once blitzed, are the flour — same grain, same starch, just self-milled. I blitz about two-thirds of them and leave the rest whole, which gives the crumb both tenderness and that seeded, porridge-adjacent heartiness. It’s the difference between a loaf that tastes like oatmeal and a loaf that tastes like bread, and the split is the recipe’s biggest open secret.
The chia is the real magician. Chia seeds absorb many times their weight in liquid and form a gel, and in this loaf that gel does roughly what gluten and eggs would otherwise do — it binds the crumb, traps moisture, and gives each slice enough flexibility to hold together. That’s what the ten-minute batter rest is for: you mix, the chia starts drinking, and you can actually watch the batter thicken from pourable to scoopable. Gluten substitute, forming in real time on your counter, no machinery required.
The lift comes from a little kitchen chemistry instead of yeast. Baking soda meets apple cider vinegar in the wet mix and fizzes on the spot, and that fizz lightens the loaf just enough to keep it from becoming a brick. The vinegar bakes out completely — nobody will taste it, though everyone will ask what makes the bread “somehow fluffy and not fluffy at the same time.” That’s the fizz and the gel, working a double shift.
⏱️ 1 HR 45 MIN | 🌾 OATS ARE THE FLOUR | 🍞 ONE LOAF, 10 SLICES
- Prep Time: 15 minutes
- Batter Rest: 10 minutes
- Bake Time: 50 to 55 minutes
- Cooling Time: 45 minutes, non-negotiable
- Total Time: 1 hour 45 minutes
- Yield: 1 loaf, about 10 slices
The Loaf Kit
One blender, one bowl, one pan:
- Blender or food processor — for turning most of the oats into coarse flour. Thirty seconds of noise, max.
- Loaf pan — 9 by 5 inches, lined with parchment with the edges hanging over like handles.
- Large mixing bowl and wooden spoon — the batter is thick; a wimpy whisk will surrender.
- Measuring jug — for warming the milk and whisking the wet ingredients.
- Serrated knife — for slicing the cooled loaf cleanly instead of compressing it.
- Wire rack — the loaf finishes its setup here, out of the hot pan.
Ingredients (With Labels)
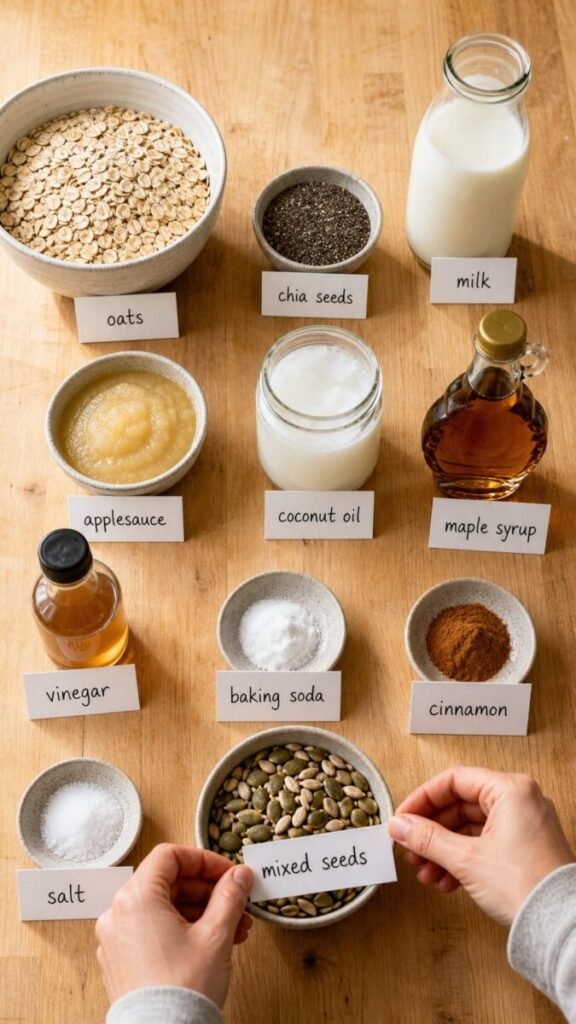
🌾 The Dry Side
- Rolled oats: 2¼ cups — certified gluten-free if the loaf needs to be; more on that below
- Chia seeds: ⅓ cup
- Baking soda: 1 teaspoon
- Salt: ½ teaspoon
- Cinnamon: 1 teaspoon, optional but recommended
🥛 The Wet Side
- Milk: 1¾ cups, warmed to comfortably lukewarm — dairy or plant, both work
- Applesauce: ⅓ cup, unsweetened — the moisture keeper
- Coconut oil: 3 tablespoons, melted — olive oil also works and tastes quietly great here
- Maple syrup: 2 tablespoons — honey if that’s the jar you have
- Apple cider vinegar: 1 tablespoon — the fizz engine; it bakes out, promise
🌻 The Seeded Top
- Mixed seeds: 2 tablespoons — sunflower, pumpkin, sesame, any combination
- Extra rolled oats: 1 teaspoon, for the looks
Step by Step How to Make
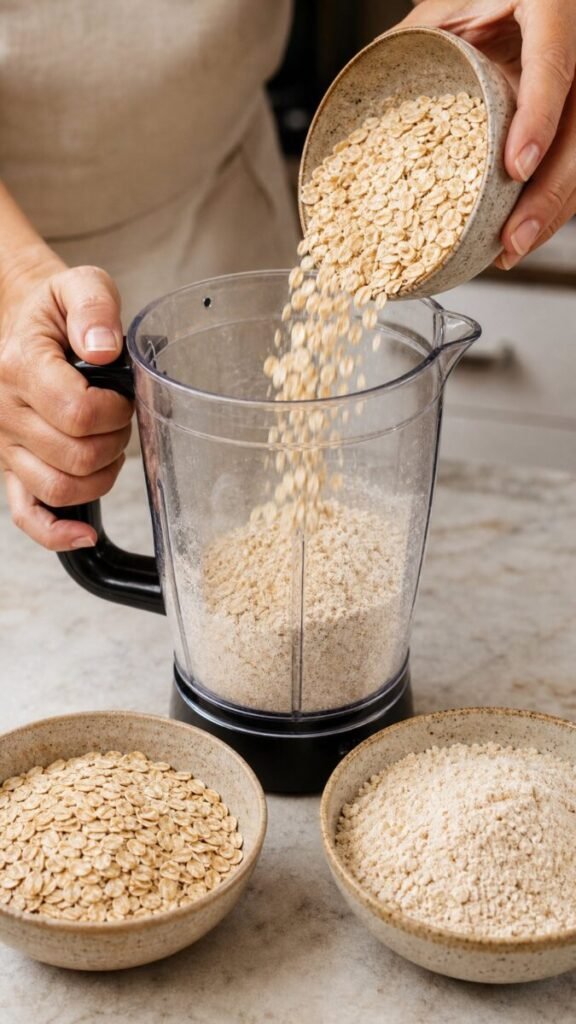
- Step 1 — Mill your flour. Measure 2¼ cups of rolled oats. Put 1½ cups of them in the blender and blitz to a coarse flour — about 30 seconds, stopping while it still looks like sandy crumbs rather than powder. Keep the remaining ¾ cup whole. Two textures of the same grain is the whole game: blitzed for tenderness, whole for character.
- Step 2 — Mix the dry side. In the big bowl, stir together the oat flour, the whole oats, the chia seeds, baking soda, salt, and cinnamon. Whisking dry ingredients matters more than usual in a flourless recipe — the baking soda especially hates clumps, and a clump of soda tastes like a small chemical incident.
- Step 3 — Fizz the wet side. In the jug, whisk the warm milk, applesauce, melted coconut oil, maple syrup, and apple cider vinegar. Add the baking soda to the wet ingredients now — not to the dry — and watch it fizz for a second before you pour. That fizz is the loaf’s only lift, and it starts the moment soda meets acid, so move promptly from here on. No dawdling, no phone.
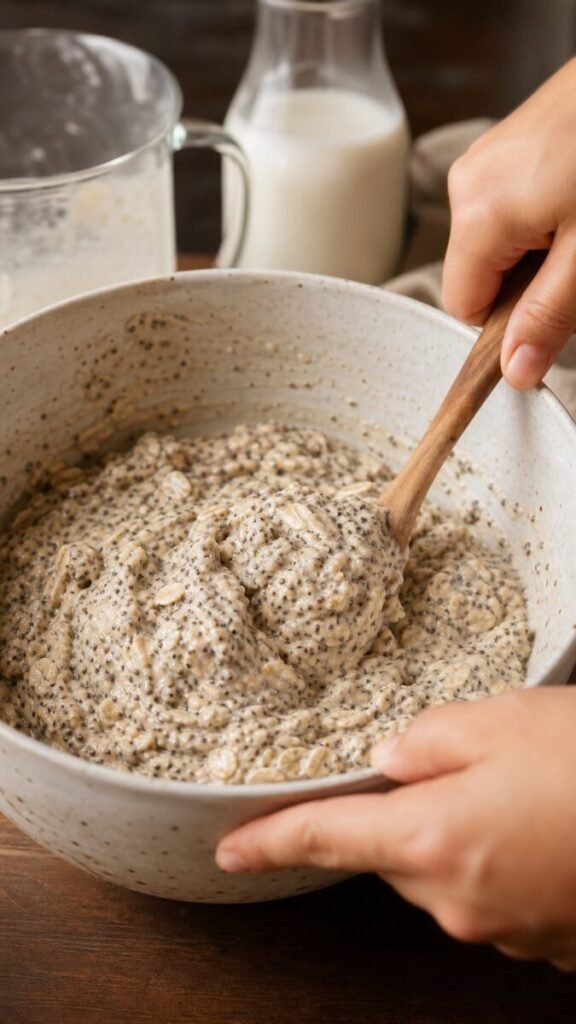
- Step 4 — Combine and rest. Pour the wet into the dry and stir with the wooden spoon until no dry pockets remain. The batter will seem loose for about four minutes — then the chia kicks in and it visibly thickens into a heavy, scoopable dough. Let it rest for the full 10 minutes. This is the gluten substitute forming, and cutting the rest short is how loaves end up sad and wet in the middle.
- Step 5 — Bake low and patient. Heat the oven to 350°F. Scoop the thick batter into the lined loaf pan, smooth the top with a wet spatula, and scatter the mixed seeds and the extra oats over it, pressing lightly so they stay put. Bake 50 to 55 minutes, until the top is deep golden and the loaf sounds faintly hollow when you tap it. If the top browns early, lay a piece of foil loosely over it — the inside needs every minute of its bake time.
- Step 6 — Cool completely. Yes, completely. Ten minutes in the pan, then use the parchment handles to lift the loaf onto the wire rack. And then — I’m sorry — walk away for at least 45 minutes. A flourless loaf finishes setting as it cools; the gel firms, the steam redistributes, the crumb knits together. Sliced hot, it crumbles. Sliced cool, it cuts clean and holds. The bread is not ready when the oven timer says so. It’s ready when it says so.
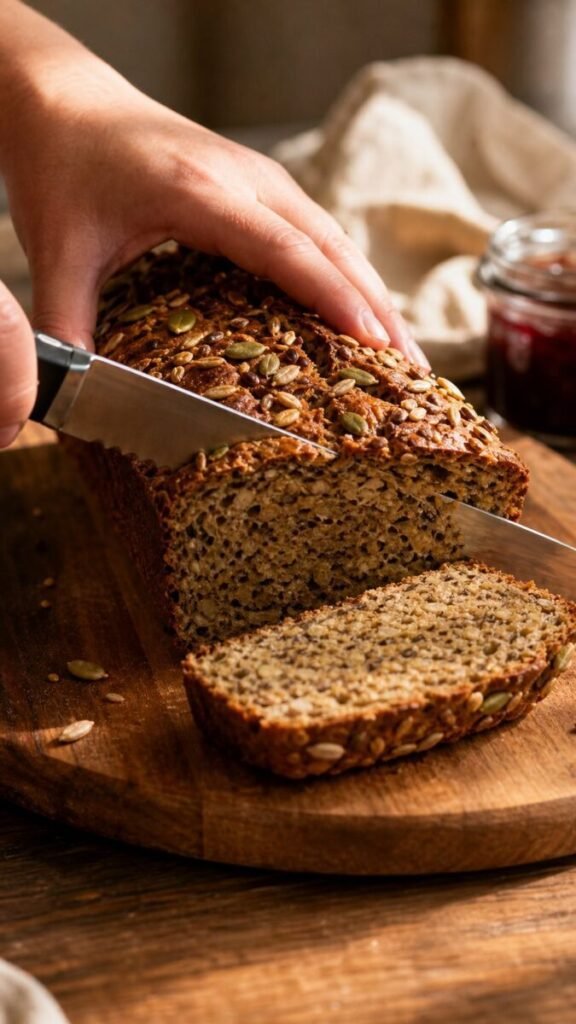
A toast loaf needs something to dunk, and my loaf’s favorite landing spot is a bowl of our Caramelized Onion Red Lentil Soup — the crusty seeded edges were born to do exactly this job.
Anna’s Kitchen Notes
The gluten-free checkbox, honestly. Oats are naturally gluten-free, but they’re usually processed on the same lines as wheat, so regular oats carry trace gluten. If this loaf is for someone with celiac disease or a real sensitivity, the oats must say “certified gluten-free” on the bag — that’s the entire difference between a gluten-free loaf and a loaf that’s mostly gluten-free. For everyone else, regular rolled oats are perfectly fine and considerably cheaper.
Toast is not optional, it’s the upgrade. Sliced from the loaf, the bread is good — dense and a little humble, like it’s still waking up. Toasted, it transforms: the edges crisp, the seeds on top get nutty, the middle goes warm and chewy, and suddenly it’s competing with bakery toast for your attention. The toaster is this bread’s best friend, and I mean that in the strongest possible terms.
The rest and the cool are the recipe. Ten minutes for the batter, forty-five for the loaf. Both are when the chia does its binding work, and skipping either one is the number-one cause of crumbly slices. I built the timing so the loaf bakes in the late afternoon and gets sliced the next morning — the overnight sit makes it even easier to cut clean slices, like it used the time to think things over.
Sweetness is a dial, not a setting. Two tablespoons of maple syrup keeps this solidly in breakfast-and-avocado territory. A ripe mashed banana in place of the applesauce nudges it sweeter; an extra tablespoon of syrup lands it next to banana bread; and leaving sweetener out entirely makes a sober, seedy loaf that’s excellent with soup and cheese. Same recipe, three personalities.
Slice thick, freeze flat. Cut the loaf into ten thick slices rather than fifteen thin ones — thin slices of a flourless bread break at the worst moments, usually mid-dunk. Whatever won’t get eaten in three days goes into the freezer, sliced, with parchment between the slices, for up to three months. Toasted straight from frozen, a slice is ready before the coffee finishes dripping, which in my house counts as a minor miracle every single time.
What to Eat It With
The sweet lane: toasted with peanut butter and banana slices, with jam and a soft-boiled egg on the side, or under a swipe of butter and honey when nobody’s watching. It also makes a proper breakfast board alongside our Pumpkin Pie Greek Yogurt — toast on one side, creamy yogurt and fruit on the other, and the morning more or less handles itself.
The savory lane is where this bread quietly excels. Toasted and rubbed with garlic, it’s the crouton-adjacent base for soup night — a bowl of The Best Broccoli Cheese Soup with this toast alongside is a full dinner with zero complaints on file. Sliced and topped with cream cheese and cucumber, it does afternoon-tea duty. And on big weekend breakfasts, it rounds out the table next to the Pancake Sausage Casserole, doing the responsible grown-up job while the casserole gets all the applause.
Loaf Variations
The banana version. Swap the applesauce for one ripe mashed banana and add an extra splash of milk if the batter sits too thick. Sweeter, softer, and dangerously close to qualifying as breakfast dessert.
The everything-seed route. Fold a handful of sunflower and pumpkin seeds into the batter along with the seeded top. More crunch, more fiber, more of everything the loaf already stands for.
Truly savory. Skip the maple and cinnamon, add a teaspoon of dried rosemary or thyme and a scattering of grated parmesan over the top before baking. This version was built for soup and a slice of sharp cheddar, and it knows it.
Chocolate chip, for the skeptics. A third of a cup of dark chips folded in makes this a legitimately good afternoon-snack loaf. I present this variation without apology, because a household that eats its fiber in chocolate chip form is still eating its fiber.
The flour-lover’s counterpoint. Some days only buttery, flaky, gloriously glutinous will do — for those days there are our Buttermilk Biscuits, and there is no shame in wanting them. Both loaves can live in one kitchen; ours negotiated a treaty years ago. On the sweet end of the loaf shelf, the Fudgy Brownie Bread is this bread’s opposite number and its occasional houseguest.
The Slice Count
| Nutrient | Per Slice (1 of 10) |
|---|---|
| Calories | 165 kcal |
| Protein | 5 g |
| Carbohydrates | 17 g |
| Fats | 9 g |
And the quiet headline: around 5 grams of fiber per slice, from the oats and chia working together. That’s a fifth of a day’s target in one piece of toast, which is more fiber than many so-called health cereals deliver in a full bowl. The fats are mostly the friendlier kind — coconut or olive oil and chia — and the sugar stays low at roughly two grams per slice. All estimates, as always; your seed topping and your generosity with the maple will move the needle a little.
Keeping It Fresh
On the counter, wrapped in a clean towel or beeswax wrap, the loaf keeps three days — though day two and three are firmer than day one, which is exactly what the toaster is for. The fridge dries it out and I don’t recommend it; this bread prefers room temperature like most of us.
The freezer is the real plan. Slice the whole loaf once it’s fully cool, stack the slices with parchment between them, and freeze in a bag for up to three months. Toasted straight from frozen — no thawing, just a slightly longer toaster cycle — a slice comes back so convincingly fresh that I’ve stopped baking this bread any other way. Bake on Sunday, toast until the following weekend.
One revival trick worth knowing: if a counter-stored slice has gone a bit firm and you’re out of toaster patience, ten seconds of steam over a kettle or a quick pass through a warm pan softens it right back. The bread forgives, which is more than I can say for most things I bake.
Where It Goes Wrong
Crumbly slices. Ninety percent of the time, the loaf was cut warm — the chia gel hasn’t finished setting and the crumb simply isn’t ready. The other ten percent, the batter rest got skipped. Cool fully, rest fully, slice with a serrated knife using a gentle sawing motion, and the problem generally apologizes and leaves.
Wet, gummy middle. Underbaked, or the loaf was sliced warm enough that steam was still escaping. The tap test and a full cool cover both. If the top is golden but the middle reads wet, your oven runs cool — add ten minutes next time and write it on the recipe like I eventually did.
A brick. The fizz got left behind. Baking soda meeting the vinegar is the entire leavening plan, and it starts fading the moment it’s mixed — if the batter sat around before baking, the lift sat around with it. Mix the wet, pour promptly, and get the pan into the oven without a detour.
Faintly soapy, chemical bites. A clump of baking soda that never got dispersed. Whisk the dry side properly, or better yet, sift the soda in with the flour. Small effort, large improvement in trust between you and your bread.
Not actually gluten-free. The oats weren’t certified. Regular oats are usually cross-contaminated with wheat somewhere in processing — fine for the generally gluten-avoidant, not fine for celiac folks. The certified bag costs a bit more and is the entire ballgame for anyone who needs the label to be true.
Tastes like cardboard. Under-salted, under-toasted, or made with ancient oats from the back of the pantry. Oats go rancid quietly, and stale oats make stale bread — taste one before you bake. Half a teaspoon of salt sounds like nothing here, but skip it and the whole loaf tastes like it’s withholding information.
Bread Questions
Is this bread actually gluten-free?
Yes — if your oats are certified gluten-free. Oats contain no gluten naturally, but most are processed alongside wheat, so cross-contamination is common. Certified GF oats are grown and milled separately, and with them, this loaf is genuinely gluten-free. With standard oats, it’s “no flour added,” which is a different and much looser claim.
Why is it so dense compared to regular bread?
Because there’s no gluten to trap air and no yeast to make it. The lift here is one small chemical fizz, and the crumb is bound by chia gel, not stretchy dough. Dense is the design — this is a toast loaf in the European seeded-bread tradition, not a sandwich loaf. Toasted, the density reads as satisfying rather than heavy.
Can I make it vegan?
It’s already egg-free, so you’re two swaps away: use plant milk and maple syrup rather than honey. Coconut oil and applesauce are already plant-based. Done — the loaf never needed the animal products in the first place and doesn’t miss them.
Can I use quick oats or steel-cut oats instead?
Neither, sorry. Quick oats are pre-cut and precooked, so they turn the crumb pasty. Steel-cut stay hard little pellets no matter how long the chia gel sits around them. Rolled oats — the old-fashioned kind — are the one correct answer, and the recipe isn’t shy about it.
Can I add banana, nuts, or berries?
All three work. One mashed banana replaces the applesauce and adds sweetness; a handful of chopped walnuts or pecans folds straight in; and blueberries are best folded in frozen so they don’t bleed streaks through the batter. Berries add moisture, so give the loaf an extra five minutes in the oven.
Why did my loaf fall apart when I sliced it?
Almost always the warm loaf. The structure of a flourless bread finishes setting as it cools — cut it at temperature and the crumb hasn’t locked yet. An hour of cooling (or an overnight rest) turns the same loaf from crumbly to clean-cut. Patience is the only ingredient in this recipe that costs nothing, which is suspiciously convenient.
How should I store it?
Three days wrapped on the counter, or sliced-and-parchmented in the freezer for up to three months, toasted straight from frozen. Skip the fridge — it dries the crumb out faster without buying you any real shelf life. The full storage plan lives one section up, next to the revival trick for firm slices.
Rolled oats · Chia seeds · Made for toast
Flourless Oat and Chia Bread
A dense, nutty, egg-free toast loaf made with blended rolled oats, chia seeds, applesauce, and a lightly sweetened seeded top. No wheat flour or yeast required.
As an Amazon Associate I earn from qualifying purchases. Ingredient and equipment links below are affiliate links.
Equipment
Ingredients
The dry ingredients
- 2¼ cups old-fashioned rolled oats, divided: 1½ cups for blending and ¾ cup left whole
- ⅓ cup chia seeds
- 1 teaspoon baking soda, added once, after hydration
- ½ teaspoon salt
- 1 teaspoon ground cinnamon (optional)
The seeded top
- 2 tablespoons mixed sunflower seeds, pumpkin seeds, or sesame seeds
- 1 teaspoon extra rolled oats
The wet ingredients
- 1¾ cups unsweetened plant milk or dairy milk, lukewarm
- ⅓ cup unsweetened applesauce
- 3 tablespoons melted coconut oil or olive oil
- 2 tablespoons maple syrup or honey
- 1 tablespoon apple cider vinegar
Dietary labels: “Flourless” here means no purchased flour; the blended oats function as oat flour. For gluten-free preparation, use certified gluten-free oats and check every other ingredient for gluten and cross-contact. Some people with celiac disease do not tolerate oats even when certified. Use plant milk and maple syrup for a vegan loaf.
Instructions
-
Prepare the oven, pan, and oats
Heat the oven to 350°F (175°C). Line a 9 × 5-inch loaf pan with parchment, leaving an overhang for lifting. Blend 1½ cups of the rolled oats into a coarse, sandy flour, without leaving large flakes. Keep the remaining ¾ cup whole. Reserve 2 tablespoons of the blended oats in a small dish.
-
Mix the base ingredients
In a large bowl, stir together the remaining blended oats, whole oats, chia seeds, salt, and optional cinnamon. In a jug, combine the lukewarm milk, applesauce, melted coconut oil or olive oil, maple syrup or honey, and vinegar. Do not add the baking soda yet.
-
Combine and hydrate
Pour the wet ingredients into the oat mixture and stir until evenly combined. Rest for 10 minutes so the oats and chia can absorb liquid. The batter should thicken noticeably. Meanwhile, sift the baking soda into the reserved 2 tablespoons blended oats and mix thoroughly.
-
Add the leavener and fill the pan
Sprinkle the oat-and-soda mixture evenly over the hydrated batter. Stir thoroughly, scraping the bowl to distribute it without leaving dry pockets. Immediately transfer to the prepared pan, smooth the top with a damp spatula, and sprinkle with the mixed seeds and extra oats. Press the topping lightly into the surface and put the loaf straight into the preheated oven.
-
Bake until the center is set
Bake for 50–55 minutes, then check the center with a skewer. The top should be golden and firm, and the skewer should not carry wet batter, although moist crumbs are expected. If needed, continue baking in 5–10-minute increments. Loosely tent with foil if the top browns before the center sets. Do not rely on a hollow tapping sound alone.
-
Cool completely before slicing
Leave the loaf in its pan for 10 minutes. Lift it out using the parchment, carefully loosen the paper from the sides, and transfer to a wire rack. Cool until the center is no longer warm, allowing at least 45–60 minutes on the rack and longer if necessary. Cut into about 10 thick slices using a serrated knife. Toast slices for crisp edges and a warm, tender center.
Method clarification: The supplied directions added baking soda twice and rested the batter after activating it. This version uses the listed 1 teaspoon only once, after hydration, to reduce gas loss before baking. This sequencing adjustment has not been kitchen-tested; the supplied liquid and leavener proportions also remain unverified.
Allow enough time: Prep, hydration, baking, 10 minutes in the pan, and at least 45–60 minutes on the rack total approximately 2 hours 10 minutes–2 hours 30 minutes, not 1 hour 45 minutes. Extra baking or cooling will extend that time. Expect a dense toast loaf, not a fluffy sandwich bread.