

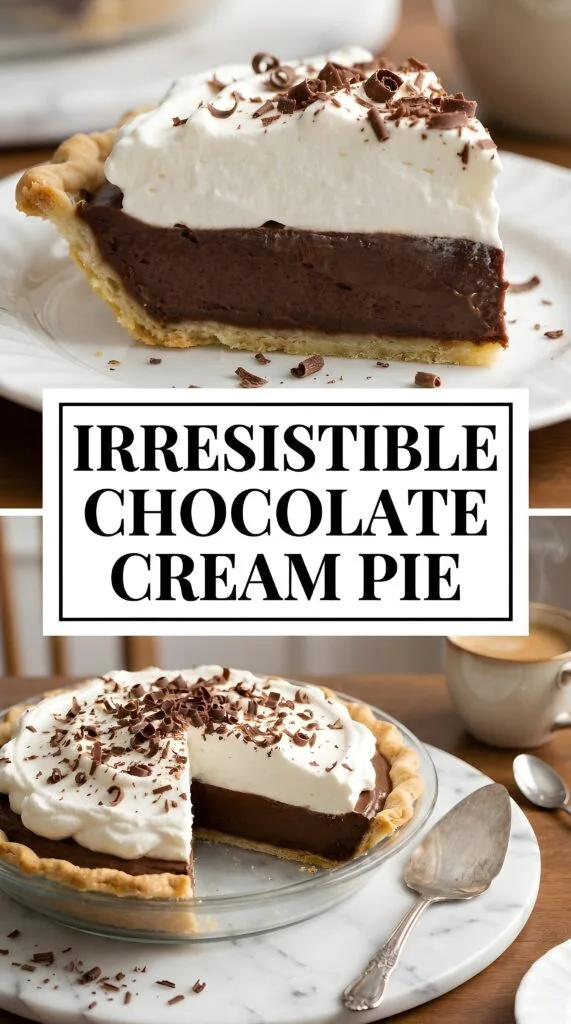
Irresistible Chocolate Cream Pie
Have you ever had a dessert that was so good it felt like a hug for your soul? You know the kind I’m talking about—the one that makes you close your eyes, let out a tiny sigh, and temporarily forget that you have 47 unread emails and a pile of laundry the size of a small mountain. Well, grab your apron and clear some space in the fridge, because this Irresistible Chocolate Cream Pie is that hug. It is a decadent, rich, and ridiculously smooth homemade chocolate silk pie that will make you the hero of any potluck, dinner party, or midnight snack session.
Let’s be honest for a second: life is hard. Sometimes, the only thing that can fix a bad day is a thick slice of chocolate heaven topped with a cloud of whipped cream. I’ve spent years tweaking this recipe, testing different cocoa percentages, and sacrificing my waistline all in the name of “research” to bring you the best chocolate pie recipe on the internet. Whether you are a seasoned baker or someone who considers boiling water a culinary achievement, this guide will walk you through making a velvety chocolate filling that rivals any fancy French bakery.
🥧 Why You’ll Obsess Over This Recipe
There are chocolate pies, and then there is *this* chocolate pie. Most store-bought versions are filled with gelatin and artificial thickeners that give them a weird, bouncy texture. This recipe, however, relies on old-school techniques—egg yolks and real chocolate—to create a texture that is so smooth it practically melts before it even hits your tongue. It is the gold standard of an easy chocolate cream pie recipe because it focuses on high-quality flavor without being overly complicated.
Another reason to obsess? The versatility. You can go with a traditional flaky pastry crust, or you can lean into the decadence with a crushed Oreo crust. It’s also the perfect “make-ahead” dessert. In fact, it actually *needs* to sit in the fridge for a few hours to set, which means you won’t be rushing around with flour on your face when your guests arrive. Plus, let’s be real: chocolate is a universal love language. If you bring this to a party, people will treat you like a celebrity. You might even get out of doing the dishes.
🛒 Ingredients You’ll Need
Before we dive into the mixing bowl, let’s make sure your pantry is locked and loaded. For the best results, try to use high-quality chocolate rather than just standard chocolate chips; the higher cocoa butter content really makes a difference in that velvety chocolate filling.
For the Crust:
- 1 ½ cups of crushed graham crackers (or chocolate sandwich cookies for extra chocolatey goodness!)
- 6 tablespoons of unsalted butter, melted
- 2 tablespoons of granulated sugar
- A pinch of salt (to balance the sweetness)
For the Chocolate Filling:
- 2/3 cup granulated sugar
- ¼ cup cornstarch
- ½ teaspoon salt
- 4 large egg yolks (save the whites for an omelet later!)
- 2 cups whole milk (don’t skimp with skim milk here, we want richness)
- 6 ounces of high-quality bittersweet chocolate (60% cacao is the sweet spot), finely chopped
- 2 tablespoons unsalted butter, at room temperature
- 1 teaspoon pure vanilla extract
For the Topping:
- 1 ½ cups heavy whipping cream, cold
- 3 tablespoons powdered sugar
- 1 teaspoon vanilla extract
- Chocolate shavings for garnish (because we’re fancy like that)
👩🍳 Step-by-Step Instructions
Step 1: Prep the Crust. Preheat your oven to 350°F (175°C). In a medium bowl, stir together the crushed crackers/cookies, melted butter, sugar, and salt. Press the mixture firmly into the bottom and up the sides of a 9-inch pie plate. Bake for 8–10 minutes until set. Let it cool completely before adding the filling. If you’re using a pre-made pastry crust, just bake it according to the package directions and let it cool.
Step 2: Mix the Dry Ingredients. In a medium saucepan (off the heat), whisk together the sugar, cornstarch, and salt. This ensures you won’t have any random clumps of starch in your finished pie. Nobody wants a “crunchy” cream pie.
Step 3: Add the Liquid Gold. Whisk in the egg yolks and then slowly pour in the milk. Whisk until the mixture is smooth and yellow. It’ll look like thin custard at this point.
Step 4: The Cooking Phase. Place the saucepan over medium heat. You need to whisk constantly—and I mean constantly. This is your arm workout for the day. Cook until the mixture thickens and begins to bubble, which usually takes about 6–8 minutes. Once it starts bubbling, keep whisking for one more minute to ensure the cornstarch is fully activated.
Step 5: The Chocolate Transformation. Remove the pan from the heat. Immediately stir in the chopped chocolate, the 2 tablespoons of butter, and the vanilla extract. Whisk until the chocolate is completely melted and the filling is glossy and deep brown. It should look like the most beautiful thing you’ve ever seen.
Step 6: Chill Out. Pour the warm filling into your cooled pie crust. Smooth the top with a spatula. To prevent a “skin” from forming on top, press a piece of plastic wrap directly onto the surface of the filling. Refrigerate for at least 4 hours, though overnight is even better.
Step 7: The Final Flourish. When you’re ready to serve, whip the heavy cream, powdered sugar, and vanilla until stiff peaks form. Spread it generously over the chilled pie and garnish with chocolate shavings.
🔄 Substitution Suggestions
Don’t have everything on hand? No worries! Here are some ways to pivot without ruining the magic.
- Dairy-Free: You can use full-fat canned coconut milk instead of whole milk and a high-quality vegan butter substitute. For the topping, use a chilled coconut cream whipped with sugar.
- Gluten-Free: Swap the crust for a gluten-free graham cracker crust or a nut-based crust (almonds and pecans work great).
- The Chocolate: If you prefer a sweeter pie, you can use semi-sweet chocolate instead of bittersweet. If you’re a dark chocolate enthusiast, go up to 70% cacao, but you might want to add an extra tablespoon of sugar to the filling.
- The Thickener: If you’re out of cornstarch, arrowroot powder can work as a 1:1 substitute.
☕ What to Pair
This pie is a heavy hitter, so it pairs best with things that provide a bit of contrast. A steaming cup of dark roast coffee or a bold espresso is the classic choice; the bitterness of the coffee cuts through the sugar beautifully. If you’re serving this to kids (or kids at heart), a cold glass of milk is mandatory.
For a fruitier vibe, serve each slice with a side of fresh raspberries or sliced strawberries. The tartness of the berries wakes up the palate between bites of rich chocolate. If you really want to go over the top, a drizzle of salted caramel sauce over the whipped cream is a move that will win you several “Cook of the Year” awards in your household.
🔗 You may also like: 10 Irresistible Cottage Cheese Ice Cream Recipes
📊 Nutritional Information
Look, I’m going to be honest with you: this is a pie. It contains butter, sugar, and cream. It is meant for enjoyment, not for weight loss tracking! However, for those who like to know, here is a general estimate per slice (assuming 8 slices per pie):
- Calories: 480 kcal
- Fat: 32g
- Carbohydrates: 44g
- Protein: 6g
- Sugar: 30g
Remember, happiness has no calories. (Okay, that’s a lie, but it sounds good, right?)
💡 Pro Tips for the Perfect Batch
Want to ensure your homemade chocolate silk pie is flawless? Follow these expert tips:
- Temper Your Eggs: If you’re worried about curdling the eggs, pour a small amount of the hot milk mixture into the egg yolks first to warm them up, then pour the yolk mixture back into the pot. This prevents “scrambled egg pie.”
- Chop Fine: The smaller you chop your chocolate, the faster and more evenly it will melt. Large chunks might leave you with a lumpy filling.
- Cold Cream is Key: When making the whipped cream, make sure the cream, the bowl, and even the whisk are cold. This helps the cream whip up faster and hold its volume longer.
- Don’t Rush the Chill: I know it’s tempting to slice it after two hours, but the center will likely be runny. Give it the full 4–6 hours to set properly.
🍫 Easy Variations to Try
Once you’ve mastered the base recipe, you can start getting creative!
- Mexican Chocolate Pie: Add ½ teaspoon of cinnamon and a tiny pinch of cayenne pepper to the chocolate filling for a warm, spicy kick.
- Peanut Butter Swirl: Melt ¼ cup of peanut butter and swirl it into the chocolate filling once it’s in the crust.
- Mocha Dream: Add 1 tablespoon of instant espresso powder to the milk while it heats up.
- Mint Chocolate: Use a teaspoon of peppermint extract instead of vanilla and top with crushed candy canes or Andes mints.
❄️ How to Store & Reheat
This pie loves the cold. Keep it in the refrigerator at all times. If you have leftovers (a rare occurrence!), cover the pie loosely with plastic wrap or a pie dome. It will stay fresh and delicious for about 3 to 4 days.
Can you freeze it? Yes! You can freeze the pie (without the whipped cream topping) for up to two months. Wrap it tightly in plastic wrap and then foil. Thaw it in the fridge overnight before adding the fresh whipped cream and serving. Note: Do not reheat this pie. It is a cream pie, and heat will turn it into a puddle of chocolate soup. Delicious soup, but not a pie.
⚠️ Common Mistakes to Avoid
- The “Skin” Issue: If you don’t put plastic wrap directly on the custard while it cools, a thick skin will form. It’s edible, but it ruins the velvety chocolate filling texture.
- Stopping the Whisk: If you walk away from the stove to check your phone, the bottom will burn. Stay vigilant!
- Using Low-Quality Chocolate: Cheap chocolate chips often contain stabilizers that prevent them from melting smoothly. Use a bar of baking chocolate for the best results.
- Undercooking: If you don’t let the mixture reach a gentle boil, the cornstarch won’t thicken the pie, and it will be “soupy” when you cut it.

❓ FAQ
Can I use a store-bought crust?
Absolutely! A pre-made graham cracker or Oreo crust works perfectly and saves you about 15 minutes of prep time.
Why is my filling lumpy?
This usually happens if the heat was too high or you didn’t whisk enough. If it happens, you can run the warm filling through a fine-mesh sieve before pouring it into the crust to catch any lumps.
How do I get clean slices?
Dip a sharp knife in hot water, wipe it dry, and then make your cut. Repeat the process for every single slice. It’s tedious, but the “clean-cut” look is worth it!
✨ Final Thoughts
There you have it—everything you need to create the most Irresistible Chocolate Cream Pie imaginable. It’s a recipe that requires a little bit of patience and a fair amount of whisking, but the reward is a dessert that looks like a million bucks and tastes even better. Whether you’re celebrating a birthday, a holiday, or just the fact that you survived a Monday, this pie is the answer.
Don’t forget to take a photo of your masterpiece before it disappears! Share it with your friends, or keep the whole thing for yourself—I won’t tell anyone. Happy baking, and may your chocolate always be rich and your whipped cream always be fluffy! Enjoy!