

Brown Butter Cookie Recipe
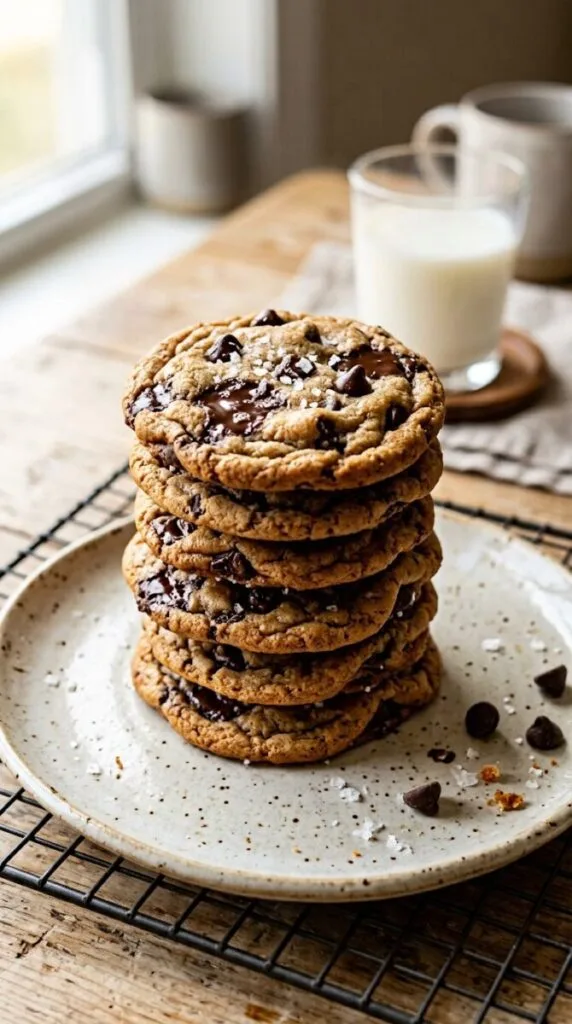
These Brown Butter Cookies are the recipe that answers the question of why two batches of cookies made from the same ingredient list can taste so completely different — the brown butter version smells like caramel and toasted hazelnuts while it is baking, tastes of something far deeper and more complex than a standard chocolate chip cookie, and produces a crispy-edged, chewy-centered cookie with a flavour that people immediately want to know the secret to.
Brown butter is the step that takes 5 minutes and transforms the single most abundant ingredient in most cookies from a neutral fat into something with a full caramelised, nutty flavour profile — the water in the butter evaporates, the milk solids brown and caramelise, and what is left behind is a fat that carries toasted, slightly sweet, almost coffee-like complexity into every bite.
These are not a single-occasion recipe. Once someone makes a brown butter cookie, they rarely go back to regular butter cookies by choice — the flavour difference is significant enough that it reclassifies what a cookie can taste like.
Why Brown Butter Is Worth the Extra Five Minutes
Regular melted butter produces cookies with a straightforward buttery flavour — clean and pleasant but not complex. Brown butter produces a cookie that tastes as though it was made with significantly better and more numerous ingredients than it actually contains, because the browning reaction creates hundreds of new flavour compounds from the simple process of cooking butter past its melting point.
The aroma during baking is the first signal — a kitchen full of brown butter cookie smell is genuinely one of the best things any home kitchen can produce, and it sets the expectation for a cookie that delivers on what the smell promises.
- Prep Time: 15 minutes (plus 30 minutes chilling after browning butter)
- Cook Time: 11 to 13 minutes per batch
- Total Time: 1 hour
- Yield: 20 to 22 cookies
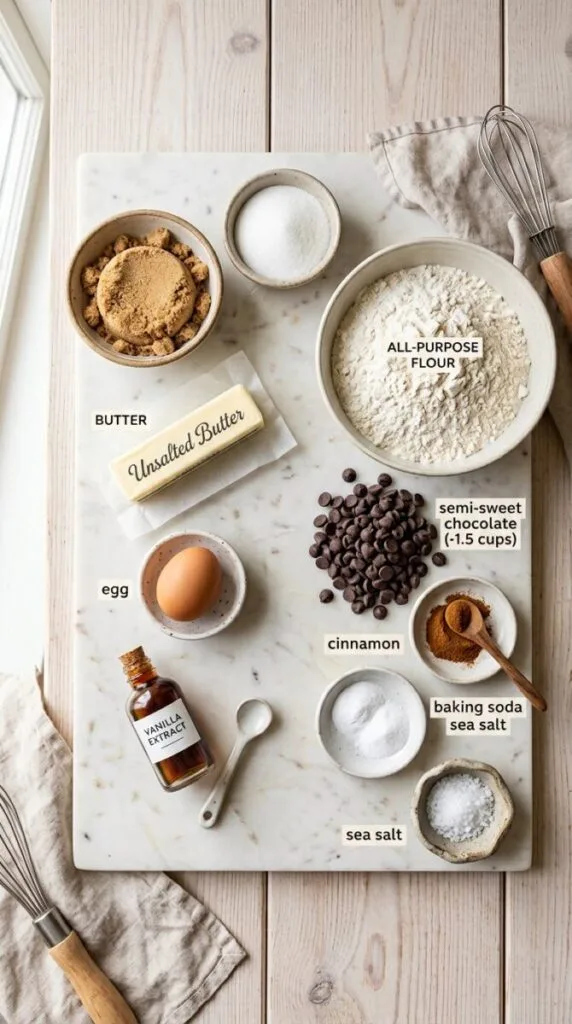
What You Need
- Unsalted butter: 1 cup (226g / 2 sticks) — browned and then cooled
- All-purpose flour: 2 1/4 cups (280g)
- Baking soda: 1 teaspoon
- Fine sea salt: 1 teaspoon
- Light brown sugar, packed: 1 cup (200g)
- Granulated sugar: 1/2 cup (100g)
- Large egg: 1
- Large egg yolk: 1
- Pure vanilla extract: 2 teaspoons
- Dark chocolate chips or chunks (optional but recommended): 1 1/2 cups (255g)
- Flaky sea salt: for finishing
How to Make Them
Browning the butter (the step everything else depends on):
- Place the butter in a light-coloured saucepan — stainless steel or a white enamel pan is ideal because it allows you to see the colour change clearly. Dark pans hide the browning and make it impossible to judge when to pull the butter off the heat.
- Melt the butter over medium heat, stirring occasionally. It will foam as the water evaporates, then the foam will subside, then it will foam again slightly as the milk solids begin to brown.
- Continue cooking, stirring more frequently now, until the butter smells nutty and toasty and the milk solids at the bottom of the pan have turned a deep golden amber colour — about 5 to 6 minutes total. The moment it smells like hazelnuts, it is done.
- Immediately pour the browned butter into a large bowl through a fine mesh sieve — straining catches any burnt bits that may have collected at the bottom and ensures a clean flavour.
- Let the browned butter cool to room temperature, then refrigerate for 20 to 30 minutes until it has firmed to a soft, spreadable consistency similar to room-temperature butter. It must not be liquid when you mix it with the sugars — liquid butter produces flat, greasy cookies.

Making the cookie dough:
- Whisk the flour, baking soda, and salt together in a medium bowl and set aside.
- Beat the cooled, solidified brown butter with the brown sugar and granulated sugar in a large bowl using a hand mixer or stand mixer on medium speed for 2 minutes until the mixture is lighter in colour and slightly fluffy — even though the butter has been melted, whipping it with the sugars at this stage incorporates a small amount of air that improves the texture of the finished cookie.
- Add the whole egg, egg yolk, and vanilla and beat for another 60 seconds until completely combined and the mixture looks glossy and emulsified.
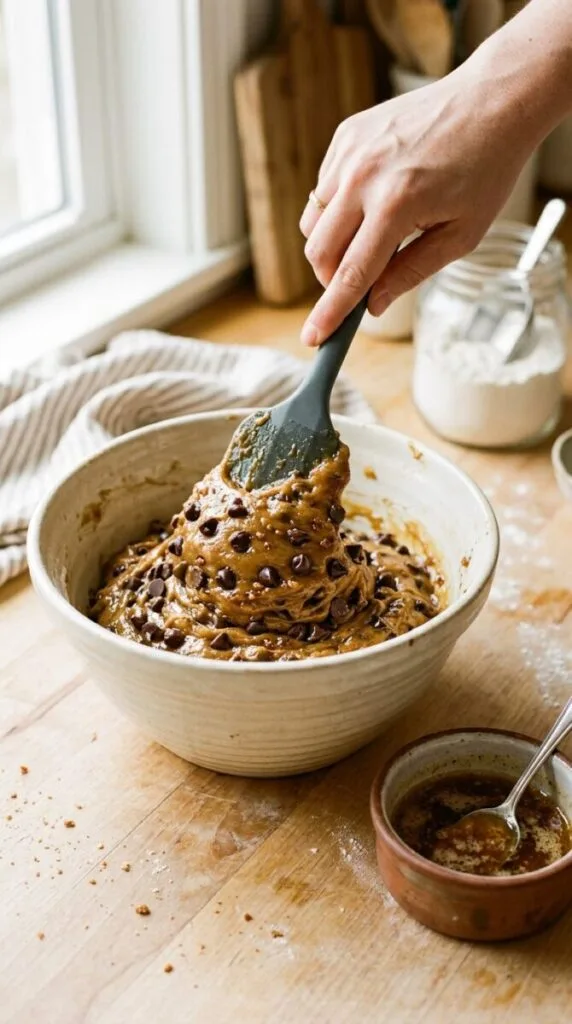
- Add the flour mixture and fold with a spatula until just combined — no dry streaks should remain but do not overmix.
- Fold in the chocolate chips if using with two or three additional strokes.
- Cover the bowl with plastic wrap and refrigerate for 30 minutes — the dough is easier to scoop and the cookies will spread less and be thicker if the dough has had a chance to firm up after mixing.
Baking the cookies:
- Preheat the oven to 375°F (190°C) and line two baking sheets with parchment paper.
- Scoop the chilled dough into balls of approximately 1.5 tablespoons each and place 2 inches apart on the prepared sheets — 8 to 9 per sheet, baking one sheet at a time for the most even results.
- Press 2 or 3 extra chocolate chips into the top of each dough ball for visible chocolate on the surface after baking.
- Bake for 11 to 13 minutes until the edges are set and golden and the centers still look slightly underdone — they will firm up significantly as they cool on the pan.
- Immediately after removing from the oven, sprinkle each cookie with a generous pinch of flaky sea salt.
- Cool on the baking sheet for 10 minutes before transferring — the cookies are fragile when hot and firm to a proper texture as they cool.
If you love the concept of brown butter across different baked goods, the same 5-minute browning technique transforms the filling in our Sourdough Discard Cinnamon Rolls into something noticeably more complex — the Variations section of that recipe covers the brown butter filling direction and the technique is identical to what you just used here.

How to Know When the Butter Is Perfectly Browned
The smell is more reliable than the colour as the primary doneness indicator — when the butter smells distinctly nutty and toasty with a slight caramel note, it has reached the right level of browning. The smell tells you what the colour is about to confirm, which gives you a moment to pull it off the heat before it tips into burnt.
The colour should be a deep amber — the milk solids at the bottom of the pan should look like finely ground coffee grounds settled at the base of the butter foam. Pale tan milk solids mean the butter needs more time; black specks mean it has gone too far and will taste bitter rather than nutty. The window between “just right” and “burnt” is approximately 30 seconds at medium heat, which is why constant attention in the final minute of browning is not optional.
Straining the butter after browning is the detail that makes the difference between a cookie with a clean, nutty flavour and one with a slightly bitter edge — even perfectly browned butter can have a few slightly darker bits at the bottom that will add bitterness if stirred into the dough. The sieve catches them cleanly in five seconds. According to Serious Eats, the golden milk solids strained from browned butter are technically edible and flavourful, but they can tip into bitter much faster than the surrounding fat and straining removes the uncertainty — the clear browned butter that passes through the sieve carries all the flavour without the risk.
What to Serve Alongside
These cookies need nothing alongside them — they are completely satisfying as a standalone cookie, and the brown butter flavour is complex enough that competing flavours from accompaniments would obscure rather than complement it.
For a dessert table with multiple options, our Lazy Chocolate Chip Cookie Bars are the natural companion — the same chocolate chip base, the same flaky salt finish, different format and slightly different texture. Together they give a dessert spread two versions of the same essential cookie in different formats that reward tasting side by side.
Variations That Build on the Brown Butter Base
Make them brown butter snickerdoodles by omitting the chocolate chips and rolling each dough ball in a mixture of 2 tablespoons of granulated sugar and 1 teaspoon of cinnamon before baking — the brown butter gives a snickerdoodle a depth and complexity that standard snickerdoodles with creamed butter lack, and the cinnamon-sugar exterior caramelises beautifully against the nutty butter base.
Add 1/2 cup of finely chopped toasted walnuts or pecans alongside the chocolate chips for a version where three different toasted, nutty flavours — brown butter, dark chocolate, and toasted nuts — reinforce each other into something greater than the sum of their parts. Toast the nuts in a dry skillet for 3 minutes before chopping to maximise their flavour contribution.
Replace the chocolate chips entirely with 1/2 cup of butterscotch chips and 1/3 cup of toasted pecans for a brown butter butterscotch pecan cookie where the brown butter and butterscotch create an almost toffee-like flavour profile — intensely sweet, caramelised, and deeply satisfying in a completely different direction from the chocolate version.
Fold in 1/3 cup of dried cherries alongside dark chocolate chunks for a brown butter chocolate cherry cookie — the tart dried cherries cut through the richness of the brown butter and dark chocolate in a way that makes the cookie taste simultaneously more indulgent and more complex. Our Zucchini Cookies with Chocolate Chunks use chopped dark chocolate in the same way and the two recipes share the same dark chocolate chunk upgrade philosophy.
Nutritional Information
| Nutrient | Amount Per Cookie (based on 22 cookies) |
|---|---|
| Calories | 210 kcal |
| Protein | 3 g |
| Carbohydrates | 26 g |
| Fats | 11 g |
These values are estimates based on the full recipe with 1.5 cups of chocolate chips, divided by 22 cookies. The calorie count is comparable to most quality chocolate chip cookies of the same size — the brown butter process doesn’t change the calorie content of the butter, only its flavour complexity.
Storing and Keeping These at Their Best
Store cooled cookies in an airtight container at room temperature for up to 5 days — the brown butter produces a moister, more stable crumb than a standard creamed-butter cookie and these hold their texture significantly longer than most cookies. Adding a slice of bread to the container extends the softness further by maintaining the moisture level inside the container.
The unbaked dough keeps refrigerated for up to 3 days — refrigerated dough actually improves over the first 48 hours as the flour fully hydrates and the brown butter flavour deepens through the dough. Cookies baked from 2-day-rested dough are noticeably more flavourful than cookies baked immediately after mixing, which makes this one of the few cookie recipes where delaying the bake is genuinely worth doing.
Freeze unbaked dough balls on a parchment-lined tray until solid, then transfer to a freezer bag and store for up to 3 months. Bake from frozen at 375°F for 14 to 15 minutes without thawing — the extra time accounts for the frozen center and produces a cookie with the same quality as freshly made dough.
Mistakes That Waste the Brown Butter or Produce Flat Cookies
Walking away from the butter during the browning phase is the mistake that produces burnt rather than browned butter — the final 2 minutes of browning happen quickly and the transition from perfect to ruined is under a minute at medium heat. Brown butter is not a set-and-forget process; it requires full attention from the moment the butter foam subsides until the pan is off the heat.
Using the brown butter while it is still liquid produces flat, greasy cookies that spread too far in the oven — the butter needs to return to a solid state (even a soft, spreadable solid) before it can be beaten with the sugars and provide the structure that creamed or solidified fat provides in cookie dough. The 20 to 30 minute refrigerator rest after browning is the step that makes the difference between flat and properly thick cookies.
Not straining the browned butter allows any slightly over-browned milk solids to carry a bitter note through every cookie in the batch — a note that is subtle enough to be difficult to identify but obvious enough to make the cookies taste less clean and less complex than they should. Strain every time, even when the butter looks perfectly browned.
Perfectly Crisp
Brown Butter Cookies
Browned butter brings a rich caramelized, toasted-hazelnut flavor to these golden cookies with crisp edges, soft chewy centers, melty dark chocolate, and a finishing pinch of flaky sea salt.
Ingredients
Instructions
Add butter to a light-colored saucepan over medium heat. Melt, stirring occasionally. It will foam, then begin to smell nutty as the milk solids toast.
Continue cooking for about 5–6 minutes, stirring frequently near the end. Once the butter smells like toasted hazelnuts and the milk solids are deep golden amber, remove it from the heat immediately.
Pour browned butter through a fine-mesh sieve into a large bowl. Cool to room temperature, then chill for 20–30 minutes until soft and spreadable, not liquid.
Whisk flour, baking soda, and fine sea salt together in a medium bowl. Set aside.
Beat cooled brown butter, brown sugar, and granulated sugar for about 2 minutes, until lighter in color and slightly fluffy.
Add the egg, egg yolk, and vanilla. Beat for 60 seconds, until glossy, smooth, and fully emulsified.
Add the dry ingredients and fold with a spatula until just combined. Fold in chocolate chips or chunks with a few additional gentle strokes.
Cover and refrigerate the dough for 30 minutes. Chilling helps create thicker cookies with chewy centers and less spreading.
Preheat oven to 375°F (190°C). Line baking sheets with parchment. Scoop 1½ tablespoon dough balls, spacing them 2 inches apart. Bake one sheet at a time for 11–13 minutes.
Kitchen Notes
A stainless steel or light enamel saucepan lets you clearly see the milk solids changing color, making it much easier to avoid burning them.
Brown butter must cool and firm before mixing. Liquid butter creates cookies that spread too much and can become greasy.
The change from perfectly nutty brown butter to bitter burnt butter can happen in less than 30 seconds, so stay close.
A small sprinkle of flaky sea salt balances the sweetness, amplifies the chocolate, and gives every cookie a bakery-style finish.
Easy Variations
Skip the chocolate chips and roll dough balls in 2 tablespoons sugar mixed with 1 teaspoon cinnamon before baking.
Add ½ cup finely chopped toasted pecans or walnuts alongside the dark chocolate for extra crunch and nutty depth.
Replace chocolate with ½ cup butterscotch chips and ⅓ cup toasted pecans for an intensely caramel-like cookie.
Fold in ⅓ cup dried cherries with dark chocolate chunks for a tart, rich contrast to the toasted brown butter flavor.
Store cooled cookies in an airtight container for up to 5 days. Add a small slice of bread to help maintain softness.
Refrigerate dough for up to 3 days. The flavor becomes even deeper after a 24–48 hour rest in the refrigerator.
Freeze scooped dough balls on a tray, then transfer to a freezer bag for up to 3 months.
Bake frozen dough balls at 375°F for 14–15 minutes without thawing.