

Homemade Mochi Ice Cream Recipe
This Homemade Mochi Ice Cream Recipe makes the Japanese-American frozen treat that has built a genuinely devoted following — a thin, pliable, slightly chewy rice flour wrapper stretched around a small, perfectly round scoop of frozen ice cream, the combination of soft and cold and creamy that makes every bite more interesting than any of the three components would be alone.
Mochi ice cream was popularised in the United States by Mikawaya, the Los Angeles Japanese bakery that began selling it in supermarkets in the 1990s and introduced millions of people to a format they had never seen before — handheld, two-bite, no bowl required, and texturally unlike anything in the existing frozen dessert category. The commercial version has since expanded to dozens of flavours, but making them at home gives you fresher, creamier ice cream, more flavour options, and the satisfaction of producing something that looks genuinely impressive from a relatively straightforward process.
The mochi dough itself takes about 10 minutes to make and wraps any flavour of ice cream — vanilla, strawberry, matcha, mango, or anything else — into a soft, powdery-exterior shell that tastes clean and neutral enough to let the ice cream flavour lead.
Why Homemade Mochi Ice Cream Is Worth the Effort
The commercial versions use small, hard-frozen ice cream centers that are dense and slightly icy to enable factory production — homemade mochi ice cream uses a generous scoop of real, premium ice cream that tastes noticeably creamier and fresher inside the same wrapper.
Once you have the mochi dough technique down — which takes one practice batch — the process becomes genuinely fast and can be adapted to any ice cream flavour you want, which the store-bought versions can never fully match for variety or freshness.
- Prep Time: 25 minutes (plus 2 hours for freezing the ice cream balls)
- Cook Time: 5 minutes (microwave method)
- Assembly Time: 20 minutes
- Total Time: about 3 hours total, 45 minutes active
- Yield: 8 to 10 mochi ice cream balls
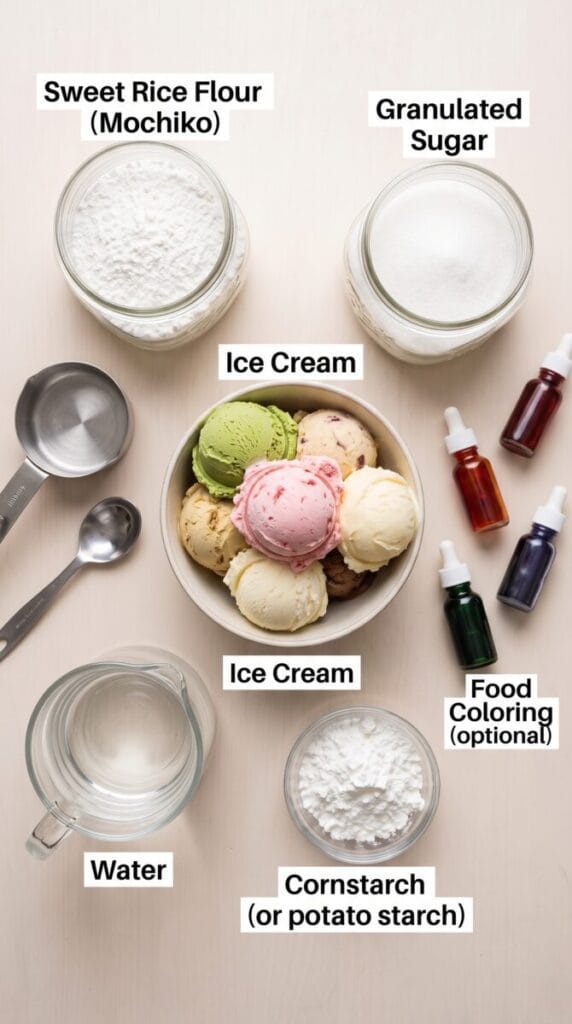
What You Need
For the ice cream centers:
- Ice cream of your choice (vanilla, strawberry, matcha, mango): 1 pint (500ml)
For the mochi dough:
- Mochiko (sweet rice flour / glutinous rice flour): 1 cup (120g) — this is non-negotiable, regular rice flour or all-purpose flour will not produce mochi texture
- Granulated sugar: 1/4 cup (50g)
- Water: 3/4 cup (180ml)
- Cornstarch or potato starch: generously, for dusting the work surface and the finished mochi — this is essential and cannot be skipped
- Food colouring (gel or liquid, optional): a drop of pink, green, or yellow to match the ice cream flavour
How to Make Them
Step 1 — Freeze the ice cream balls (do this first, several hours ahead):
- Line a baking sheet with parchment paper and place it in the freezer for 10 minutes to pre-chill.
- Working quickly, scoop the ice cream into 8 to 10 golf-ball sized portions (about 1.5 tablespoons each) and place them on the chilled baking sheet.
- If the ice cream is too soft to scoop cleanly, let the pint soften for 3 to 5 minutes at room temperature, then refreeze the pint for 5 minutes before scooping again.
- Use wet hands or the back of a spoon to quickly shape each scoop into a smooth, compact ball — any irregular shapes will create uneven mochi wrappers.
- Freeze the ice cream balls uncovered for a minimum of 2 hours, preferably overnight — they must be rock solid before wrapping or they will melt during the assembly process.
Step 2 — Making the mochi dough:
- Whisk the mochiko, sugar, and water together in a microwave-safe bowl until completely smooth with no lumps — the batter will be thin and liquid at this stage, which is correct.
- Add a drop of food colouring if using and stir to incorporate.
- Cover the bowl loosely with plastic wrap and microwave on high for 2 minutes.
- Remove from the microwave, stir the partially cooked dough well with a wet spatula, then cover again and microwave for another 1 to 1.5 minutes until the dough is fully cooked — it should look translucent, slightly shiny, and pull away from the sides of the bowl as a cohesive mass rather than a pourable batter.
- Let the cooked mochi dough cool for 5 minutes in the bowl — it will be very hot and sticky immediately out of the microwave and needs to be handleable but still warm and pliable for wrapping.
Step 3 — Assembling the mochi ice cream:
- Generously dust a clean work surface, your hands, a rolling pin, and a piece of parchment paper with cornstarch — the mochi dough is extremely sticky and cornstarch is the only thing that prevents it from sticking to every surface it touches.
- Turn the warm mochi dough out onto the dusted surface and dust the top as well.
- Roll or press the dough into a thin, even sheet about 1/4 inch thick — work quickly while the dough is still warm and pliable. Cold mochi dough becomes stiff and cracks rather than stretching around the ice cream.
- Use a round cutter or a glass about 3.5 to 4 inches in diameter to cut circles from the dough. You should get 8 to 10 circles — gather and re-roll the scraps to cut any additional circles needed.
- Work with one circle at a time and keep the remaining dough circles covered with a slightly damp cloth to prevent drying.
- Remove one frozen ice cream ball from the freezer — return the rest to the freezer immediately, only take out one at a time.
- Place the ice cream ball in the center of a mochi circle, then quickly gather the edges of the dough up around the ball, pinching and pressing firmly to seal the dough closed at the bottom — work as fast as possible since body heat from your hands begins melting the ice cream immediately.
- Place the finished mochi seam-side down on a cornstarch-dusted parchment-lined tray and return to the freezer immediately.
- Repeat with the remaining circles and ice cream balls.
- Freeze all the assembled mochi ice cream for at least 1 hour before serving to re-firm the ice cream inside and set the mochi wrapper. Stored in the freezer in an airtight container, they keep for up to 1 month.
If you love Japanese-inspired desserts that come from careful technique rather than complicated ingredients, our 5-Ingredient Strawberry Sago is the chilled dessert from the same Southeast and East Asian dessert tradition — tapioca pearls in coconut strawberry cream, no baking, just beautiful technique and good ingredients.
The Technique Details That Determine Success
Mochiko (sweet rice flour, also sold as glutinous rice flour) is the only flour that produces mochi texture — it contains a specific type of starch called amylopectin that creates the characteristically stretchy, chewy consistency when cooked. Regular rice flour, all-purpose flour, and tapioca starch all produce completely different results. The bag is typically found in the Asian foods aisle of grocery stores, in any Asian grocery store, or online, and a bag makes several batches of mochi dough at low cost.
The cornstarch dusting is not optional at any stage — mochi dough is one of the stickiest substances in home cooking, and insufficient cornstarch at any point in the process means the dough sticks to your hands, the cutting board, the rolling pin, and itself. Dust generously and repeatedly, and don’t worry about too much cornstarch since the excess brushes off the finished mochi easily.
Speed during assembly is the critical skill — every second the frozen ice cream ball is out of the freezer it is softening, and once it starts to melt it cannot be re-frozen successfully inside the mochi wrapper without a lumpy, icy result. Work one ball at a time, have your dough circle ready before you take the ice cream out of the freezer, and return the assembled mochi to the freezer within 30 seconds of starting the wrap. According to Serious Eats, the window for wrapping a frozen ice cream ball before surface softening begins in a warm kitchen is approximately 30 to 45 seconds, which is why professional mochi makers chill their hands in ice water between each piece — a trick worth borrowing if your kitchen is warm.
What to Serve Alongside Them
Mochi ice cream works as a standalone dessert or as part of an Asian-inspired dessert spread. Serving two or three different flavours on the same plate — vanilla, matcha, and strawberry are the classic trio — gives guests the comparative tasting experience that makes mochi ice cream genuinely fun to eat rather than just convenient.
For a full no-bake Asian dessert spread, our 5-Ingredient Strawberry Sago and these mochi ice cream balls together cover every textural category — cold and chewy, cold and creamy, soft and airy — in a spread that requires no oven and impressively little active cooking time.

Flavour Combinations Worth Making
Matcha mochi with vanilla ice cream is the most classically balanced combination — the earthy, slightly bitter green tea dough against creamy, neutral vanilla filling tastes genuinely sophisticated and is the version most similar to what you’d find in a high-quality Japanese patisserie.
Strawberry mochi (tint the dough pink with one drop of red food colouring) filled with strawberry or mango ice cream is the most visually striking and the most crowd-pleasing flavour for people encountering mochi ice cream for the first time.
Black sesame mochi — add 1 tablespoon of ground black sesame paste to the dough before cooking — with vanilla ice cream is an advanced direction with a nutty, slightly roasted flavour that is deeply satisfying for anyone who loves Japanese sesame desserts.
Ube (purple yam) mochi filled with coconut ice cream is the most visually dramatic option — the deep purple dough against white coconut filling looks stunning and the flavour combination is a classic of Filipino-influenced dessert culture. The ube colour comes from ube extract or purple yam powder added to the dough alongside a drop of purple food colouring for intensity. If you love the coconut ice cream direction, our Lemon Blueberry No-Churn Ice Cream uses the same no-churn technique you can use to make the filling for these mochi rather than buying a commercial pint — giving you complete control over the flavour and quality of every component.
Nutritional Information
| Nutrient | Amount Per Piece (based on 10 pieces, vanilla ice cream) |
|---|---|
| Calories | 130 kcal |
| Protein | 2 g |
| Carbohydrates | 22 g |
| Fats | 4 g |
These values are estimates based on standard vanilla ice cream and the mochi dough recipe, divided by 10 pieces. Values will shift depending on the ice cream flavour and brand used — premium full-fat ice creams will increase the fat content per piece, while lower-calorie ice cream alternatives will reduce it.
Storing and Serving These Properly
Store finished mochi ice cream in an airtight container or zip-lock bag in the freezer, separated by pieces of parchment so they don’t stick together, for up to 1 month. The mochi wrapper may harden slightly over extended freezer storage — this is normal.
Remove from the freezer and let rest at room temperature for exactly 3 to 5 minutes before serving — the mochi wrapper needs this brief thaw to soften from its frozen-stiff state to the characteristic soft, pliable texture. Eating straight from the freezer makes the mochi tough and the ice cream too hard; waiting much longer than 5 minutes lets the ice cream soften past the point where it holds its round shape when bitten.
The 3 to 5 minute rest at room temperature is the single most important serving instruction for mochi ice cream and the one most commonly skipped — it is the difference between a mochi that is tough and chewy in a bad way and one that is soft, pliable, and satisfying in the way the format is meant to be experienced.
Where First Batches Go Wrong
Using the wrong flour is the most fundamental mistake — any flour other than mochiko will produce a dough that doesn’t stretch and doesn’t have the characteristic chew of mochi. The ingredient cannot be substituted and is worth a dedicated shopping trip to find before starting.
Not freezing the ice cream balls for long enough before wrapping produces ice cream that melts during assembly and cannot be successfully sealed into the mochi wrapper — the ice cream balls need to be rock solid, not just cold, before they come out of the freezer for wrapping. Two hours is the minimum; overnight is better.
Letting the assembled mochi warm at room temperature for too long after sealing allows the ice cream to melt enough to leak through the sealed seam — return each assembled piece to the freezer within 30 seconds of closing the wrapper, and don’t assemble more than one at a time regardless of how efficiently the process begins to feel after the first few.
Homemade Mochi Ice Cream
Adorable bite-sized treats featuring a stretchy, chewy mochi wrapper wrapped around a creamy frozen ice cream center. Customize them with vanilla, strawberry, matcha, or mango!
Ingredients
Instructions
Line a baking sheet with parchment paper and place it in the freezer for about 10 minutes so it is icy cold.
Working quickly, scoop the ice cream into 8–10 portions, approximately 1½ tablespoons each. Place them on the chilled baking sheet.
In a microwave-safe bowl, whisk together the mochiko, sugar, and water until completely smooth. Add 1 drop of food coloring if desired.
Cover the bowl loosely with plastic wrap and microwave on high for 2 minutes.
Carefully remove and stir the dough vigorously with a wet silicone spatula. Cover again and microwave for another 1–1½ minutes, until the dough is translucent, shiny, and very sticky.
Remove one frozen ice cream ball at a time from the freezer. Place it in the center of a mochi circle. Quickly stretch the edges of the dough around the ice cream and pinch firmly at the top to seal.
Place the finished mochi seam-side down on a cornstarch-dusted parchment tray and immediately return it to the freezer. Repeat with the remaining ice cream balls.
Freeze the assembled mochi for at least 1 hour. Before eating, let them sit at room temperature for 3–5 minutes so the dough softens back to its chewy texture!
Kitchen Notes
You must use mochiko (sweet rice flour/glutinous rice flour). Regular rice flour will not stretch and will not create the chewy mochi texture.
The ice cream balls need to be frozen rock-hard before you attempt to wrap them. If they are even slightly soft, they will melt instantly in your hands.
Keep the ice cream balls in the freezer and take out only ONE at a time to wrap. Return the finished mochi to the freezer immediately.
If your kitchen is warm, or your hands run hot, chill your hands briefly under cold running water (and dry them) before wrapping.
Flavor Variations
Add ½ tsp matcha powder to the dough water before microwaving, and fill with vanilla or green tea ice cream.
Tint the dough with one drop of pink food coloring and fill with strawberry ice cream.
Add a few drops of ube extract to the dough water, and fill with creamy coconut ice cream.
Add 1 tablespoon of ground black sesame paste to the dough and fill with vanilla ice cream.
Store finished mochi ice cream in an airtight freezer-safe container or zip-top freezer bag for up to 1 month.
Place small squares of parchment paper between the pieces in your container to prevent them from freezing together.
For the best texture, always let each piece sit at room temperature for 3–5 minutes before eating. The wrapper needs to soften slightly!