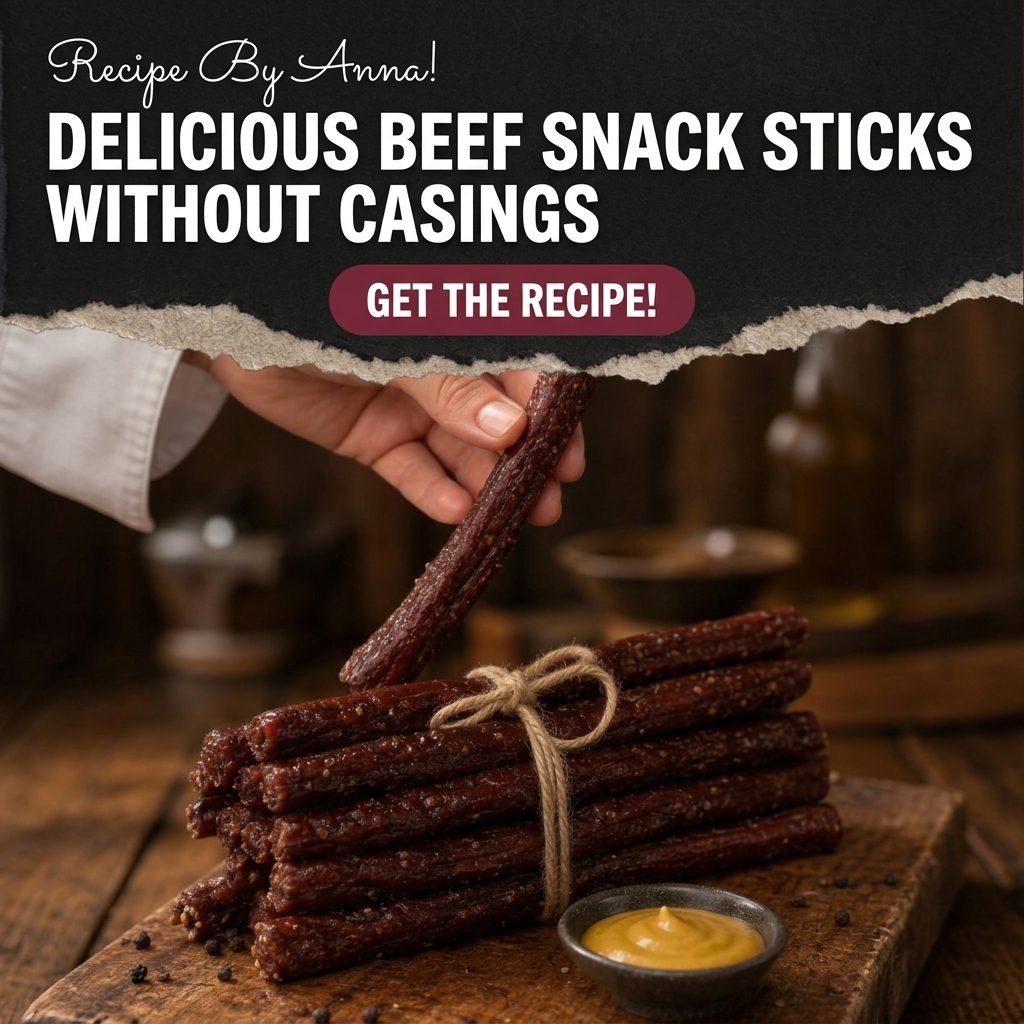
Delicious Beef Snack Sticks Without Casings
Beef snack sticks are the snack I buy at a checkout counter, eat in the car, and immediately regret — not because of the flavor, but because of the price. Good sticks cost roughly their weight in gold, and the cheap ones taste like smoked regret. So I started making them at home, and here’s the happy ending: you don’t need a sausage stuffer, you don’t need casings, and you don’t need any gear you don’t already own. You need lean ground beef, a spice drawer, an oven set low, and the patience to let four quiet hours pass. The result is a batch of twenty chewy, peppery, deeply savory sticks that taste better than anything hanging at a register — and cost about a quarter as much.
The “without casings” part is the whole trick. Traditional snack sticks get stuffed into casings — that’s the snap and the shape. This version skips all of it: the seasoned ground beef is kneaded until it turns sticky and self-binding (there’s real sausage-science happening, and I’ll walk you through it), rolled into ropes on a baking sheet, and baked low and slow until it firms into that classic dense, chewy stick. No casing, no stuffer, no casing-stuffer cleanup, no wondering where one even buys casings (a question I Googled once with great determination and then abandoned, gloriously).
They’re high-protein, sugar-light, endlessly snackable, and they disappear from the jar at a rate you should psychologically prepare for now. Lunchboxes, gym bags, road trips, hiking packs, the 3 p.m. desk slump — this is fuel food, and homemade fuel food hits different. Make one batch and you’ll be making two forever after. Welcome to the stick life. The jerky aisle will miss you, but it’ll understand.
Why These Sticks Stick
Let’s talk about the science that replaces the casing, because it’s genuinely cool. When you knead ground meat hard and long — three to four minutes of real effort — the salt and mechanical action dissolve a muscle protein called myosin, and the mixture turns from crumbly to sticky and tacky. That’s the same protein extraction sausage makers rely on: the meat essentially glues itself together. That stickiness is your casing. It’s why these ropes hold their shape through hours in the oven, slice clean, and bite with the dense chew of a commercial stick instead of crumbling into a burger-adjacent mess. Under-kneaded meat makes broken sticks; properly kneaded meat makes snack sticks. Knead like you mean it, and the recipe does the rest.
The second act of the magic happens in the low oven. Baking at around 200°F does two things at once: it gently cooks the meat through to a safe 160°F internal (verified with a thermometer — non-negotiable with ground beef), and it slowly drives off moisture, concentrating the beef flavor and firming the texture from soft rope to bendable stick. Thin ropes mean this all happens gently and evenly, with no tough exterior sealing in a wet middle. The bake time is flexible: pull earlier for a softer, juicier chew, bake longer for the firm, snap-happy jerky end of the spectrum. You get to choose your own adventure, one hour at a time. The oven does the driving; you just check in occasionally like a very relaxed supervisor.
🥩 NO CASINGS, NO STUFFER | 🧂 PANTRY SPICES | 💪 HIGH-PROTEIN SNACKING
- Prep Time: 25 minutes (mostly kneading — the recipe’s one workout)
- Chill Time: 30 minutes (firming up for rolling)
- Bake Time: 4 to 5 hours low and slow, almost entirely hands-off
- Yield: About 20 sticks (from 2 lbs of beef — they lose weight as they dry; flavor moves in to fill the space)
The Jerky Rig
Everything here is standard kitchen equipment — that’s the pitch:
- Rimmed baking sheet — or two; the ropes lay out in rows with a little breathing room.
- Wire cooling rack — the ropes bake on the rack set over the sheet, so air moves underneath and the sticks dry evenly instead of steaming on one side. This one piece of gear is the difference between sticks and sad meat loaves.
- Parchment paper — under the rack for easy cleanup of drips, and on the counter for the rolling stage.
- Large bowl and clean hands — the stand mixer with a paddle attachment can do the kneading, but hands are the traditional tool and the honest one.
- Instant-read thermometer — the food-safety essential. Ground beef needs to reach 160°F internal, and with thin sticks you’ll be surprised how early that happens. Verify, don’t guess.
- Sharp knife or bench scraper — for cutting the ropes into even stick lengths.
- Gloves (optional) — for rolling; a lightly oiled hand works just as well and involves fewer glove-box negotiations.
Ingredients (With Labels)
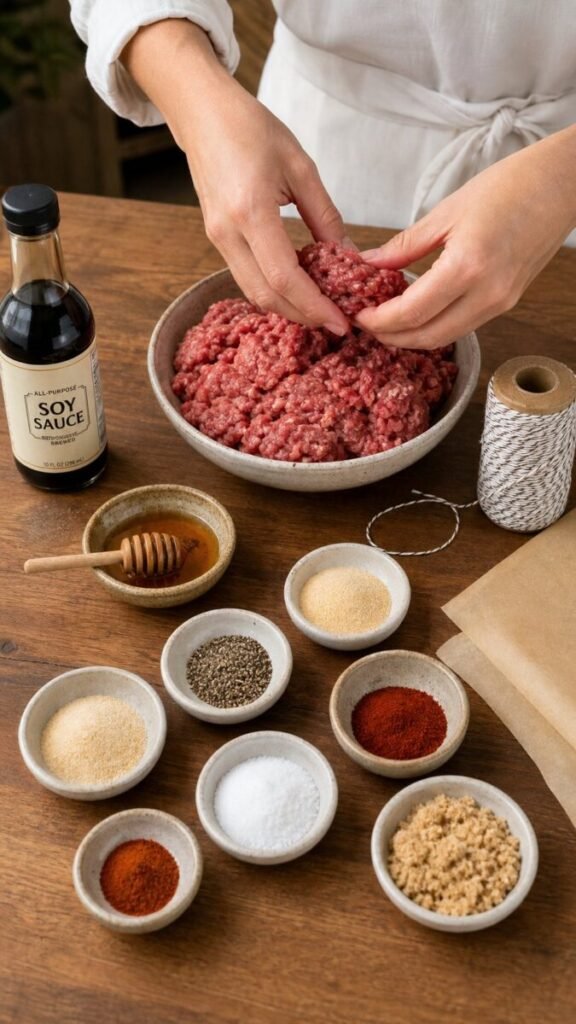
🥩 The Meat Counter
- Lean ground beef: 2 lbs, 90/10 or leaner — fat doesn’t dry; it goes greasy and turns rancid faster, so this is the one place the recipe insists
🧂 The Seasoning Mix
- Kosher salt: 2 teaspoons — fine sea salt works; just don’t double up if your salt runs salty
- Coarse black pepper: 2 teaspoons — the classic snack-stick signature; cracked is even better for freckles you can see
- Garlic powder: 1 teaspoon
- Onion powder: 1 teaspoon
- Smoked paprika: 1 teaspoon — the smokehouse note (and it earns its name twice here)
- Dry mustard: 1/2 teaspoon
- Cayenne: 1/2 teaspoon — optional heat; a pinch of red pepper flakes adds freckled fire instead
🍯 The Flavor & Bind
- Brown sugar or honey: 1 tablespoon — a whisper of sweet, not a glaze; it balances the smoke and pepper
- Soy sauce: 1 tablespoon — liquid umami (Worcestershire is the peppery understudy)
- Ice water: 2 tablespoons — helps the seasonings distribute evenly through the mix
❄️ Optional, For the Traditionalists
- Prague Powder #1 (curing salt): 3/8 teaspoon for this 2-lb batch — the classic cure that gives commercial sticks their pink center and longer keeping; strictly optional in this oven-cooked version, but if you use it, measure precisely with a proper measuring spoon and never more than the recipe says
Step by Step How to Make
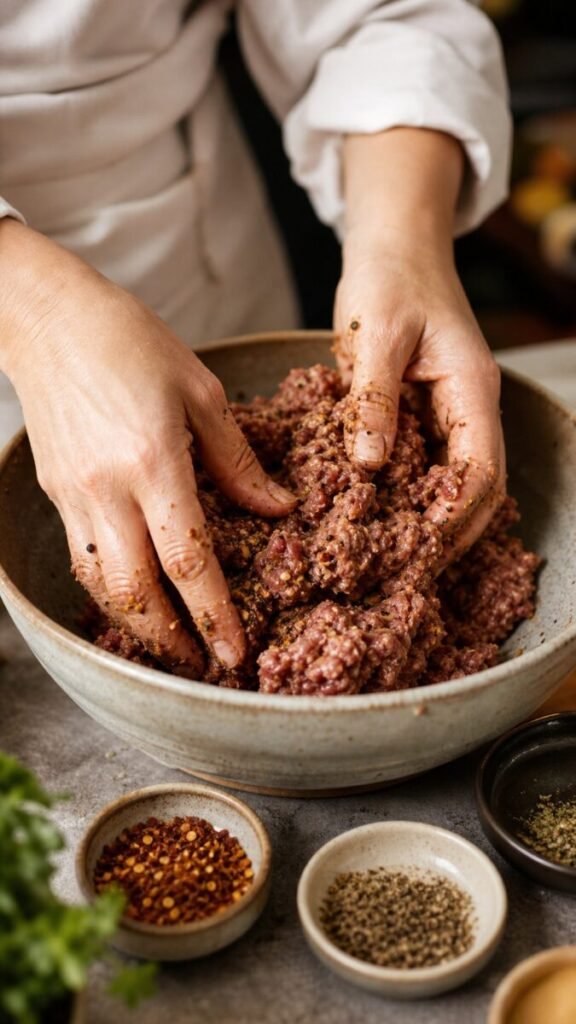
- Step 1 — Mix like you mean it. Combine the cold ground beef with everything — salt, pepper, garlic, onion, paprika, mustard, cayenne, brown sugar, soy sauce, and ice water (plus the cure if you’re using it) — in your big bowl. Now knead, squeeze, and fold for a full 3 to 4 minutes, longer than feels necessary. You’re waiting for the moment the texture changes: crumbly becomes sticky, tacky, and cohesive — the meat will start clinging to itself (and your hands) like it has a plan. That’s the myosin doing its casing impersonation. This is the most important step in the recipe and the only one that asks for effort. Earn the sticks.
- Step 2 — Chill the mix. Cover the bowl and refrigerate for 30 minutes (overnight is even better — the flavors meld and the mix rolls cleaner). This is a firming-up pause, not a food-safety pause; the real safety moment comes later with the thermometer. Use the half hour to set up your baking sheet, rack, and parchment, and to contemplate how many sticks you’re going to eat warm. A conservative estimate, history shows, is wrong.
- Step 3 — Roll the ropes. With cold, lightly oiled hands (a smear of oil keeps the meat from adopting your palms), pinch off about 2 tablespoons of the mix and roll it on the parchment into an even rope, roughly 1/2 inch thick and 5 to 6 inches long. Even thickness matters more than even length — thin sections dry fast and thick sections stay soft, and a rope that’s both will cook like two different recipes. Aim for uniform. Perfection is not required; the sticks forgive a little rusticity.
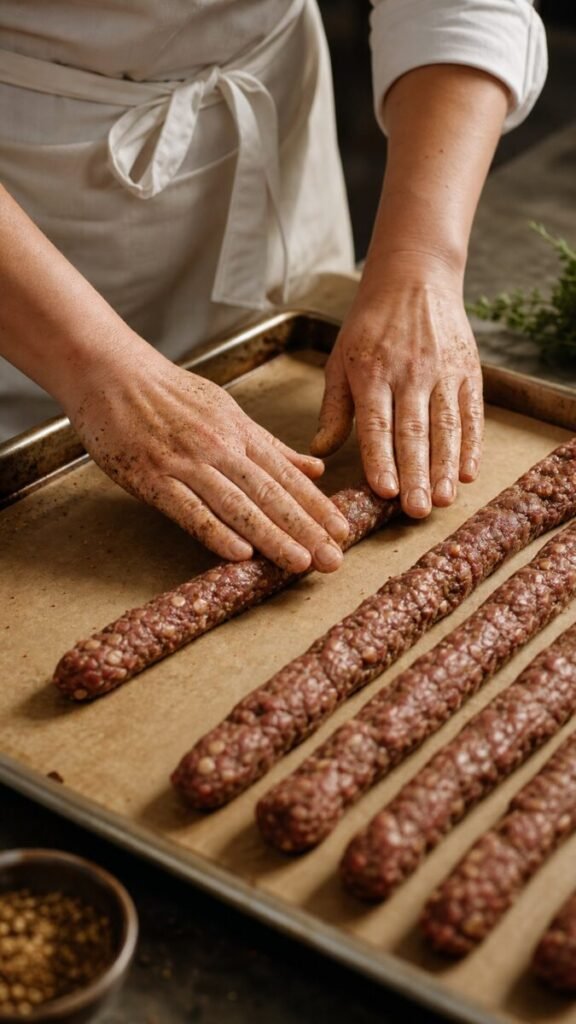
- Step 4 — Lay out and air-dry. Set the wire rack over the parchment-lined baking sheet and lay the ropes in rows, close but not touching. Now a small pro move: let them sit, uncovered, in the refrigerator for 1 to 2 hours (or skip it if the day is short). A dry surface browns and firms better than a wet one — it’s the same logic as patting a steak dry, applied to twenty little meat ropes.
- Step 5 — Bake low and slow. Heat the oven to 200°F (95°C) — convection if you have it, which moves air and dries the sticks like a tiny wind tunnel; otherwise conventional works with a little more time. Bake the ropes for 2 hours, then flip each stick and bake 1 to 2 hours more, checking hourly after that. Early in the bake — usually within the first 90 minutes — check a fat rope with your instant-read thermometer: it should read 160°F, and from there the remaining hours are pure drying. The sticks are done when they’re dark, firm, and bend without breaking (soft-chew style) or snap cleanly (jerky style). You’re the artist. The oven holds the brush.
- Step 6 — Cool completely, then jar them. Transfer the sticks off the rack to cool fully — at least 30 minutes, and this matters: they firm dramatically as they cool, and a warm stick is a misleadingly soft stick. Once cool, blot any beads of fat off the surfaces, then stack them in a jar or airtight container lined with a paper towel (more on why in the storage section). One test bite is permitted. Historically, the first bite has never once been the last, so plan your dignity accordingly.
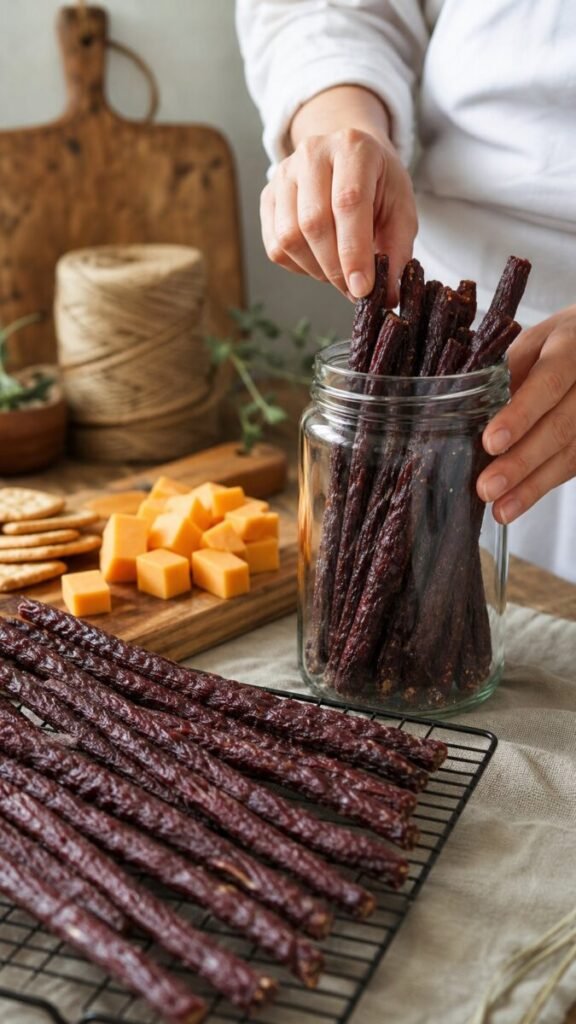
Every serious snack bowl deserves a chewy counterpart — set a jar of these sticks next to a batch of our Ranch Ritz Crackers and the table has both bases covered: crunchy and herby on one side, dense and peppery on the other. That’s not a snack table anymore. That’s a roster.
Smokehouse Wisdom
Lean beef or bust. This is the one ingredient rule with no flexibility. Fat doesn’t dehydrate — it sits in the stick, goes greasy in the oven, and turns rancid in storage. 90/10 is the floor; 93/7 is even better. If your beef runs fatty, brown it off first, chill it, then proceed (add a splash of the ice water back). The stick rewards leanness with shelf life and chew.
The knead is the casing. Three to four minutes feels absurd when the first minute already looks mixed. Keep going. The change from crumbly to tacky is visible and unmistakable — the meat will start stringing between your fingers. That’s the protein that holds everything together. Skip the knead and you’re baking loose meat logs; complete the knead and you’re making snack sticks. There is no middle path.
Verify 160°F, always. Ground beef needs to reach 160°F internal to be safe, and “it looks done” is not data — with dark spiced meat, looks lie. Thin ropes reach temperature surprisingly early in a low oven, which is exactly why we check rather than assume. One thermometer reading, zero guesswork, complete peace of mind. That’s the best trade in the recipe.
Choose your chew. The doneness window is a spectrum, and you get to pick where your sticks live: pull them at bendable-but-soft for a juicy, semi-dry style (the kids’ favorite, and mine), or ride another hour to the firm snap of true jerky (the car-trip, gym-bag, hiking-pack style). Hour by hour, the sticks get darker and firmer — sample one cool before committing. The recipe is a dial, not a switch.
Blot, then store cool. Even lean beef renders a few beads of fat in the oven. Blot the cooled sticks dry before jarring them, and keep them in the fridge — homemade sticks aren’t shelf-stable like the vacuum-sealed commercial kind (no nitrite fortress, no factory drying). Cold storage keeps them at their best for a solid two weeks. In practice, this has never once been tested to its limit.
The Lunchbox League
These sticks pair with everything a snack board or lunchbox loves. Cheese is their soulmate — sharp cheddar cubes or a wedge of swiss turn a stick into a full protein moment — and the jar-plus-cheese-board combo in the photo is the serving suggestion I stand behind. On a party table, run them alongside the Cold Shrimp Dip and a bowl of Crispy Onion Parmesan Chips — creamy, crunchy, chewy, the three-texture triangle of a complete snack spread. For the lunchbox rotation, wrap a stick next to our Everything Bagel Cucumber Bites and you’ve got protein plus crunch with zero vending machine involvement. Hikers, road-trippers, and after-school raiders: the jar is in the fridge, and yes, you may have one. That sentence loses all meaning by day two, when the jar is empty and the negotiating is moot.
Beyond Basic Beef
Honey-Sriracha Sticks — swap the brown sugar for honey and add a tablespoon of sriracha to the mix. Sweet heat in chewy form — the same flavor play that makes our Slam Dunk Dip dangerous, now in portable meat format. The double-batch rule applies with prejudice.
Teriyaki Sticks — replace the soy sauce with 2 tablespoons of teriyaki sauce, skip the cayenne, and add a teaspoon of fresh grated ginger. Sweet-savory and road-trip ready, with the same glaze DNA as our Sticky Chicken Rice Bowls — snack and dinner, united by one very good sauce family.
Pepperoni-Style Sticks — double the black pepper to 4 teaspoons, add 1 teaspoon of fennel seed and 1/2 teaspoon of anise, and swap the smoked paprika for regular sweet paprika. Suddenly it’s pizza-night energy in stick form, and lunchboxes everywhere rejoice.
Smoked Version — if you own a smoker, smoke the ropes at 180 to 200°F instead of oven-baking, with your favorite wood for 3 to 4 hours to the same 160°F-and-dry finish. The flavor upgrade is enormous, and you get to stand outside tending it like a person with important business.
Game-Meat or Turkey Sticks — the seasoning mix works on ground venison, elk, or turkey; keep everything else the same. Turkey sticks run milder and softer, so give them the longer end of the drying window. Venison makes arguably the best sticks of all — lean by nature, born for this. This recipe has range.
Trail Fuel Figures
| Nutrient | Per Stick (1 of about 20) |
|---|---|
| Calories | 80 kcal |
| Protein | 7 g |
| Carbohydrates | 1 g |
| Fats | 5 g |
Estimates for sticks made with 90/10 beef, dried to the medium-chew stage. Seven grams of protein and one gram of carbs per stick is the nutrition profile of an energy bar that actually tastes like food — this is honest, dense snacking with no ingredient list to squint at. Two sticks and a piece of cheese is a genuinely respectable 3 p.m. rescue. Three sticks is what actually happens.
The Long Haul
Storage, the honest version: homemade sticks live in the refrigerator. Cooled, blotted, and stored airtight with a paper towel tucked in to absorb any lingering moisture, they hold their best texture and flavor for about 2 weeks. The paper towel is a real move, not decoration — it wicks moisture away, and moisture is the enemy of chew. Swap it for a fresh one if it ever feels damp.
For the longer term, the freezer is a genuine all-star here: vacuum-seal or wrap sticks tightly in foil, bag them, and freeze for up to 3 months. They thaw in twenty minutes at room temperature and come back with their chew intact — many people eat them straight from the fridge or even lightly frozen, which sounds suspicious and is delicious. Pack a frozen stick for a hike and it thaws on the trail, which is the kind of convenient I refuse to call an accident.
What you can’t do is the pantry shelf: without commercial sealing and curing, room-temperature storage is where homemade sticks go to retire early. If you used the optional Prague Powder #1 cure, the fridge life stretches a bit longer and the color stays pinker — but the jar in the fridge is still home base. A batch this good has never once faced a storage crisis. The two-week window is theoretical; the one-week reality is a clean, empty jar.
When Sticks Misbehave
Sticks fell apart in the oven. The knead came up short. Three to four minutes of mixing is what develops the protein bind that replaces a casing — if the mix ever looked crumbly going onto the pan, that was the warning. Re-knead the remaining mix with a splash of ice water until genuinely tacky, and the next tray will hold together. The first tray’s fragments are still delicious, by the way. Chef’s crumbs.
Greasy, oily sticks. The beef was too fatty. Fat renders in the low oven and has nowhere to go — it pools on the surface and turns the sticks shiny and slick. Blot what you can, but the real fix is upstream: 90/10 or leaner, every time. This is the single most common cause of disappointing homemade sticks, and the easiest to prevent.
Soft, bendy sticks that never firm up. Either the ropes were rolled too thick or the bake ended too soon. An extra hour at 200°F transforms soft sticks into proper ones — the texture change in hour three and four is dramatic. If your oven runs cool (many do), a cheap oven thermometer will tell you what “200°F” really means in your kitchen. The sticks are patient; the oven should be too.
Dry, crumbly, sawdust sticks. They went too far. Over-dried sticks snap hard and drink the moisture out of your mouth. Pull sticks at the bend stage next time — a finished stick should flex like a firm licorice, not shatter like a breadstick. If a whole batch runs dry, a day in a sealed container with a slice of bread softens them a notch. Old delicatessen trick, works on sticks, works on brown sugar, works on my patience.
Bland sticks. Two likely causes: under-salted mix or skipping the air-dry rest before baking. The cure for blandness, though, is built into the recipe — fry a small pinch of the seasoned mix in a pan before rolling and taste it. Season the raw mix (salt, pepper, smoke) until that tester tastes slightly bolder than you want the finished stick; drying concentrates flavor, but it also firms it, and boldness going in is flavor coming out. Test, adjust, roll. The pinch of meat is the cheapest cooking lesson in the whole post.
Stick Questions
Why no casings — and does it really work?
Because casings require a stuffer, a soaking step, and a sourcing quest, and none of that is necessary. The kneading step makes the meat its own casing — the proteins that hold sausage together in a skin do the same job skinless when you work them enough. The sticks look rustic rather than machine-smooth, and honestly, that’s the homemade charm. Flavor and chew are identical. The casing never gets missed, and neither does the equipment.
Are these safe without a curing salt?
Yes — with two conditions the recipe already builds in. First, ground beef must reach 160°F internal, which we verify with a thermometer early in the bake. Second, the finished sticks are stored in the refrigerator, not the pantry. Curing salt (Prague Powder #1) is what makes commercial sticks pink and shelf-stable; this oven-cooked, fridge-stored version doesn’t need it. If you do use it, measure it precisely — 3/8 teaspoon for this 2-lb batch — because cure is the one ingredient where “a little extra” is never the right call.
Can I make these in a dehydrator or air fryer?
Dehydrator: absolutely — it’s the classic tool. Set it to 160°F and dry the ropes 4 to 6 hours, checking after hour three. Because dehydrators run at true low temperatures, the 160°F setting doubles as your safety step; still verify with a thermometer. Air fryer: yes, in smaller batches — arrange ropes in a single layer, set it to the lowest heat (usually 160 to 180°F), and dry 2 to 3 hours, flipping once. The oven version remains the most convenient for a full batch, but the recipe travels well between machines.
Why is my mix so hard to roll?
Warm meat is the usual culprit — it softens and smears instead of rolling. Chill the mix for 30 minutes before rolling, keep your hands cool (a quick rinse in cold water), and oil them lightly so the meat releases instead of clinging. Rolling between two sheets of parchment is the tidy alternative: press the mix into an even slab, then cut it into strips. Same sticks, less wrestling, marginally less character-building.
How long do they keep — really?
Refrigerated airtight: about 2 weeks at peak, a few days more in honest decline. Frozen: 3 months, with the chew surviving beautifully. The truth, though, is that a 20-stick batch in a household of snackers has a working lifespan of days. If you need these to last a month, make a double batch and hide half in the freezer behind the peas. The peas can keep a secret — they’ve seen things.
Can I grind my own beef?
And it’s the best version of the recipe — chuck roast trimmed lean and ground at home gives you control over the fat (and a texture with more bite than pre-ground). Partially freeze the meat before grinding for the cleanest grind, then proceed with the recipe as written. Homemade-high-protein is a whole genre at this point — for its dinner-table counterpart, our Savory Lentil Meatloaf plays the same honest-ingredients, big-flavor game from the other side of the fridge.
Lean Ground Beef · Pepper · Smoked Paprika · No Casings
Beef Snack Sticks Without Casings
Homemade peppery beef sticks shaped by hand without casings or a sausage stuffer. Cook the ground beef through first, then dry gently in the oven for a firmer chew. These uncured snacks must be refrigerated or frozen; they are not shelf-stable jerky.
Important safety correction: This card replaces the source’s low-temperature raw-meat drying step with an initial cook to 160°F (71°C) before drying. The optional curing salt is omitted. Neither curing salt, vacuum sealing nor a dry-looking surface establishes shelf stability. This is a refrigerated cooked-beef snack, not a validated preservation recipe.
Ingredients
As an Amazon Associate, we earn from qualifying purchases. Ingredient and equipment links below are affiliate links.
For the Beef and Seasoning
- Lean ground beef, 90/10 or leaner, kept cold 2 lb / 907 g
- Kosher salt 2 tsp*
- Coarse black pepper 2 tsp
- Garlic powder 1 tsp
- Onion powder 1 tsp
- Smoked paprika 1 tsp
- Dry mustard ½ tsp
- Cayenne pepper, optional ½ tsp
*Kosher salt brands differ substantially in weight per teaspoon. Fine salt is not an equal-volume substitute. The salt here provides seasoning and helps binding; it is not a preservation treatment.
For Flavor and Mixing
- Brown sugar or honey 1 tbsp
- Soy sauce or Worcestershire sauce 1 tbsp
- Ice-cold water, tap water is fine 2 tbsp
- Neutral cooking oil, optional, for hands and rack a very thin coating
Equipment
- Rimmed baking sheets 1–2, as needed
- Oven-safe wire racks to fit the sheets
- Parchment paper for shaping and lining beneath racks
- Large mixing bowl 1
- Thin-tip digital food thermometer essential for the thin sticks
- Oven thermometer to verify oven temperature
- Bench scraper or knife for portioning
- Food-safe gloves, optional for shaping
How to Make It
- Mix the cold beef until tacky Combine the cold ground beef, kosher salt, pepper, garlic powder, onion powder, smoked paprika, dry mustard, optional cayenne, sugar or honey, soy sauce and ice water. Knead with clean hands for 3–4 minutes until sticky and cohesive. If it begins warming or smearing, refrigerate before continuing. Do not brown the meat before mixing; the raw proteins are needed for binding.
- Chill and prepare the racks Cover and refrigerate for 30 minutes at 40°F (4°C) or below. Set oven-safe wire racks over rimmed baking sheets lined beneath the racks with parchment. Lightly oil the racks if needed. Preheat the oven to 325°F (165°C).
- Shape evenly sized sticks Work with small portions of cold mixture, keeping the remainder refrigerated. With lightly oiled hands, roll ropes about ½ inch thick on clean parchment, then cut to your preferred length. Place on the racks without touching. Prioritize an even diameter; the final number of sticks depends on their length.
- Cook through before drying Bake at 325°F (165°C) until the centers of the sticks reach at least 160°F (71°C). Begin checking early, around 10–15 minutes, but continue as needed. Insert a thin-tip thermometer lengthwise into a stick so the sensing area sits in its center. Check several thick sticks from different areas of each tray. Color and firmness are not reliable safety checks.
- Dry gently for texture Once the sticks have reached 160°F (71°C), reduce the oven to 200°F (95°C) and continue drying. Start checking texture after 1 hour, turning the sticks and rotating trays as needed. Continue in 30-minute increments until they have your preferred firm chew. Cool a small cooked sample before judging texture. Several hours may be needed, but do not force the original 4–5-hour schedule if the sticks are already dry.
- Cool promptly and refrigerate Use clean utensils to transfer the cooked sticks to a clean rack. Blot visible surface fat if desired. Cool briefly, then refrigerate in shallow containers within 2 hours of leaving the oven, or within 1 hour if the surroundings exceed 90°F (32°C). Cover tightly once chilled. Use within 3–4 days or freeze for longer keeping.
This two-stage cooking method is a safety-focused adaptation of the supplied recipe and has not been kitchen-tested for texture or timing. The source’s stated yield, portion size and dimensions do not align precisely, so treat “20 sticks” as approximate rather than enlarging the diameter to force that count.
Keep finished sticks refrigerated at 40°F (4°C) or below, including during transport in an insulated bag with ice packs. They are not suitable for unrefrigerated hiking packs or pantry jars. A bend test, snap test or dry exterior cannot establish safe room-temperature storage.
Do not add bread to soften stored sticks or rely on a paper towel to extend their safe life. Curing salt is not interchangeable with table salt and should only be used with an appropriate tested formulation and the product’s exact directions. A dehydrator’s temperature setting is not proof that the meat itself reached a safe temperature.
Nutrition
| Nutrient | Source estimate per stick (if 20 total) |
|---|---|
| Calories | 80 kcal |
| Protein | 7 g |
| Carbohydrates | 1 g |
| Fat | 5 g |
Figures supplied with the original recipe, not independently calculated. They may not match 2 pounds of 90/10 beef divided into 20 portions. Actual values depend on beef leanness, rendered fat and the number of sticks. Nutrition microdata is omitted pending verification.