
Copycat Drumstick Ice Cream Cones – Better Than the Original
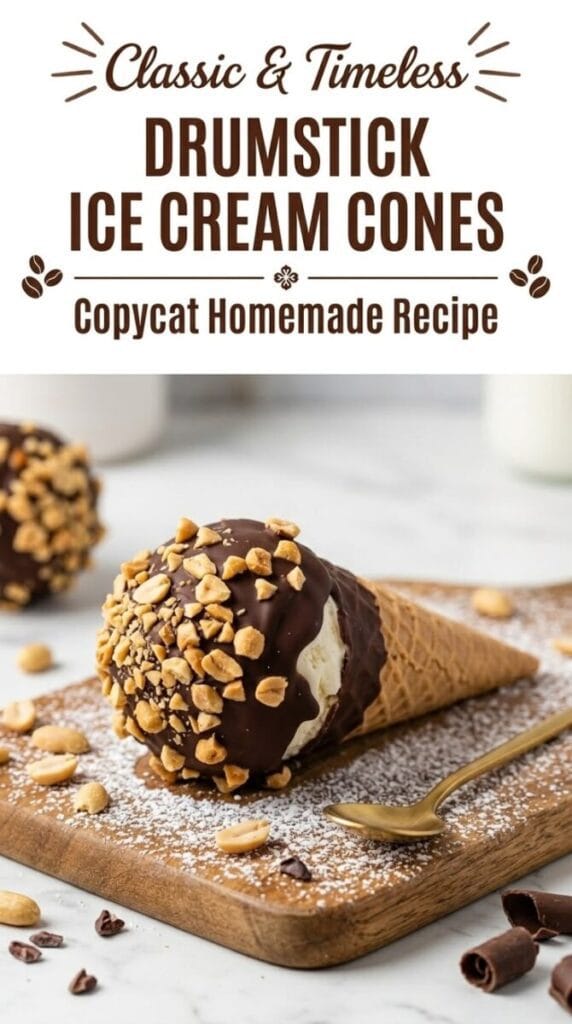
These Copycat Drumstick Ice Cream Cones replicate every element that makes the original iconic — the chocolate-lined sugar cone that prevents sogginess, the creamy vanilla ice cream packed tightly inside, the thick chocolate shell dipped around the top scoop, the chopped peanuts pressed into the coating, and the famous chocolate-filled tip at the bottom of the cone that delivers the best last bite in frozen dessert history.
The original Drumstick, introduced by Nestlé and produced since the 1920s, became a summer institution on the strength of that specific combination of textures and the clever chocolate-lined cone that holds up to ice cream without going soft. The commercial version uses a chocolate coating formulated for hardness and specific textural properties, but the homemade version gets just as close as it needs to using good-quality dark chocolate and a small amount of coconut oil that produces the same snap-and-crack shell at a fraction of the cost per cone.
Making these at home means you control the quality of the chocolate, the size of the scoop, and the chocolate-to-peanut ratio on top — and you can make a full batch in about 30 minutes of active work for a fraction of what a box of the commercial version costs at the grocery store.
Why Homemade Beats the Freezer Aisle Version
The chocolate is better — real dark chocolate with a genuine snap rather than a compound coating formulated for shelf stability. The peanuts are fresher and crunchier. The ice cream portion is significantly more generous. And the whole thing costs less per cone than a box of six at most grocery stores.
Once you have the technique for lining the cone with chocolate and sealing the tip, these take about the same time to assemble as filling a cone with a scoop — just with an extra 10 minutes of freezing in between.
- Prep Time: 25 minutes
- Freeze Time: 30 minutes (in two stages)
- Total Time: 55 minutes active and passive
- Yield: 6 to 8 cones
Everything You Need
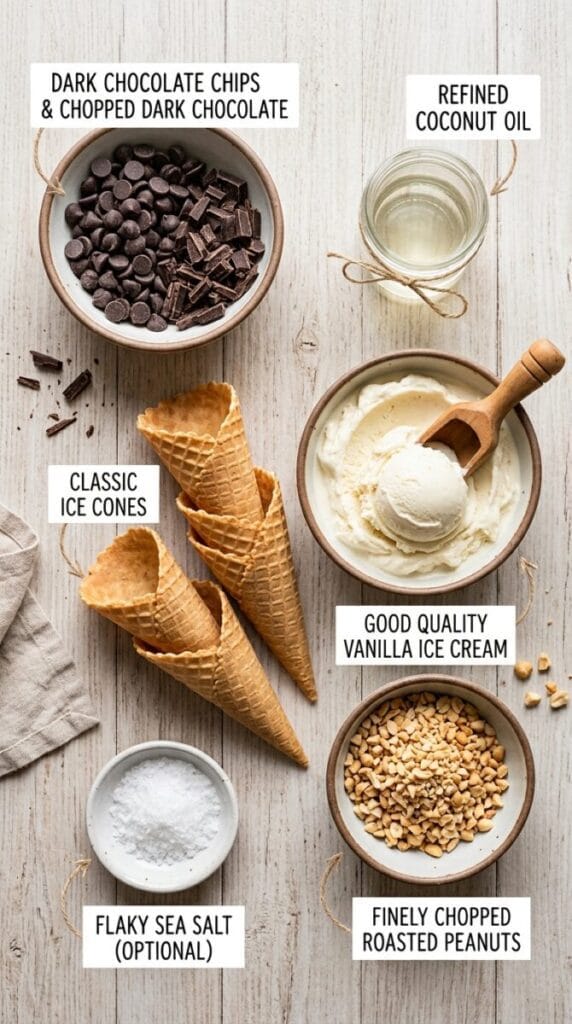
- Sugar ice cream cones: 6 to 8
- Good quality vanilla ice cream: about 1 quart (1 litre), softened slightly for easier packing
- Dark chocolate chips or chopped dark chocolate (60 to 70% cacao): 10 oz (280g), divided
- Refined coconut oil: 2 tablespoons, divided (refined has no coconut flavour)
- Dry roasted salted peanuts, finely chopped: 1/2 cup
- Flaky sea salt: optional, for sprinkling over the top
How to Build Them Cone by Cone
Step 1 — Seal the tip and line the cone:
- Melt 3 oz (85g) of the chocolate with 1 teaspoon of coconut oil in a microwave-safe bowl in 30-second intervals, stirring between each, until completely smooth.
- Drop about 1 teaspoon of melted chocolate down into the tip of each cone and tilt the cone to coat the inside bottom — this is the chocolate seal that prevents the ice cream from soaking through the cone tip and also creates the signature chocolate surprise at the bottom of the last bite.
- Stand the cones upright in a glass or muffin tin and place in the freezer for 5 minutes until the tip chocolate is fully set.
- Pour another teaspoon of melted chocolate into each cone and tilt to coat about 1 to 2 inches up the inside walls — this creates the chocolate lining that insulates the cone from the ice cream moisture.
- Return to the freezer for another 5 minutes until the lining is fully set.
Step 2 — Fill with ice cream:
- Let the vanilla ice cream sit at room temperature for 3 to 5 minutes until it’s just soft enough to pack firmly but not melting.
- Pack the ice cream tightly into each lined cone using a small spoon or spatula, pressing it down firmly to eliminate any air pockets — air pockets create structural weakness in the cone when it freezes solid.
- Mound a generous scoop of ice cream above the rim of each cone, shaping it into a dome with your hands or the back of a spoon.
- Place the filled cones upright in the freezer for at least 15 minutes until the ice cream is firm again — if the ice cream softened significantly during filling, give it 20 minutes.
Step 3 — Dip and coat:
- Melt the remaining 7 oz (200g) of chocolate with the remaining coconut oil in a deep, narrow bowl — narrow and deep rather than wide and shallow allows the cone to be submerged at an angle efficiently. Let it cool to just above room temperature, about 85°F, before dipping — chocolate that is too hot will melt the ice cream instantly.
- Remove the cones from the freezer one at a time and hold each one at a slight angle over the chocolate bowl, then spoon the chocolate over the ice cream dome quickly and evenly — or tilt the bowl and rotate the cone through the chocolate. Work fast since the ice cream will start melting under the warmth of your hand within 30 to 60 seconds.
- Immediately and generously scatter the finely chopped peanuts over the wet chocolate coating before it sets — the shell sets within 10 to 15 seconds of leaving the melted chocolate, so the peanuts need to go on immediately.
- Place each finished cone upright in the freezer within 30 seconds of dipping and return to freeze for at least 10 minutes before serving.
Making these for a summer dessert spread? Our 5-Ingredient Strawberry Sago is another make-ahead frozen and chilled dessert that works alongside these cones for a full cold dessert table — no baking required for either, and both can be made the day before and served straight from the fridge or freezer.
The Details That Make These Better Than Store-Bought
The coconut oil in the chocolate coating is the technique ingredient that makes the homemade shell behave like the commercial version — it lowers the melting point of the chocolate slightly and creates the glossy, snap-when-you-bite-it shell rather than a soft, matte coating that never fully hardens. Use refined coconut oil rather than virgin so there’s no coconut flavour in a vanilla-and-chocolate dessert. The ratio of 1 tablespoon of coconut oil per 5 oz of chocolate is the balance that creates a shell that snaps cleanly without being brittle enough to shatter entirely when bitten.
Letting the dipping chocolate cool to around 85°F before using it is the step most people skip and the one that causes the most problems — chocolate straight off the heat at 110°F to 120°F will melt the surface of the ice cream before the shell can set, which causes the coating to slide rather than adhere and produces a streaky, uneven shell. A candy thermometer for this step is useful if you have one; if not, hold your wrist near the bowl — if it feels warm rather than hot, it’s approximately the right temperature.
Chopping the peanuts finely rather than leaving them in large pieces helps them adhere to the shell before it sets — larger pieces are heavier and tend to slide off the wet chocolate in the 10-second window before it hardens. A rough chop in a food processor or by hand to pieces about half the size of a standard peanut is the right size. According to Serious Eats, the classic shell coating on an ice cream drumstick relies on the same principle as a compound chocolate couverture — a fat that is liquid at room temperature but solid when cold, which is what the coconut oil achieves in a home kitchen context without access to commercial coating formulations.
What to Serve Alongside for a Full Dessert Spread
These cones work as a standalone dessert or as the centerpiece of a summer dessert table where guests pick up their own and eat them like the original.
For a full frozen and chilled dessert spread, our Lemon and Blueberry Keto Cheesecake Fluff is the lighter, fruit-forward contrast that gives guests who want something less indulgent an equally satisfying cold dessert option — both come straight from the fridge or freezer and require no last-minute preparation.
Variations That Customise Every Cone
Swap the vanilla ice cream for strawberry for a version that mimics the strawberry drumstick variety — the pink ice cream against the dark chocolate shell and golden peanuts is visually striking and the flavour combination is excellent.
Use white chocolate in place of dark for the dipping shell and swap the peanuts for finely crushed graham crackers or sprinkles — the white chocolate shell requires the same coconut oil ratio and behaves identically in terms of setting time, giving a completely different visual result from the same technique.
Replace the peanuts with finely chopped toasted almonds or crushed Oreo cookies for versions that hit different flavour notes — almonds give a more refined, less salty finish, Oreos give a cookies-and-cream direction that pairs particularly well with a dark chocolate shell over vanilla ice cream.
If you love the concept of no-bake ice cream-adjacent desserts that come together quickly and impress without the effort level they suggest, our Irresistible Chocolate Cream Pie is the cold, creamy, chocolate-forward dessert to add to the same summer repertoire — it sets in the fridge rather than the freezer and delivers the same rich, chocolate-and-cream satisfaction in a sliceable format rather than a hand-held one.
Nutritional Information
| Nutrient | Amount Per Cone (based on 8 cones) |
|---|---|
| Calories | 420 kcal |
| Protein | 7 g |
| Carbohydrates | 44 g |
| Fats | 24 g |
These values are estimates based on a generous scoop of standard vanilla ice cream, a full chocolate dipping coating, and the peanut topping, divided by 8 cones. Values will vary significantly depending on the ice cream brand and how generously each cone is filled and dipped.

Storing Finished Cones Without Ruining the Coating
Stand the finished, frozen cones upright in a tall container or a muffin tin and cover loosely with plastic wrap — the cones need to stand upright while freezing and storing to keep the ice cream dome and the chocolate coating symmetrical. Laying them on their sides causes the ice cream to shift inside the cone and the chocolate shell to crack from the pressure.
Store for up to 2 weeks in the freezer — after 2 weeks the cone begins to soften slightly from freezer moisture absorption and loses some of its initial crunch, though the flavour remains good for longer. Let each cone stand at room temperature for 2 to 3 minutes before eating so the chocolate shell isn’t rock hard straight from the freezer — that short rest is the difference between a satisfying snap and a jaw-testing bite.
Wrap individual cones in plastic wrap before storing if they’ll be in the freezer longer than a few days — the direct exposure to freezer air accelerates the softening of the cone and can cause the chocolate coating to develop a slightly chalky surface from the cold moisture.
What Goes Wrong and How to Fix It
Ice cream melting faster than the shell can set is the most common problem and it happens when the dipping chocolate is too warm — if the surface of the ice cream dome is visibly melting as you dip, return the filled cones to the freezer for 10 more minutes before attempting again and let the chocolate cool further before the next dip. Speed is also part of the solution — have the peanuts ready and the freezer door open before you pick up the cone to dip.
A chocolate coating that never fully hardens into a shell almost always means either the coconut oil ratio was off or the coconut oil was omitted — without it, chocolate alone doesn’t set hard enough at freezer temperatures to produce a snap-shell. Check the ratio (1 tablespoon coconut oil per 5 oz of chocolate) and make sure the coconut oil was fully melted and incorporated into the chocolate before dipping.
Peanuts falling off the coating before it sets means either the peanuts were too large to adhere in the available window, the chocolate had already begun to set before the peanuts were applied, or the peanuts were added too gently — press them lightly into the wet coating with your fingertips rather than just scattering them, and work within the first 10 seconds of the cone coming out of the chocolate.
Copycat Drumstick Ice Cream Cones
Recreate the ultimate frozen treat at home: a chocolate-lined sugar cone packed with creamy vanilla ice cream, dipped in a crisp chocolate shell, and rolled in roasted peanuts.
Ingredients
As an Amazon Associate, I earn from qualifying purchases.
Instructions
Melt 3 ounces of the dark chocolate with 1 teaspoon of coconut oil in the microwave until smooth. Add about 1 teaspoon of the melted chocolate straight into the tip of each cone. Tilt gently to coat the inside bottom.
Place the cones upright using a muffin tin or tall glasses and freeze for 5 minutes.
Add another teaspoon of melted chocolate inside each cone. Tilt and rotate to coat the inside walls about 1 to 2 inches up. Freeze for another 5 minutes until completely hardened.
Let the vanilla ice cream soften at room temperature for 3–5 minutes. Pack the ice cream firmly into each cone, pressing gently to eliminate any hidden air pockets.
Use a small scoop to shape a perfectly rounded dome of ice cream on top of each cone. Return to the freezer upright for 15–20 minutes until the ice cream is very firm.
Melt the remaining 7 ounces of chocolate with the remaining coconut oil. Let it cool slightly until it is just warm. If it is hot, it may instantly melt the ice cream.
Working quickly and one at a time, dip the ice cream dome into the chocolate or spoon it over. Immediately sprinkle generously with chopped peanuts before the shell hardens. Add a pinch of flaky sea salt if desired.
Return the finished cones to the freezer for at least 10 minutes to set completely before serving.
Kitchen Notes
Do not skip lining the cones. That inner layer of chocolate acts as a moisture barrier, helping your sugar cone stay crisp in the freezer.
Refined coconut oil gives the chocolate shell its signature snap and thins it out for dipping without adding coconut flavor.
Let the dipping chocolate cool to room temperature. If it is too warm, the ice cream domes may melt and slide off the cones.
The magic shell hardens in seconds when it hits cold ice cream. Have your chopped peanuts ready so you can sprinkle them immediately.
To keep the cones upright while freezing, poke holes in the bottom of a cardboard box, or stand them in a muffin tin or narrow drinking glasses.
Once the chocolate shell is fully hardened, wrap each cone individually in plastic wrap or wax paper. Store in the freezer for up to 1 month.
Melt the coating chocolate in a narrow, deep bowl or wide mug. This makes it easier to dunk the entire ice cream dome at once.