
Tiramisu Balls Recipe — No-Bake, Easy and Irresistible
These Tiramisu Balls are the no-bake dessert that delivers all the essential flavour of a classic tiramisu — the espresso-soaked ladyfinger, the creamy mascarpone, the dusting of bitter cocoa — in a hand-held truffle format that requires no oven, no baking skill, no assembly of delicate layers, and no overnight set time. They are ready in 30 minutes of active work plus 1 hour of refrigeration, and they taste genuinely, unmistakably of tiramisu in every single bite.
Tiramisu balls are also one of the most crowd-pleasing party desserts in this collection — they are bite-sized, individually portioned, visually beautiful when arranged on a plate with a dusting of cocoa, and can be made 2 to 3 days in advance without any quality loss. They are the dessert for the holiday cookie tray, the dinner party that needs something after a heavy main course, the potluck contribution that runs out first, and the Tuesday afternoon treat that satisfies the tiramisu craving in 30 minutes without turning on the oven.
What Makes These Taste Like Real Tiramisu
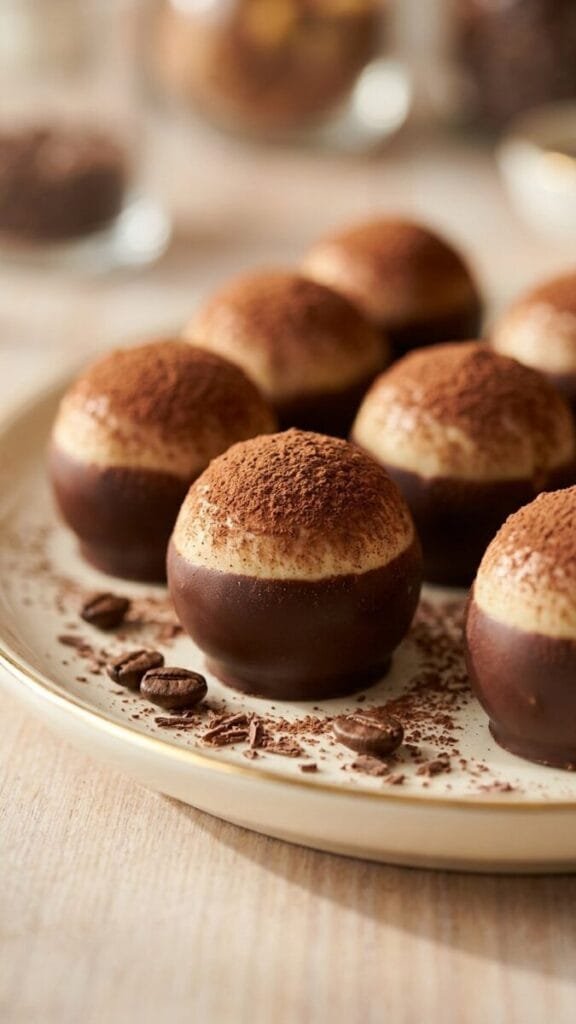
The three flavours that define tiramisu are coffee, cream (mascarpone specifically), and cocoa — and all three are present in each tiramisu ball in the right proportions. The crushed ladyfinger absorbs the espresso as it chills, the mascarpone and cream cheese mixture provides the sweet, slightly tangy cream layer, and the cocoa powder dusting on the exterior delivers the finishing bitterness that makes the first bite of tiramisu specifically satisfying rather than just sweet.
Mascarpone rather than cream cheese alone is the ingredient that makes tiramisu taste like tiramisu — mascarpone’s specific richness and mild dairy flavour is the defining creaminess of the dessert, and replacing it entirely with cream cheese produces something that tastes like a cheesecake truffle rather than a tiramisu ball. A mixture of mascarpone and cream cheese (used in this recipe) provides both the mascarpone flavour character and the structural stability that pure mascarpone lacks in a rolled ball format.
- Prep Time: 25 minutes
- Chill Time: 1 hour minimum, overnight preferred
- Total Time: 1 hour 25 minutes, 25 minutes active
- Yield: approximately 24 tiramisu balls
What You Need
- Ladyfinger biscuits (Savoiardi), finely crushed: 200g (approximately 20 to 24 cookies) — process in a food processor to fine crumbs, or seal in a bag and roll with a rolling pin
- Mascarpone cheese, room temperature: 250g (approximately 1 cup)
- Cream cheese, softened: 115g (4 oz) — the cream cheese provides structure that helps the balls hold their shape; pure mascarpone is too soft for rolling
- Powdered sugar, sifted: 1/2 cup (60g)
- Strong espresso or very strong coffee, cooled: 3 tablespoons
- Coffee liqueur (Kahlúa or Tia Maria), optional: 2 tablespoons — adds depth and the authentic tiramisu flavour note that distinguishes made-for-adults tiramisu balls from made-for-everyone ones; omit and replace with an equal amount of extra espresso for an alcohol-free version
- Pure vanilla extract: 1 teaspoon
- Fine sea salt: a small pinch
- Unsweetened cocoa powder: 1/4 cup, for rolling — Dutch-process cocoa produces a darker, richer coating than natural cocoa
Optional coating alternatives:
- Dark chocolate, melted — dip each ball for a chocolate shell instead of cocoa dusting
- Crushed ladyfinger crumbs mixed with cocoa — for a textured coating
- Cocoa powder mixed with a pinch of cinnamon — adds a warm spice note

How to Make Them
- Beat the mascarpone and cream cheese together in a large bowl using a hand mixer or stand mixer on medium speed for 1 to 2 minutes until smooth and completely lump-free. Room temperature is essential — cold mascarpone or cream cheese forms lumps that cannot be smoothed out by beating and produces grainy balls. Remove both from the fridge 30 minutes before beginning.
- Add the powdered sugar, espresso, coffee liqueur (if using), vanilla, and salt. Beat on medium for another 60 seconds until the mixture is smooth, slightly thickened, and uniform in colour.
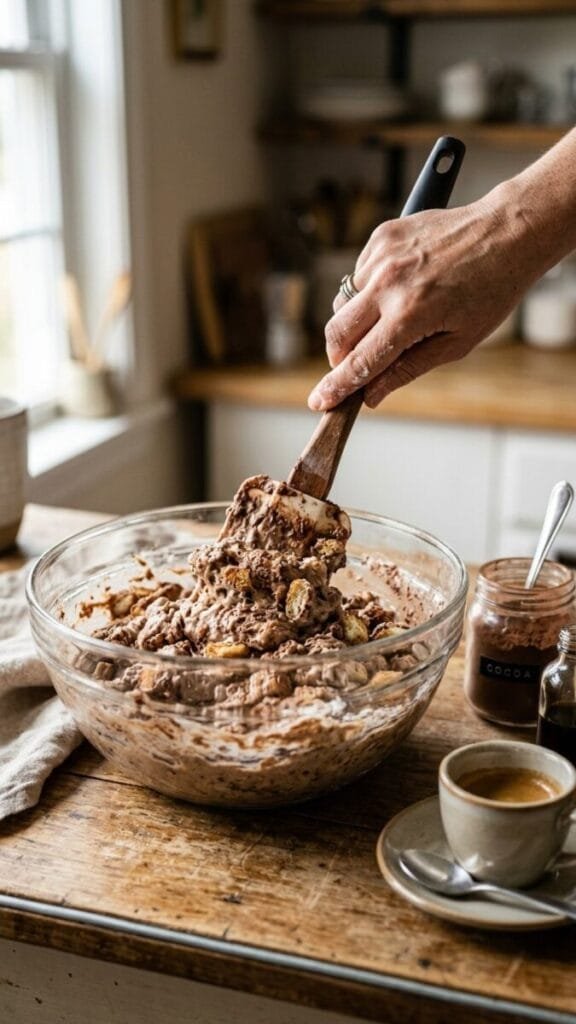
- Fold in the crushed ladyfinger crumbs with a spatula — fold rather than beat, as the crumbs provide texture and should remain slightly coarse rather than being fully incorporated into the cream. The mixture should be thick, scoopable, and hold its shape when pressed. If it seems too soft to roll, refrigerate for 20 minutes before proceeding.
- Refrigerate the mixture for 20 minutes if it feels soft — this makes it significantly easier to roll into clean balls.
- Spread the cocoa powder in a shallow plate or wide bowl.
- Using a tablespoon measure or small cookie scoop, portion the mixture into approximately 24 equal pieces. Roll each piece between your palms into a smooth ball — work quickly as the warmth of your hands softens the mixture. If the mixture sticks to your hands, lightly dampen your palms with cold water between balls.
- Roll each ball immediately in the cocoa powder until completely coated on all sides. Place on a parchment-lined plate or baking sheet.
- Refrigerate for at least 1 hour before serving — the chill time firms the balls and allows the espresso to fully absorb into the ladyfinger crumbs, deepening the coffee flavour significantly. Overnight refrigeration produces the best flavour of all.
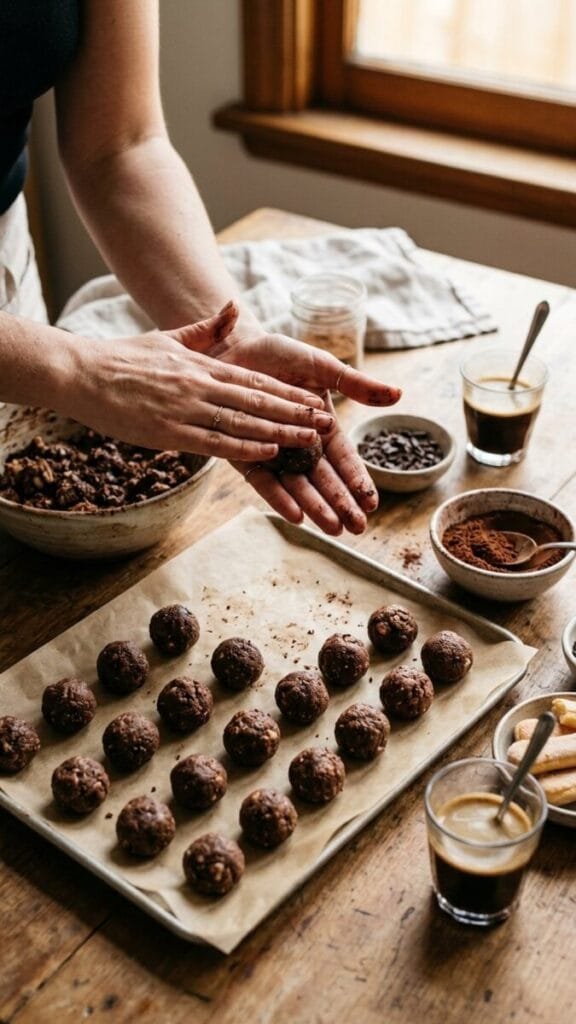
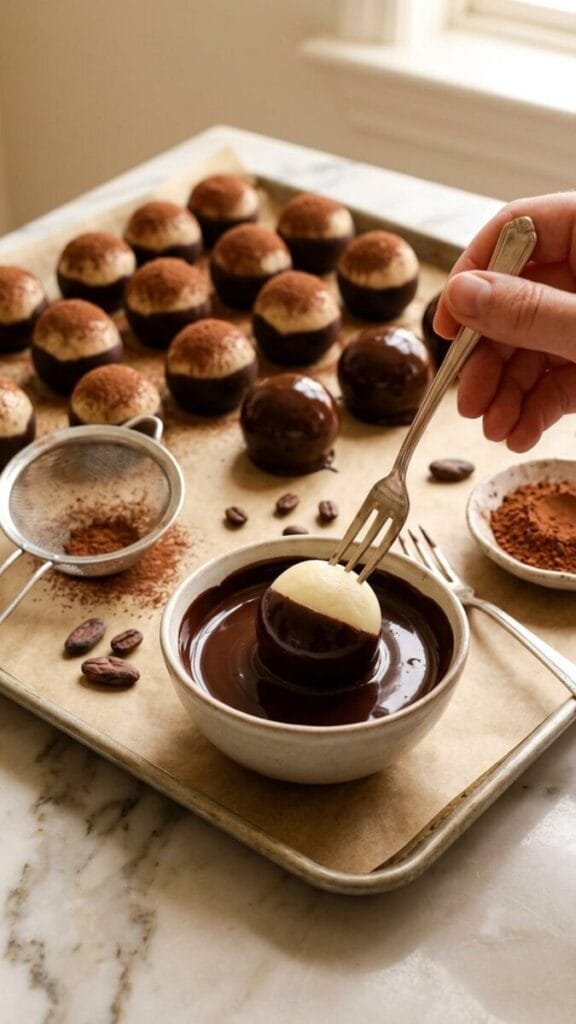
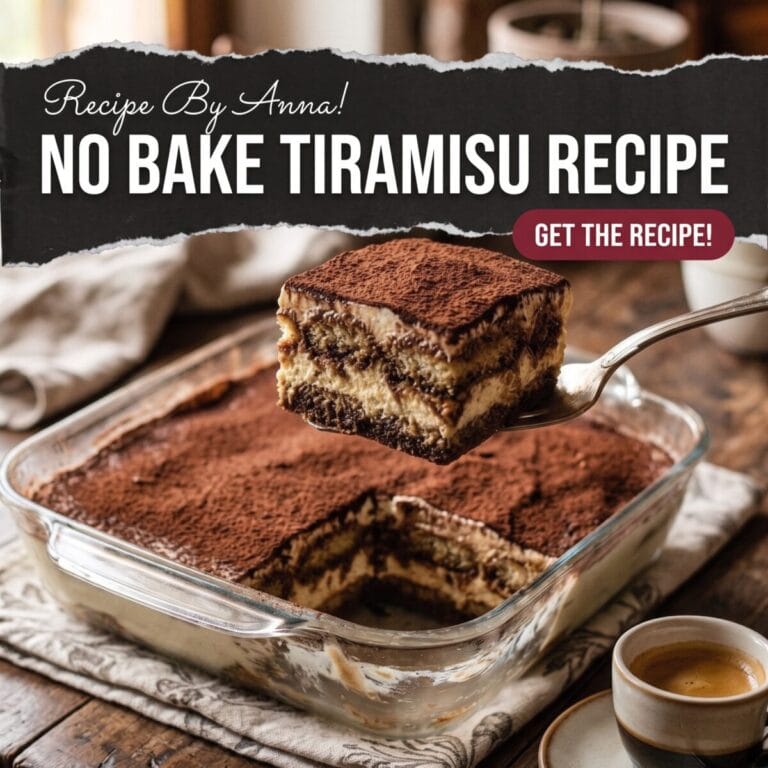
Tiramisu balls served alongside our Classic No-Bake Tiramisu is the dessert table combination for anyone who wants to offer the full tiramisu experience plus an elegant bite-sized version — the traditional layered dessert for those who want the full portion, the tiramisu balls for grazing and sharing. Both made ahead, both served cold, both earning their place.
The Room Temperature Dairy, the Chill Before Rolling, and the Cocoa Coating Details
Room temperature mascarpone and cream cheese is not optional — cold dairy beaten together produces a grainy, lumpy mixture where the fat has seized rather than emulsified, and the lumps cannot be smoothed out by additional beating. They must be completely soft before the mixer touches them. If short on time, cut both into small pieces and let stand at room temperature for 15 minutes — small pieces warm faster than whole blocks.
The 20-minute chill before rolling transforms a soft, sticky mixture that smears rather than forming clean balls into a firm, scoopable mixture that rolls smoothly between the palms. The mascarpone and cream cheese firm slightly in the fridge and the ladyfinger crumbs absorb enough moisture to bind the mixture more cohesively. Do not skip this chill; rolling a warm mixture produces misshaped, flat-bottomed balls rather than neat spheres.
Dutch-process cocoa for rolling produces a darker, more intensely chocolatey-looking coating with less bitterness than natural cocoa — the Dutch-process treatment neutralises the natural cocoa’s acidity and produces a smoother, deeper colour. Either works, but Dutch-process cocoa is the choice for the most visually dramatic tiramisu ball with the most rounded cocoa flavour against the sweet cream center.
What to Serve These With
A small cup of espresso or a shot of strong coffee alongside is the most natural companion — the same coffee flavour in the tiramisu balls echoed in the cup, and the slight bitterness of the espresso contrasting the sweet, creamy interior of the balls.
As part of a dessert spread, tiramisu balls alongside our Greek Yogurt Cookie Dough (as a dip with graham crackers) and our Peanut Butter Greek Yogurt Desserts produces a no-bake dessert table that covers chocolate, coffee, and peanut butter in a spread that serves a crowd entirely from the refrigerator with no oven required.
Variations on the Classic Tiramisu Ball
Tiramisu Truffles with Chocolate Shell — roll the tiramisu balls and chill for 30 minutes on parchment. Melt 200g of good quality dark chocolate (70%) with 1 teaspoon of coconut oil in a double boiler or microwave in 30-second intervals. Dip each chilled ball in the chocolate using a fork or dipping tool, let the excess drip off, place on parchment, and dust with a pinch of cocoa powder before the chocolate sets. The chocolate shell produces a satisfying crack against the creamy tiramisu interior and elevates the presentation from elegant truffle to genuinely stunning party dessert. Refrigerate until the chocolate is fully set.
No-Bake Tiramisu Balls (alcohol-free) — replace the coffee liqueur with 2 additional tablespoons of strong espresso and 1/2 teaspoon of coffee extract. The coffee extract provides the intensity that the liqueur contributes without any alcohol — the alcohol-free version has a slightly less complex, more straightforwardly coffee flavour but is equally delicious and suitable for any table regardless of guests.
Matcha Tiramisu Balls — replace the espresso with 2 tablespoons of strongly brewed matcha (2 teaspoons of matcha powder whisked with 2 tablespoons of hot water, then cooled), omit the coffee liqueur, and add 1 teaspoon of additional matcha powder to the cream mixture. Roll in matcha powder instead of cocoa. The matcha version is the most visually dramatic — pale green balls with a slightly bitter, earthy flavour against the sweet cream — and the most photogenic variation for any dessert tray.
Oreo Tiramisu Balls — replace half the crushed ladyfinger with an equal weight of finely crushed Oreo cookies (cream filling removed). The Oreo version has a darker, more chocolatey interior and a less distinctly tiramisu flavour profile — closer to an Oreo truffle that has been given the tiramisu treatment with espresso and mascarpone. Coat in cocoa powder or melted white chocolate for the most striking contrast against the dark interior.
Strawberry Tiramisu Balls — omit the espresso and coffee liqueur entirely. Replace with 2 tablespoons of strawberry purée (fresh strawberries blended and strained) and 1 tablespoon of Grand Marnier or orange juice. Add 1/4 teaspoon of lemon zest to the cream mixture. Roll in a mixture of freeze-dried strawberry powder and powdered sugar rather than cocoa. The strawberry version is the most visually striking and the most appropriate summer variation — not a tiramisu in the coffee-flavour sense but a mascarpone ball in the tiramisu format with a completely different fruit-forward character.
Nutritional Information
| Nutrient | Amount Per Ball (based on 24 balls) |
|---|---|
| Calories | 115 kcal |
| Protein | 2 g |
| Carbohydrates | 10 g |
| Fats | 7 g |
These values are estimates for the base recipe with coffee liqueur, divided by 24 balls. At 115 calories per ball, tiramisu balls are genuinely one of the more calorie-controlled indulgent desserts in the collection — the small portion size makes it easy to have two or three without reaching the calorie count of a full slice of dessert. The chocolate-shell truffle variation adds approximately 35 calories per ball from the chocolate coating.
Storing These for Maximum Shelf Life and Flavour
Store in an airtight container in the fridge for up to 5 days — tiramisu balls improve significantly during storage as the espresso continues to soak into the ladyfinger crumbs and the flavours meld together. Day-three tiramisu balls are noticeably more developed in flavour than day-one. The cocoa powder coating stays dry and powdery for the first two days, then begins to absorb moisture from the surrounding air and becomes slightly damp on the surface — still delicious but visually less pristine. For the most appearance-conscious presentation, roll in cocoa within 2 hours of serving.
Freeze for up to 2 months — place on a parchment-lined tray and freeze until solid, then transfer to a sealed bag. Thaw in the refrigerator for 2 hours before serving. The frozen version loses a small amount of the cocoa coating crispness during thawing but retains the full flavour of the fresh version. Refresh the coating with a brief re-roll in fresh cocoa powder after thawing if the appearance matters.
Mistakes That Produce Sticky, Shapeless, or Grainy Balls
Using cold mascarpone or cream cheese produces a grainy, lumpy mixture that cannot be beaten smooth — the fat in cold dairy seizes when beaten rather than emulsifying, and the lumps persist in the final balls as visible grainy texture. Always bring both to room temperature before beginning, and if in doubt, wait another 15 minutes.
Not chilling the mixture before rolling produces balls that flatten on the bottom and smear rather than rolling clean — the mixture is too warm and soft directly after beating to hold its shape during the rolling process. The 20-minute chill produces a mixture that is firm enough to roll between the palms into a sphere that holds its shape on the parchment rather than slumping.
Rolling too large a portion per ball produces tiramisu balls that are unwieldy for a single bite and look disproportionate on a tray — a tablespoon measure of mixture produces the ideal 1-inch to 1.5-inch ball that is genuinely bite-sized. Rolling larger also produces balls where the ratio of cream to cocoa coating shifts unfavourably — too much cream and not enough of the cocoa exterior that provides the tiramisu character in the first place.
Tiramisu Balls Recipe
No-bake tiramisu balls made with crushed ladyfingers, mascarpone, cream cheese, espresso, optional coffee liqueur, and a cocoa powder coating.
Ingredients
How to Make
Beat the room-temperature mascarpone and softened cream cheese together in a large bowl for 1 to 2 minutes, until smooth and completely lump-free.
Add powdered sugar, cooled espresso, coffee liqueur if using, vanilla, and salt. Beat for about 60 seconds until smooth and uniform.
Fold in the crushed ladyfinger crumbs with a spatula until the mixture is thick, scoopable, and evenly combined.
If the mixture feels soft, refrigerate it for 20 minutes before rolling. This makes it easier to shape into clean balls.
Spread the cocoa powder in a shallow plate or wide bowl.
Use a tablespoon measure or small cookie scoop to portion about 24 pieces. Roll each portion quickly between your palms into a smooth ball.
Roll each ball in cocoa powder until fully coated, then place on a parchment-lined plate or baking sheet.
Refrigerate for at least 1 hour before serving. Overnight chilling gives the best flavor as the espresso absorbs into the ladyfinger crumbs.
Nutrition
| Nutrient | Amount Per Ball |
|---|---|
| Calories | 115 kcal |
| Protein | 2 g |
| Carbohydrates | 10 g |
| Fat | 7 g |
Values are estimates based on 24 tiramisu balls made with coffee liqueur. A chocolate shell adds approximately 35 calories per ball.