Reese’s Peanut Butter Bars — No-Bake Copycat That’s Even Better
I have a complicated relationship with my Halloween candy stash.
Every year I buy Reese’s “for the trick-or-treaters.” Every year the trick-or-treaters mysteriously get like four pieces and I’m left sitting on the couch on November 1st surrounded by orange wrappers, explaining that I was “quality checking.”
It’s the peanut butter to chocolate ratio. It’s perfect and I can’t leave it alone.
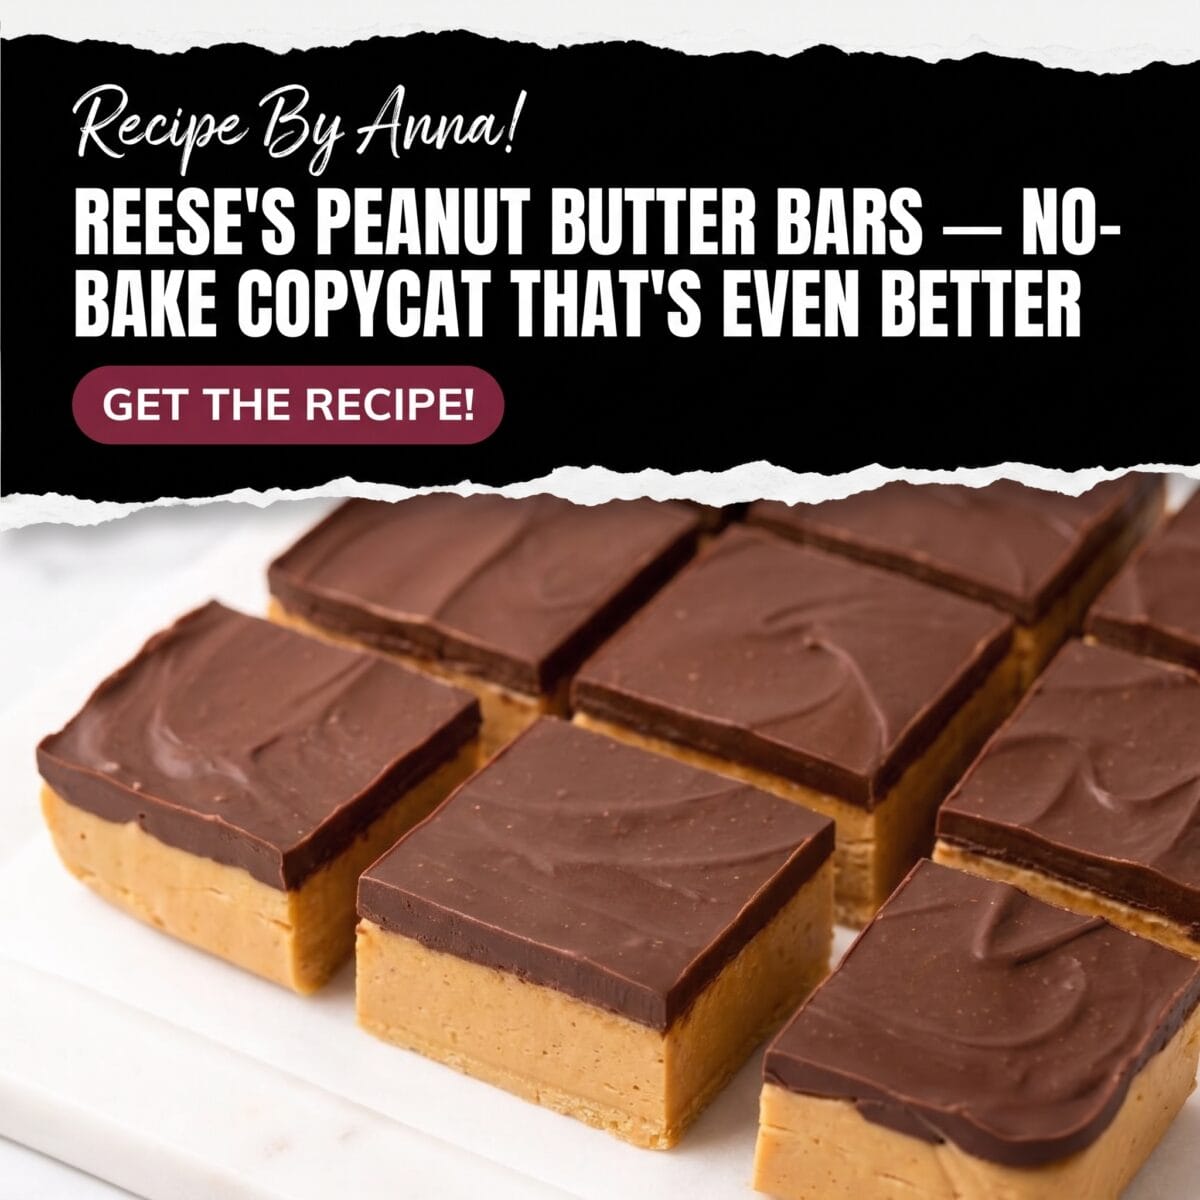
So I started making these no-bake Reese’s peanut butter bars because I can make a whole pan for the price of two bags of minis, and I can cut them huge. Like, not those tiny sad squares. I’m talking big, thick, peanut butter layer that’s almost an inch tall with a glossy chocolate top that actually snaps a little when you bite it. Better than the store version because YOU control the peanut butter.
The bottom tastes like the inside of a Reese’s cup that went to finishing school — graham cracker crumbs for little crunch, powdered sugar for smoothness, butter and peanut butter whipped into this almost fudge-like layer that holds its shape but melts in your mouth. Top is just chocolate chips melted smooth. That’s it. No oven. No mixer drama. Your food processor does most of it and your fridge does the rest.
This is the dessert I bring when I want people to think I spent hours but I actually spent 15 minutes and then watched Netflix while it set.
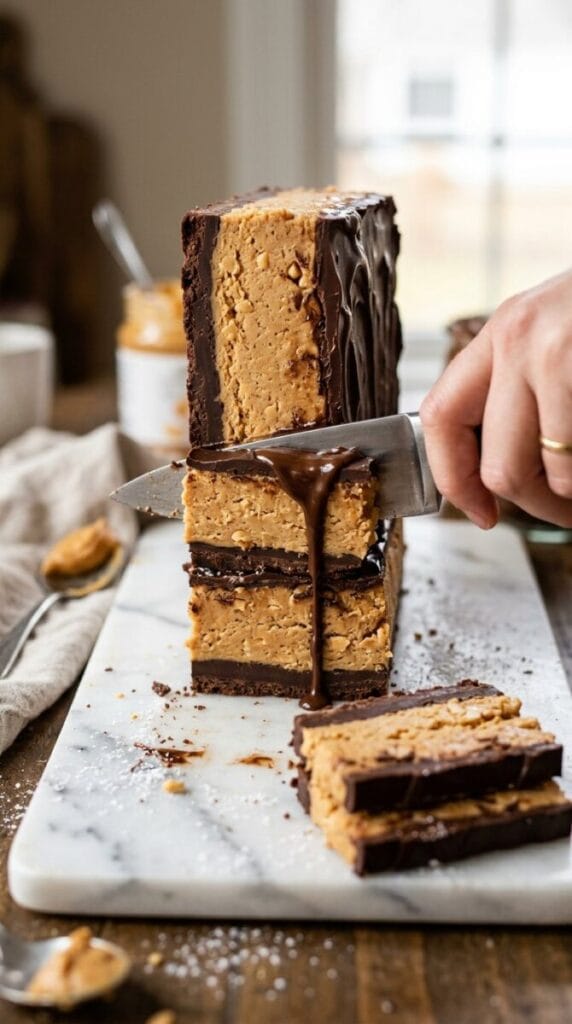
Thick peanut butter layer, glossy chocolate top — better than the wrapper, and you get to cut them as big as you want.
Why These Are Better Than The Real Thing (I Said What I Said)
1. More peanut butter. A real Reese’s cup is what, 60% peanut butter? These bars are like 75% peanut butter layer. It’s the part we all actually want.
2. Texture you can control. Store-bought can be a little grainy and dry if it sat in a warehouse. These are creamy because you use melted butter plus creamy peanut butter (not natural — natural separates and makes them oily, I learned the hard way) plus powdered sugar that melts on your tongue.
3. No-bake, no fail. You literally cannot overbake it because you don’t bake it. The worst thing that can happen is you eat too much of the peanut butter mixture before it goes in the pan. Which I always do.
4. That chocolate snap. We melt chocolate chips with a tiny bit of coconut oil or butter so the top is shiny and snaps a little, not that waxy thick layer that cracks off in chunks.
What You Need (Pantry Stuff, I Promise)
Makes one 9×9 pan — 16 small squares or 9 big “I’m not sharing” squares
For the peanut butter base:
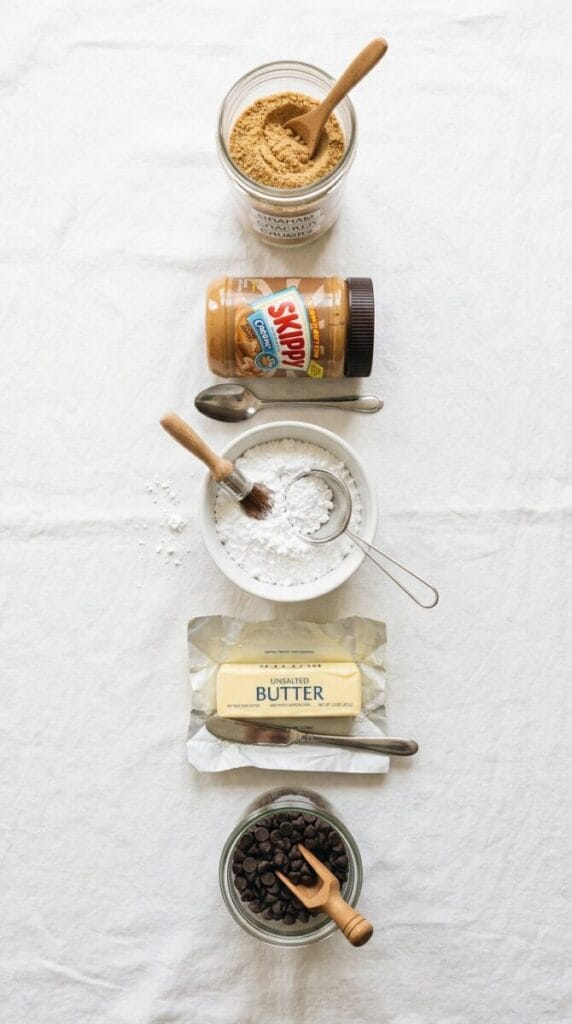
- 1/2 cup butter, melted — salted or unsalted, both work. If unsalted, add pinch salt
- 2 cups graham cracker crumbs — about 14 full sheets, or 1 sleeve pre-crushed. Or use Nilla wafers for sweeter
- 2 cups powdered sugar — sift if clumpy, or you’ll get little white dots
- 1 cup creamy peanut butter — Jif or Skippy, not natural, not crunchy for this one. The classic smooth is key for that Reese’s inside texture
- Pinch salt if your peanut butter is unsalted
For the chocolate top:
- 12 oz semi-sweet chocolate chips — about 2 cups. Or milk chocolate if you want sweeter like real Reese’s. I do half semi, half milk
- 1 tbsp coconut oil or shortening — optional but makes chocolate super glossy and easier to cut without cracking
- Or 1/2 cup extra peanut butter mixed into chocolate for softer ganache-like top that never cracks — my husband’s favorite version
That’s it. Five ingredients if you count salt as free.
Graham crumbs, powdered sugar, real peanut butter, butter, chocolate — pantry staples that turn into that cup you love.
How to Make Them — 15 Minutes Then Fridge Does the Rest
Equipment: 9×9 pan, parchment, food processor or bowl plus hands, microwave-safe bowl
Step 1: Make the peanut butter layer
Line or grease your 9×9 pan. I line with parchment with overhang so I can lift the whole slab out to cut — way cleaner.
In medium bowl, combine melted butter, graham crumbs, powdered sugar, and peanut butter. Stir — or pulse in food processor — until it looks like thick cookie dough that holds together when you squeeze it. It will be slightly crumbly but should press together. If it feels too dry, add 1 tbsp more melted butter or peanut butter.
Press evenly into pan into one even layer. I use bottom of measuring cup or wax paper to press it flat and into corners. You want it compact so it doesn’t crumble when you cut.
Pop whole pan in freezer for 10 minutes while you melt chocolate. This little chill makes chocolate go on smoother.
Step 2: Melt chocolate without drama
In microwave-safe bowl, place chocolate chips plus coconut oil. Heat in 25-second bursts, stirring between each. Don’t just blast it for 2 minutes or you’ll get burnt chocolate and you’ll be sad.
Stir until fully melted and smooth. It should look like glossy pudding.
If you want softer top that never cracks: melt chocolate plus 1/2 cup extra peanut butter together — makes a peanut butter ganache that cuts like butter.
Step 3: Pour, spread, chill, pretend you’re patient
Pour melted chocolate over peanut butter layer. Smooth with offset spatula or back of spoon — little swirls on top look pretty.
Place in fridge to set for 2 hours, or overnight if you can wait. I cannot wait, so I do freezer 30 minutes then fridge.
Once set, lift out using parchment, cut into squares. Hot knife trick: run knife under hot water, wipe dry, cut — clean lines, no cracked chocolate.
Eat. Then eat another because quality checking is important.
See that thick peanut butter layer? That’s the ratio we all actually want from a Reese’s.
My Tips So Yours Looks Like That Pinterest Pin
- Use creamy Jif/Skippy, not natural. Natural peanut butter separates and makes base oily and crumbly. Classic creamy holds shape and tastes like Reese’s inside. Save natural for toast.
- Don’t skip parchment overhang. Lifting the slab out to cut on cutting board is 10x easier than cutting in pan and scratching your pan.
- Hot knife = clean cuts. Chocolate cracks if you just hack at it cold. Hot water, wipe, cut, repeat. Or let sit at room temp 5 minutes before cutting if chocolate top is super hard.
- If chocolate is too hard to cut: You used only chocolate plus coconut oil and chilled too long. Let sit 10 minutes at room temp before cutting, or next time add that 1/2 cup peanut butter to chocolate for softer ganache top.
- Press base REALLY firmly. Loose base crumbles when you lift. Press hard with measuring cup bottom until it looks like smooth peanut butter fudge.
Variations Because One Pan Is Never Enough
Crunchy: Use crunchy peanut butter and add 1/2 cup chopped roasted peanuts into base. Texture heaven.
Reese’s Pieces Explosion: Press Reese’s Pieces into peanut butter layer before chocolate, and sprinkle more on top of wet chocolate and press in gently. My kid’s birthday version.
Buckeye Bars (9×13 party size): Double recipe, press into 9×13 dish, melt 1 bag chocolate chips with 3 tbsp butter, spread. Makes 45 little 2-inch pieces for potlucks — disappears.
Salty Sweet: Sprinkle flaky sea salt on top of wet chocolate. Sweet plus salty equals you can’t stop.
Oreo Reese’s Bars: Replace graham crumbs with Oreo crumbs (about 20 Oreos, no filling). Chocolate-ier, darker, so good.
No graham? Use Nilla wafer crumbs or even Ritz crackers — Ritz plus peanut butter plus chocolate is salty-sweet magic I didn’t know I needed.
What to Serve With (And What to Do With Leftovers If You Have Any)
These are rich, so I like something cold or salty with them:
- Cold glass of milk — obviously, we’re not reinventing the wheel here.
- My Top 10 Refreshing Beverages Recipes for Summer — that cold brew coffee addition is perfect with chocolate peanut butter.
- Ice cream — crumble a bar over my Lemon Blueberry Ice Cream No-Churn or Vanilla no-churn, it’s like Reese’s blizzard.
More no-bake, easy desserts from my kitchen that same crowd loves:
- Easy No-Bake Blueberry Cheesecake — Cool, Creamy & Summer Perfect — same chill and slice vibe
- Sopapilla Cheesecake Bars — Buttery Crispy and Totally Addictive — another press-in-pan, creamy, gone-in-minutes dessert
- 3-Ingredient Protein Fluff — High Protein Dessert in 5 Minutes — if you want peanut butter protein version
- 3-Ingredient Creamsicle Popsicles — Orange Cream Summer Dream — easy, no-bake, kid favorite
- Perfect New York Style Cheesecake Recipe — when you DO want to turn on the oven and impress
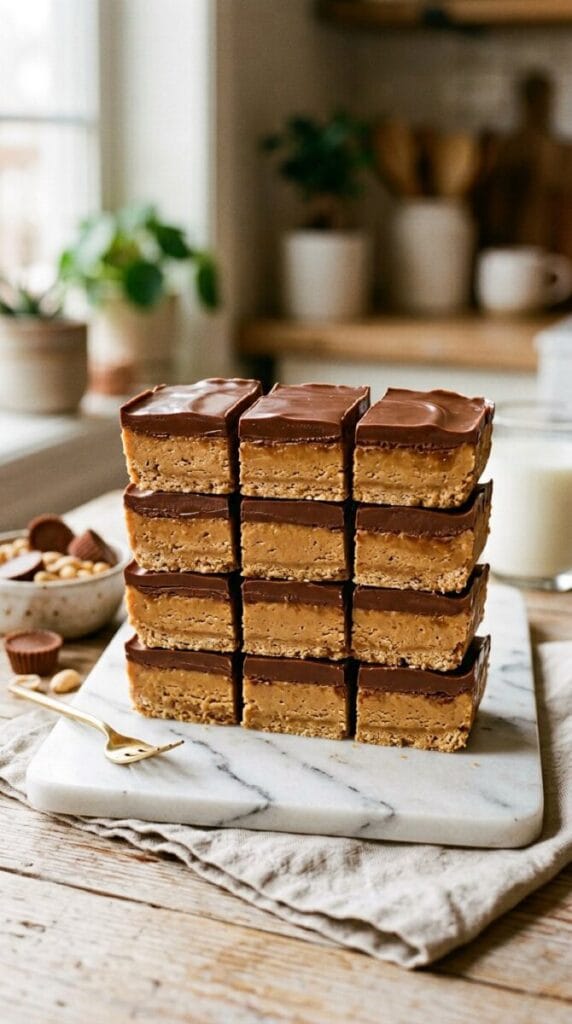
Stacked and ready — these are the bars that disappear before dinner even starts.
Storage — If You Can Make Them Last
- Fridge: Covered, 1 week. They actually get better after day 1 because base firms up and chocolate sets.
- Freezer: Freeze whole slab or cut squares, wrapped well, up to 3 months. Thaw in fridge or eat frozen — frozen Reese’s bars are honestly amazing, like peanut butter fudge pops.
- Room temp: If your house is cool (under 72°F), they can sit out 2-3 days covered, but chocolate gets softer. I keep mine in fridge because I like that snap.
- Make ahead for party: Make 2 days before, keep covered fridge, cut day of. One less thing to worry about.
FAQ — Because People Always Ask
Can I use natural peanut butter?
You can, but stir it super well and expect more oily, crumbly base. Add extra 1/4 cup powdered sugar plus 2 tbsp graham crumbs to absorb oil. Jif holds shape best for copycat texture.
Why does my chocolate crack when I cut?
You melted only chocolate plus coconut oil and chilled rock hard. Let sit at room temp 5-10 minutes before cutting, use hot knife. Or add 1/2 cup peanut butter to chocolate for softer top that never cracks — my fix for perfect cuts.
Graham crackers vs graham crumbs?
Both work. Crumbs are just faster. If using crackers, process in food processor until like bread crumbs, no big chunks or base will be crumbly in weird way.
Can I make them gluten-free?
Yes — use gluten-free graham crackers or almond flour (1 1/2 cups almond flour works). Ensure chocolate chips are GF.
Can I make them vegan?
Use vegan butter, dairy-free chocolate chips, peanut butter without honey. Works great.
If you’ve been buying those little cups and hiding them from your family in the veggie drawer (no? just me?), make a pan of these instead. You can cut them as big as you want and you don’t have to share the bag.
Let me know — did you go classic or did you add Reese’s Pieces and extra peanut butter in the chocolate? And how long did your pan last? Mine lasted… not long.
— Anna, who is currently hiding a pan in the back of the fridge behind the pickles and calling it “meal prep”
P.S. If you have leftover peanut butter mixture that doesn’t fit in pan, roll into little balls, dip in melted chocolate, and you have buckeyes. Or just eat it with a spoon. I won’t tell.
Reese’s Peanut Butter
Bars
Thick, creamy peanut butter bars topped with a smooth chocolate layer. These easy no-bake bars have the classic Reese’s-inspired flavor with a buttery graham cracker base for the perfect texture.
Ingredients
Optional Soft Topping: For a softer peanut butter chocolate topping that won’t crack when cut, replace the coconut oil with ½ cup creamy peanut butter!
Instructions
Line a 9×9-inch baking pan with parchment paper, leaving some overhang on the sides for easy removal later.
In a large bowl, combine the melted butter, graham cracker crumbs, powdered sugar, and creamy peanut butter. Stir until the mixture forms a thick, cohesive dough that holds together when pressed.
Transfer the peanut butter mixture to the prepared pan. Press it firmly and evenly into the bottom using the back of a measuring cup, spatula, or a piece of parchment paper.
Add the chocolate chips and coconut oil to a microwave-safe bowl. Microwave in 25-second intervals, stirring well between each interval, until completely melted and smooth.
Pour the melted chocolate over the chilled peanut butter layer. Spread evenly with a spatula or the back of a spoon.
Refrigerate for at least 2 hours, or until the chocolate and peanut butter layers are firm. (For a faster option, freeze for 30 minutes, then transfer to the fridge).
Use the parchment paper overhang to lift the bars from the pan. For clean slices, run a sharp knife under hot water, wipe it dry, and cut the bars. Repeat between cuts.
Kitchen Notes
Use a stabilized, classic creamy peanut butter (like Jif or Skippy). Natural peanut butter can separate and make the base oily or crumbly.
A tightly packed peanut butter layer will hold together much better when sliced. Don’t be afraid to put some weight into it when pressing it into the pan!
If the chocolate is very firm straight out of the fridge, let the bars sit at room temperature for 5–10 minutes before slicing to prevent the chocolate from cracking.
If you prefer a softer chocolate layer that cuts effortlessly without a hot knife, mix ½ cup creamy peanut butter into the melted chocolate instead of coconut oil.
Delicious Variations
Use crunchy peanut butter instead, and stir ½ cup of chopped roasted peanuts into the base layer for extra texture.
Press Reese’s Pieces into the peanut butter layer before adding the chocolate, and sprinkle more on top while the chocolate is soft!
Replace the graham cracker crumbs with approximately 20 Oreo cookies, processed into fine crumbs.
Sprinkle a small amount of flaky sea salt (like Maldon) over the chocolate before it sets.
Store covered in the refrigerator for up to 1 week. These bars are best served slightly chilled or at room temperature.
Freeze the whole slab or individual bars, tightly wrapped, for up to 3 months. Enjoy them slightly frozen for a firmer, fudgy texture!
These bars can easily be prepared up to 2 days before serving and kept covered in the refrigerator.
Recommended Kitchen Tools for Clean Cuts & a Silky Top
No-bake peanut butter bars rely on pressing a dense base firmly and getting a smooth, crack-free chocolate layer. These five tools make assembling and slicing these copycat bars completely foolproof:
1. 8×8 or 9×9 Square Metal Baking Pan
A sharp-cornered metal baking pan conducts cold quickly in the fridge and creates crisp, clean 90-degree edges on your finished bars for that authentic commercial look.
Check Price on Amazon2. Parchment Paper Sheets
Lining your pan with parchment paper—leaving a slight overhang on the sides—creates a sling that lets you lift the entire chilled block of peanut butter bars out of the pan effortlessly before slicing.
Check Price on Amazon3. Flat-Bottomed Measuring Cup or Glass
The peanut butter and Graham cracker base needs to be packed down tightly to prevent crumbling when cut. Pressing with the flat bottom of a cup creates a firm, perfectly level foundation.
Check Price on Amazon4. Heat-Safe Silicone Spatula
Ideal for melting chocolate and peanut butter together over a double boiler or in the microwave, and then scraping every last drop of silky, smooth glaze evenly over the peanut butter base.
Check Price on Amazon5. Large Chef’s Knife (Warmed)
Slicing cold chocolate can cause the top layer to crack. Running a long, sharp chef’s knife under hot tap water and drying it off before making each slice glides through the chocolate layer cleanly without cracking it.
Check Price on Amazon